


Tracy has joined the Clearsnap blog party – RIGHT HERE on our blog today! For the next two weeks the Clearsnap blog will be sharing inky projects right up to National Scrapbook Day on May 7th!!!! Our team has been on our their blog all week and we thought we would share with you this GREAT blog post featuring Clearsnap from our Guest Designer Tracy McLennon!

Paintball Crazy: Splatter Layout and Card by Tracy McLennon
Mixed Media, paints, sprays and mists are all the rage these days. I wanted to create a layout using sprays in a little different way. As I was experimenting and playing around with drips, splats and sprays I found exactly the look that I wanted for a very specific photo.
“Confession: My father is an outdoorsman, and I learned to shoot as a child. I’m not into hunting. But…shoot people with PAINT?? Heck YES!”
It’s true, I did target shooting growning up. Archery and pellet guns. I was an outdoorsy kid, and had a lot of fun. So paintball from time to time, just brings back some pretty fun memories.


Project Recipe:
Clearsnap ColorBox- Spritzers
Grasshopper, Pumpkin Pie, Mermaid, Frosted Plum
Straw
Cardstock
Letter Stickers
Black Brads and Tag

Here’s how I did it…first I traced a pencil circle on my white cardstock, as a guide to the shape I wanted my splatters to become.
Then, by unscrewing the caps of the Clearsnap ColorBox Spritzers, I took out the nozzle and let single drops land on the white cardstock. Then pretty quickly I grabbed my bendy straw and with one fast and pretty powerful blow, I blew directly above the drop. The ink spreads like you see on my layout.
Tip: You really do want to use a strong burst of air. Now, I’m a brass player…so I’m used to expelling lots of air. This might take some practice for others. Do some practice runs before going right into a project.

Another Tip: If your splatter doesn’t quite do what you wanted it to do, you can add another drop on top if where the first drop was added, and simple blow again. I did this a couple of times on my layout to get the result I wanted.
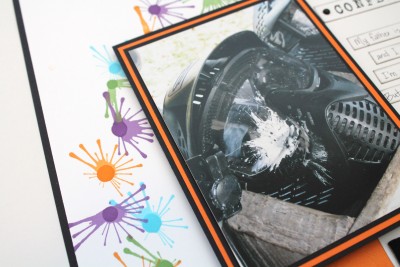
Once I was finished making my splatters, I let the page dry completely. It shouldn’t take that long. Then I erased my pencil circle and started adding everything else. I kept the rest of my layout pretty simple.
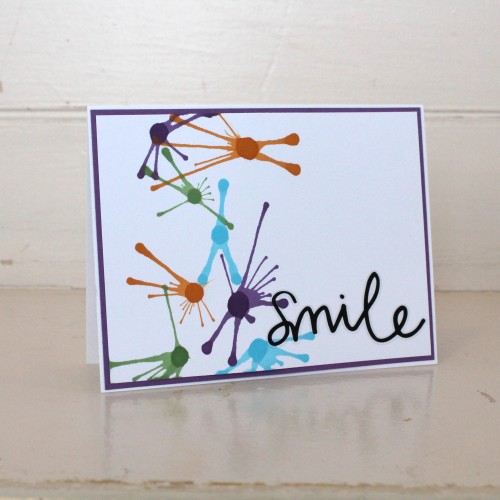
I used the same technique to create a card as well. Fun, bright and simple.
Thanks for stopping by to see my Spritzer splatter technique. Have fun!
Tracy
VISIT THE CLEARSNAP BLOG FOR MORE INSPIRATION – CLICK HERE
To See More of Tracy’s work visit her blog – Scrappy Chick Designs
SUBSCRIBE TODAY to our quarterly publication – delivered right to your door!


Comments
very cool idea and great blog post!!! Thanks for sharing!!
Used a similar idea with paints for Art class one year at school. Thanks for the reminder! I’ll plan to try it on a grandkids page….
another awesome project. Love the clearsnap products
We did that when I was a kid in school, funny how you forget about that.