


Superhero Shirt Tutorial

Hey crafters, Nicole here and I’m back to share these awesome shirts I made for the Great Canadian Scrapbook Carnival in Calgary this coming weekend. The theme is Super Hero’s! I have been humming and hawing about this for months! I didn’t want a costume and I didn’t want to spend a fortune on shirts I knew I wouldn’t wear again. So I made my own… for $10 in supplies!
Lets create stencils using you’re die cuts, paints and a little imagination!
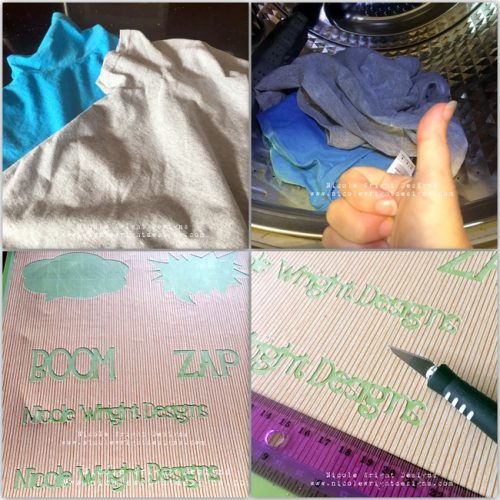
Step one buy some shirts and wash them. I grabbed mine at Michaels, $3 each. I picked up this sticky back roll of vinyl stuff at the dollar store, 7ft for $3. One Cricut machine for cutting out letters and speech bubbles.

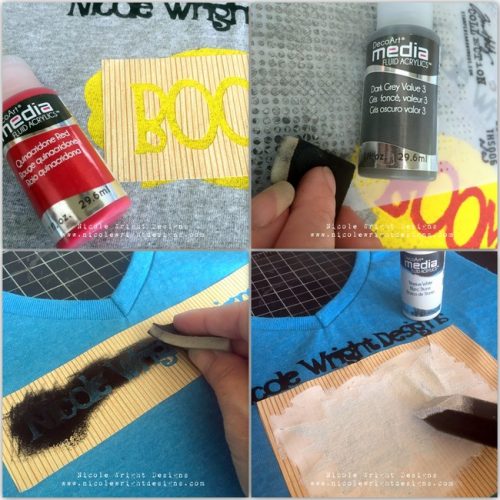
I needed to create a stencil so I removed the images and cut carefully cut the images out with an X-Acto knife. Carefully I removed the “stencil” and placed it out over my prepared shirt. I tucked my Stampin’ Up self healing mat inside the shirt so the paint doesn’t bleed through.
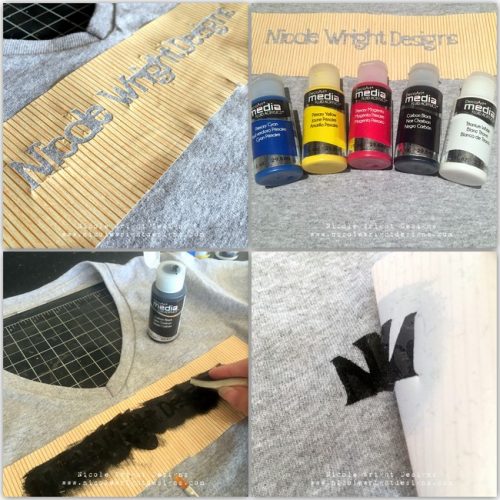
Don’t forget to use all the centers for the letters. Those cut separately and you’ll need them to form the words. I selected some DecoArt Media Fluid using primary colours. When the first stencil is ready I used a sponge to apply the Carbon Black. Carefully pull back and WOW it worked.
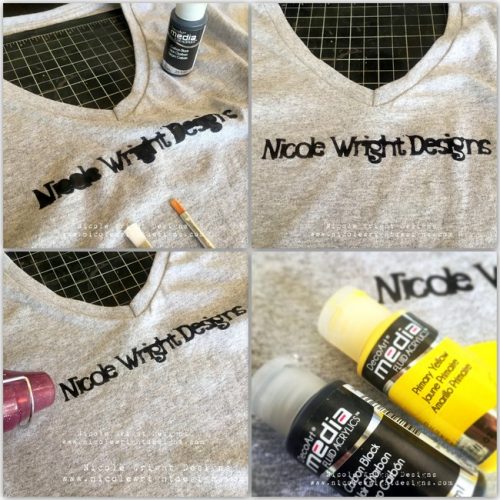
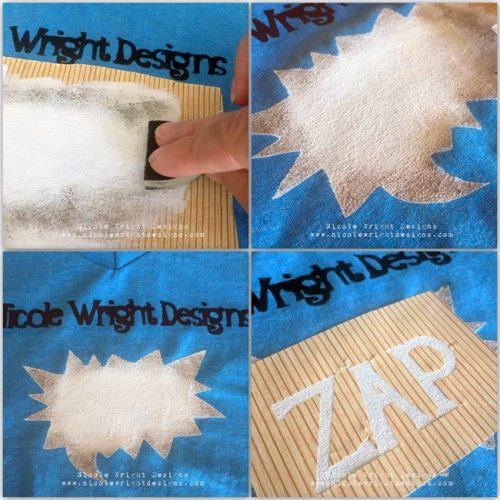
Remove the center pieces that help form the words exposing the words! A little heat to set and it’s ready in moments. Time to do a speech bubble.
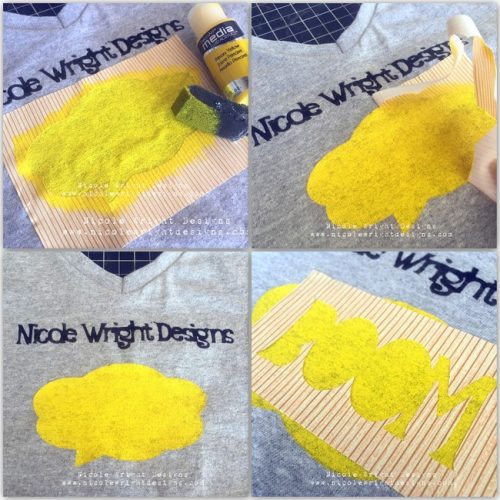
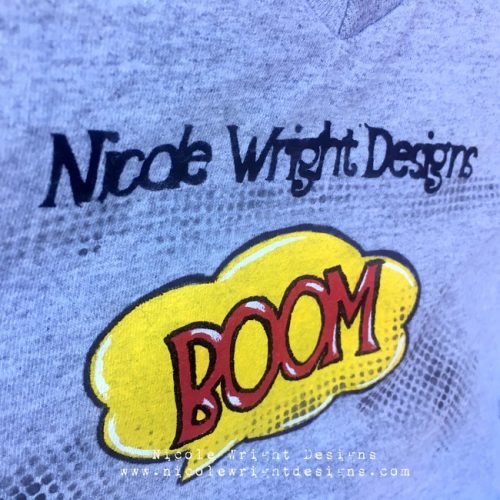
I centered the speech bubble below my name and layered two coats of the primary yellow drying between each coat. Gently pull the stencil back and there you have it a speech bubble. Now for the word to be centered in the bubble.
Don’t forget to add the center’s for the O’s then apply the Quinacridone Red with a sponge. Here, I found the paint letter’s bled a bit onto the bubble. A steady hand and a small paint brush and that is an easy tidy up. Shirt #2!
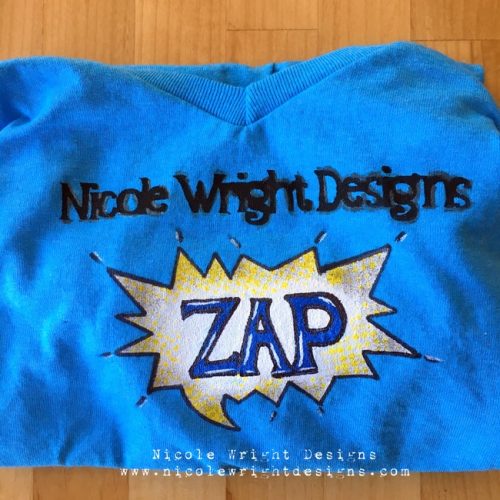
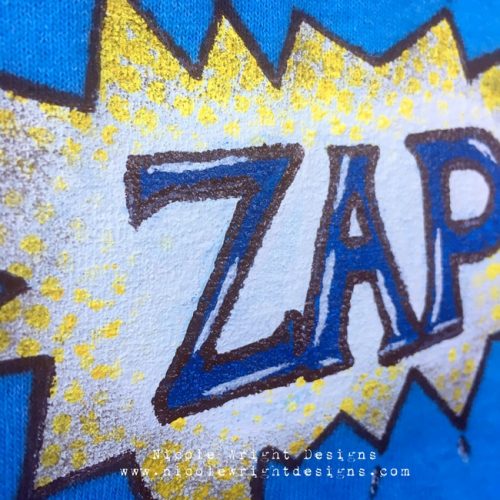
Just like before work each stencil one at a time and dry before moving on. I created a little distressing on this speech bubble by gently sponging the tips with Dark Grey Value 3. Layer the ZAP over the speech bubble. Hold onto that speech bubble stencil. You’ll need it.
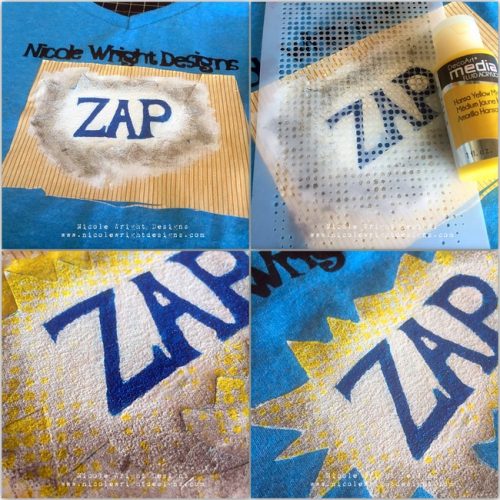
I used Primary Cyan on the letters for a vibrate pop of colour. I removed the Zap stencil and placed the speech bubble back on. By using the Dot Fade Stencil and the Primary Yellow paint I am able to create those retro dots. How fun!
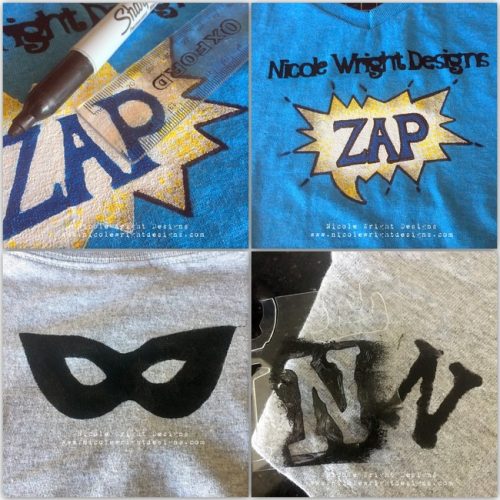
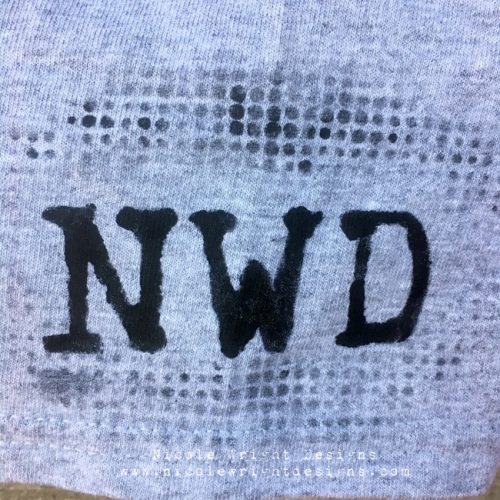
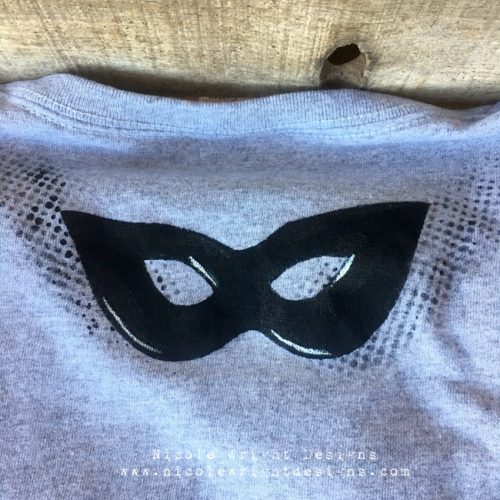
Sharpen up those lines with a black sharpie and ruler. A steady hand helps so perhaps before you have that second cup of coffee. I added this fun mask to the back and I created my initials for my sleeve using the Sizzix Upper Case Typo die!
Have some create fun and continue the dots throughout the design for that retro look.
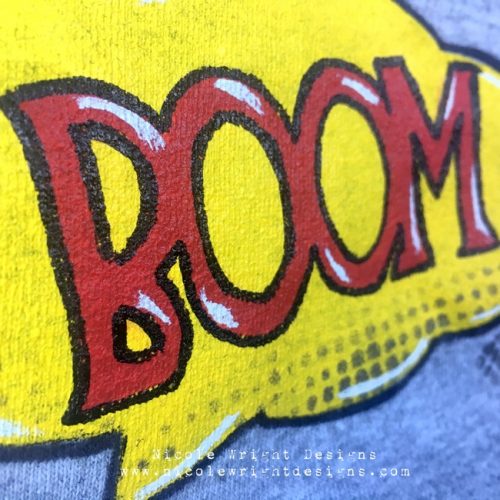
The sharpie makes the image pop around the bubble and letters.
A little white highlight looks amazing painted on.
Check it out… you can create your own stencil with any of your Sizzix dies!
Add a little character to that mask.

Finish off the Zap bubble with accents of white.

I added some Dark Grey Value 3 to add highlights to my name.

Why not add more to my sleeve initials.
Continuing those faded dots throughout. The faded dots look awesome and retro in primary yellow.

I can’t always find what I want. So if I can create it using my die cuts, paint and creativity I can make whatever I want. I have never made anything like this and I had so much learning as I went along. I love to use my die cuts in as many ways as I can.
Thanks for checking out my creative Super Hero shirts. I will be wearing them this coming weekend at Great Canadian Scrapbook Carnival. Be sure to join us to play, create and shop.
Cheers, Nicole
To see more of Nicole’s work visit her blog – Nicole Wright Designs
SUBSCRIBE TODAY to our quarterly publication – delivered right to your door!


Comments
Wonderful job Nicole! Love the t-shirts. Thank you for the tutorials!
These turned out awesome Nicole! Can’t wait to see them this weekend!