


Do you remember paper-tole from the 80’s?
It was a very fussy art form that involved layering identical prints to build a 3D pictures.
I love to make dimensional cards and there is a quicker and easier way to get a suede-paper-tole look and not waste anything!
 How to make two 3-dimensional cards at once:
- leave one Therm O Web Deco Foil Toner Card Front intact.
- use a second Therm O Web Deco Foil Toner Card Front to cut out a large flower for a 3D flower.
- layer the remaining pieces of the second card to build a stunning 3D floral cluster.
 Foiling made easy:
Therm O Web Deco Foil has partnered with Unity Stamp Co. to create an exclusive line of Toner Card Fronts.
The Toner Card front is made for foiling.
You can have a lot of fun changing up the foil colours but for this set, I used Gold Sequins
 How to Foiling:
- Heat up the laminator for at least 10 minutes.
- Cut the toner paper down to fit the card front,
- Create a sandwich by placing the card and foil in a piece of parchment (a piece is included in the card front packs).
- Make sure that the foil and card front are pressed firmly in the fold of the parchment. I put the folded edge into the laminator first.
- Run two Therm O Web Deco Foil Unity Toner Card Fronts through a laminator with Therm O Web Gina K. Designs Fancy Foils.
- Squeal when you remove the foil and see the gorgeous print below.
- There may be black dots. You can run the print through the laminator again if you didn’t get good coverage. If your parchment is folded or crumpled in any way it will affect coverage. A few flecks are fine because once you colour it you won’t notice anything.
 Get Colouring:
- Colour both card fronts.
- The Toner Cards work beautifully with alcohol markers.
- If you colour over the foil, don’t sweat it. It doesn’t ruin anything.
- make sure to march the colour of the big flower on the second card with the first card colour scheme
 Cut it out:
- The toner card has one large pansy.
- Carefully follow a foiled line from the bottom up towards the flower. Cut out the flower.
- When you are careful you can use the left over pieced to build your second card. I hate wasting things and this is really worth it!

 Finishing touches: Thanks Card
- Run a thin line of Liquid Pearls around the cut-out flower.
- Use high profile Glue Dots, to adhere the flower that you cut out, on top of the first card front.
- Use Ranger’s Enamel Accents to fill in the centre of the flowers. Tuck gold threads under the flower for added dimension.
- Wrap ribbon around the card front and place the sentiment on top using Glue Dots
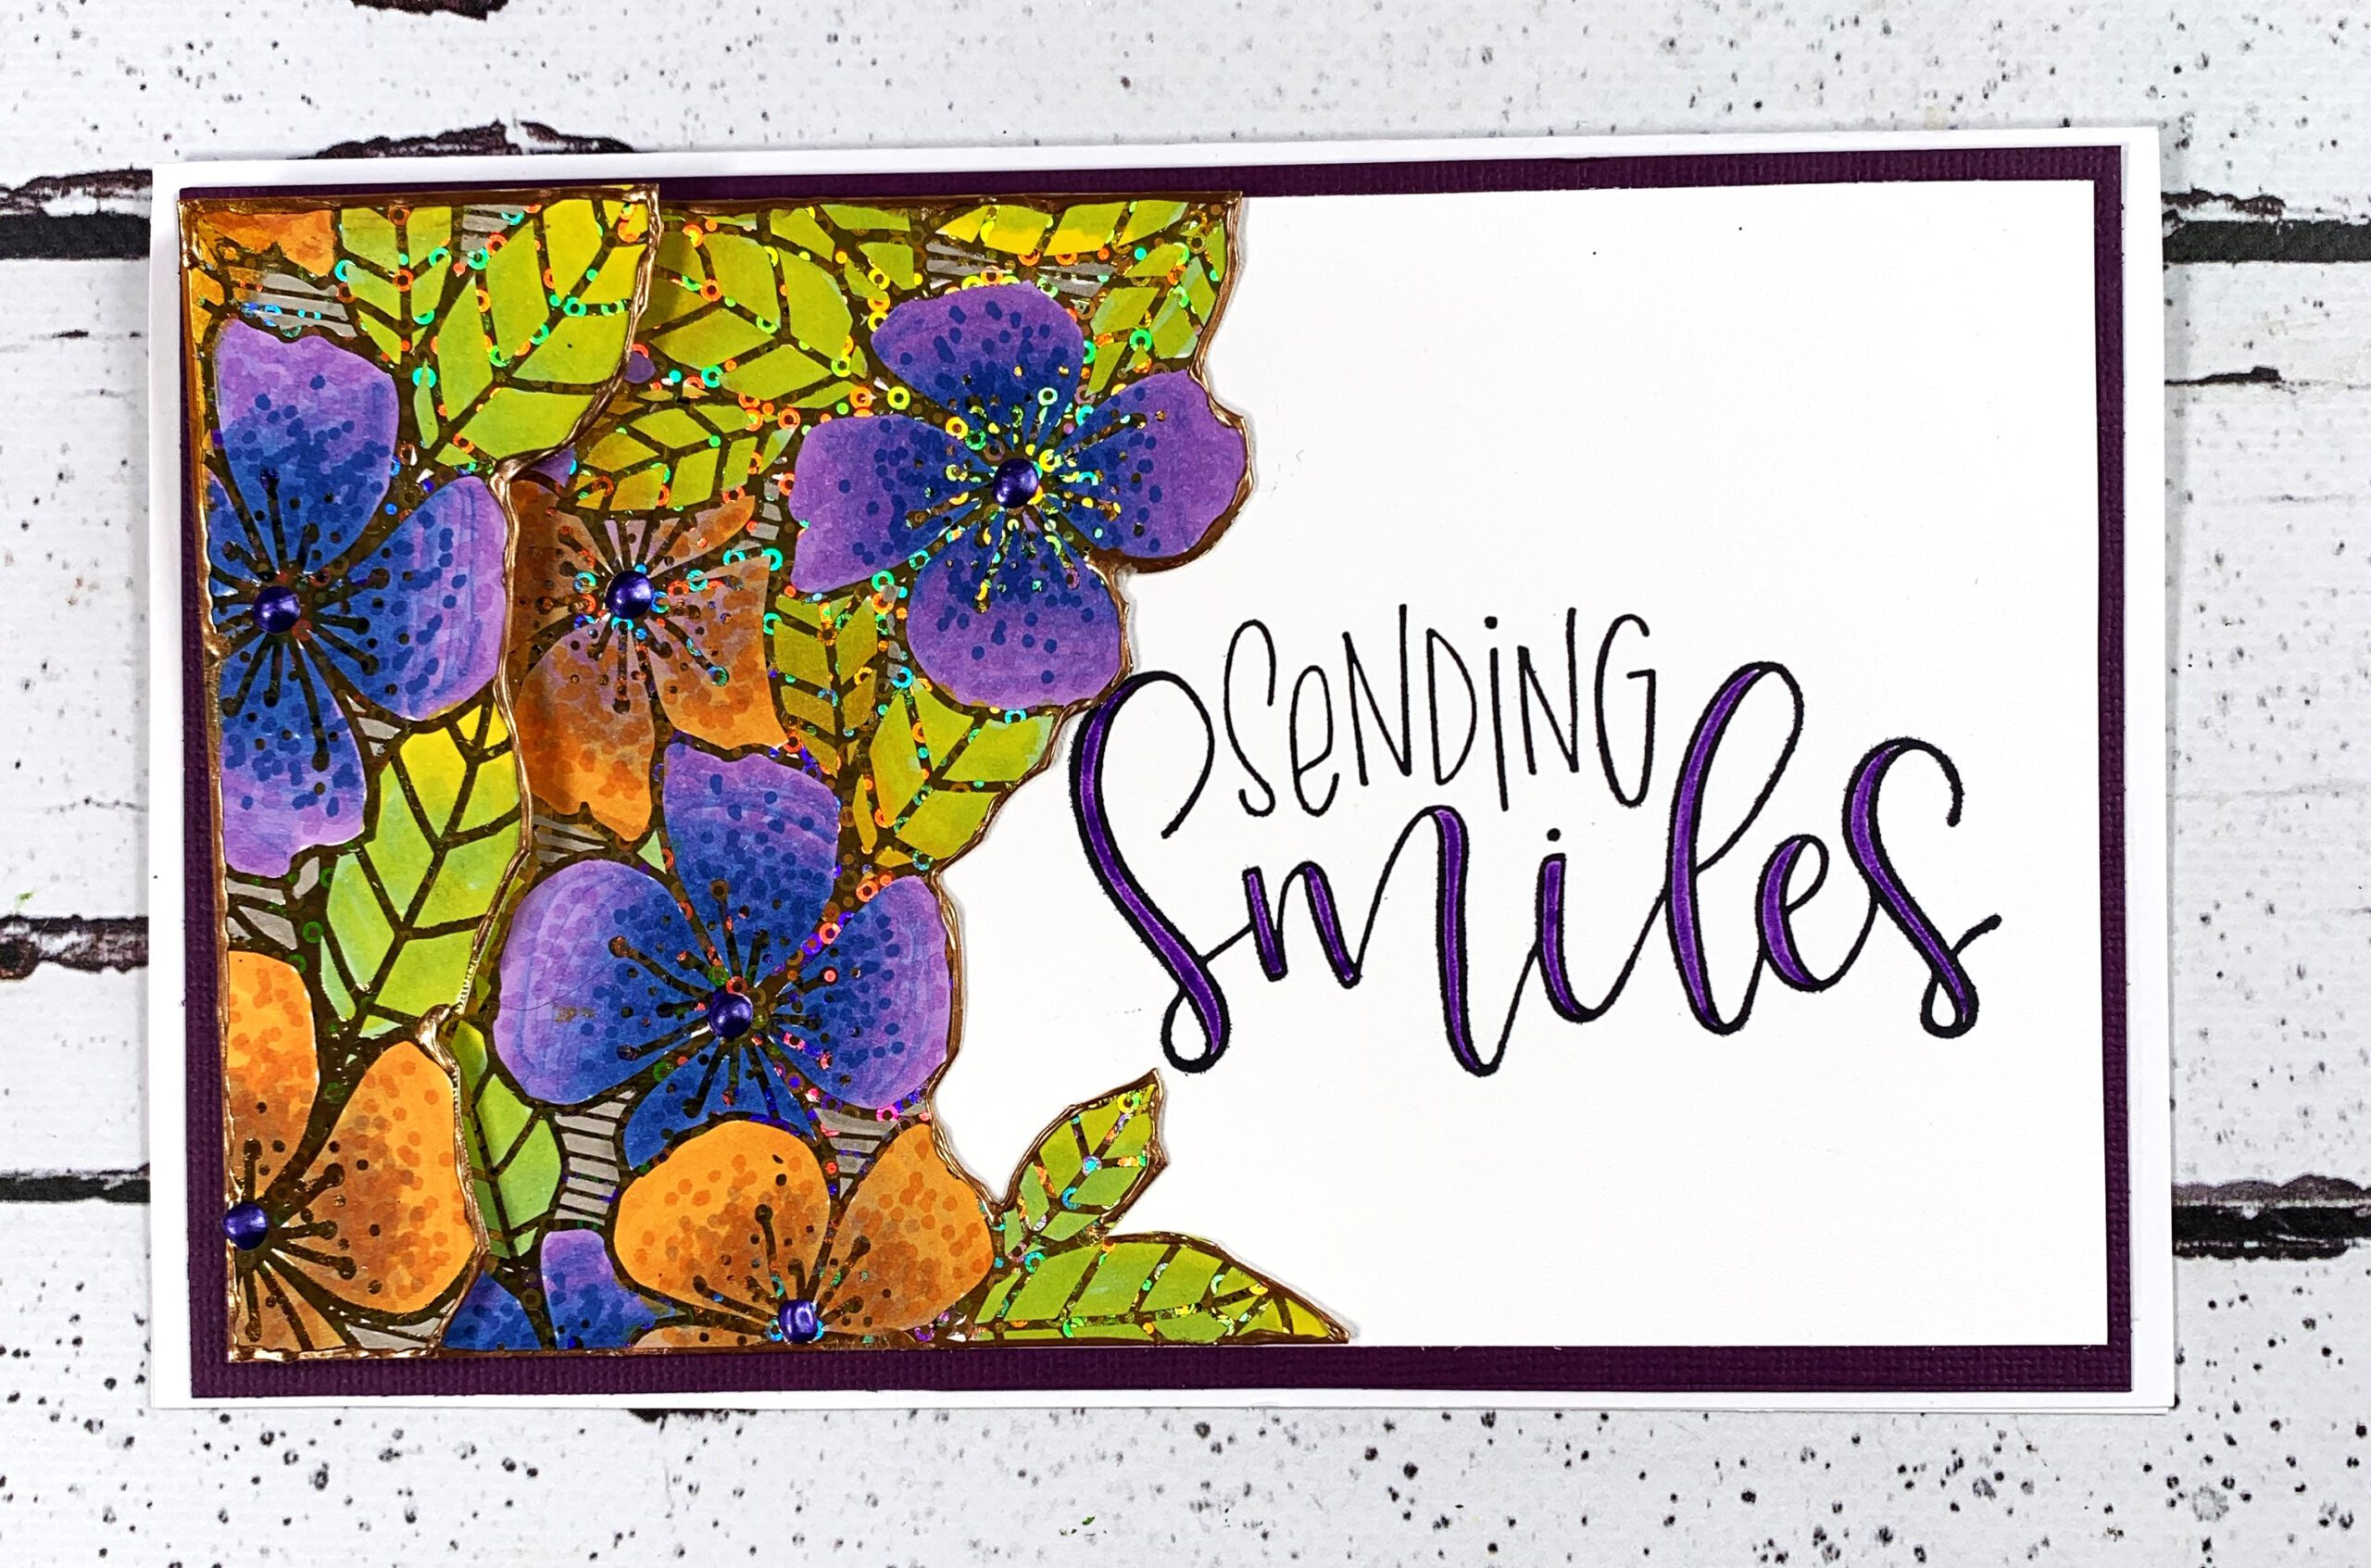 Finishing Touches: Sending Smiles Card
- Run a thin line of Liquid Pearls around the edges of the leftover pieces from the second card front.
- Stamp sentiment on a 7 x 4.5-inch piece of Gina K Premium white card stock
- Color in the open lines on the “smiles” word with Sakura gel pen
- Adhere the bigger floral piece on the white card base with the sentiment.
- Use high profile Glue Dots to adhere the smaller piece (of the cut-up card) edge of the card. It will look like you have a cascade of flowers.
- Use Ranger’s Enamel Accents to fill in the centre of the flowers.
- If you wish, layer your card on coordinating card stock.
 I found this process really relaxing and rewarding. The cards are stunning. I ended up making four of them!
Have a wonderful day everyone!

SUPPLIES::
Therm O Web
– Deco Foil Toner Card Fronts by Unity
– Gina K. Designs Fancy Foils, Ribbon and Premium Cardstock
– iCraft Purple Tape
Ranger
– Archival Ink
– Letter it clear stamps
– Liquid Pearls
Sakura Gel Pen
Glue Dots Adhesives
Elizabeth Craft Designs Die
Kerry is a MORNING crafter! Every morning before she heads off to work she takes some time in her craft room. Once or twice a week she shares what she has been working on, within the Creative Scrapbooker Magazine Instagram Stories. Be sure to follow us on Instagram so you won’t miss what is cooking at Kerry’s house! CLICK HERE

