


Hey Creative Scrapbooker Fans! For today’s blogpost, I’m sharing with you how to create these two Welcome Little One Cards using The Our Baby & Our Baby Boy Collection from Echo Park Paper Co.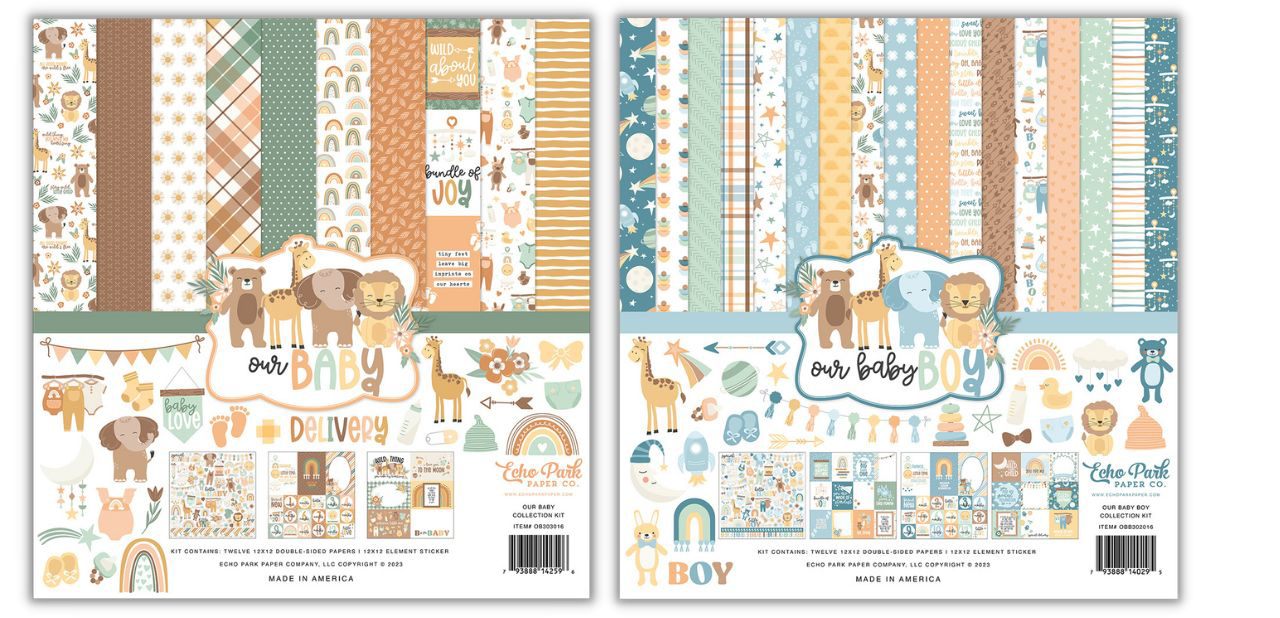 Dies from Elizabeth Craft Designs, Super Stock from Creative Scrapbooker Magazine and adhesive from Scrapbook Adhesives by 3L.
 You’ll want to grab a cup of your favourite beverage and learn how to recreate my cards at home.
  To start, we will create the New Arrival Card.
 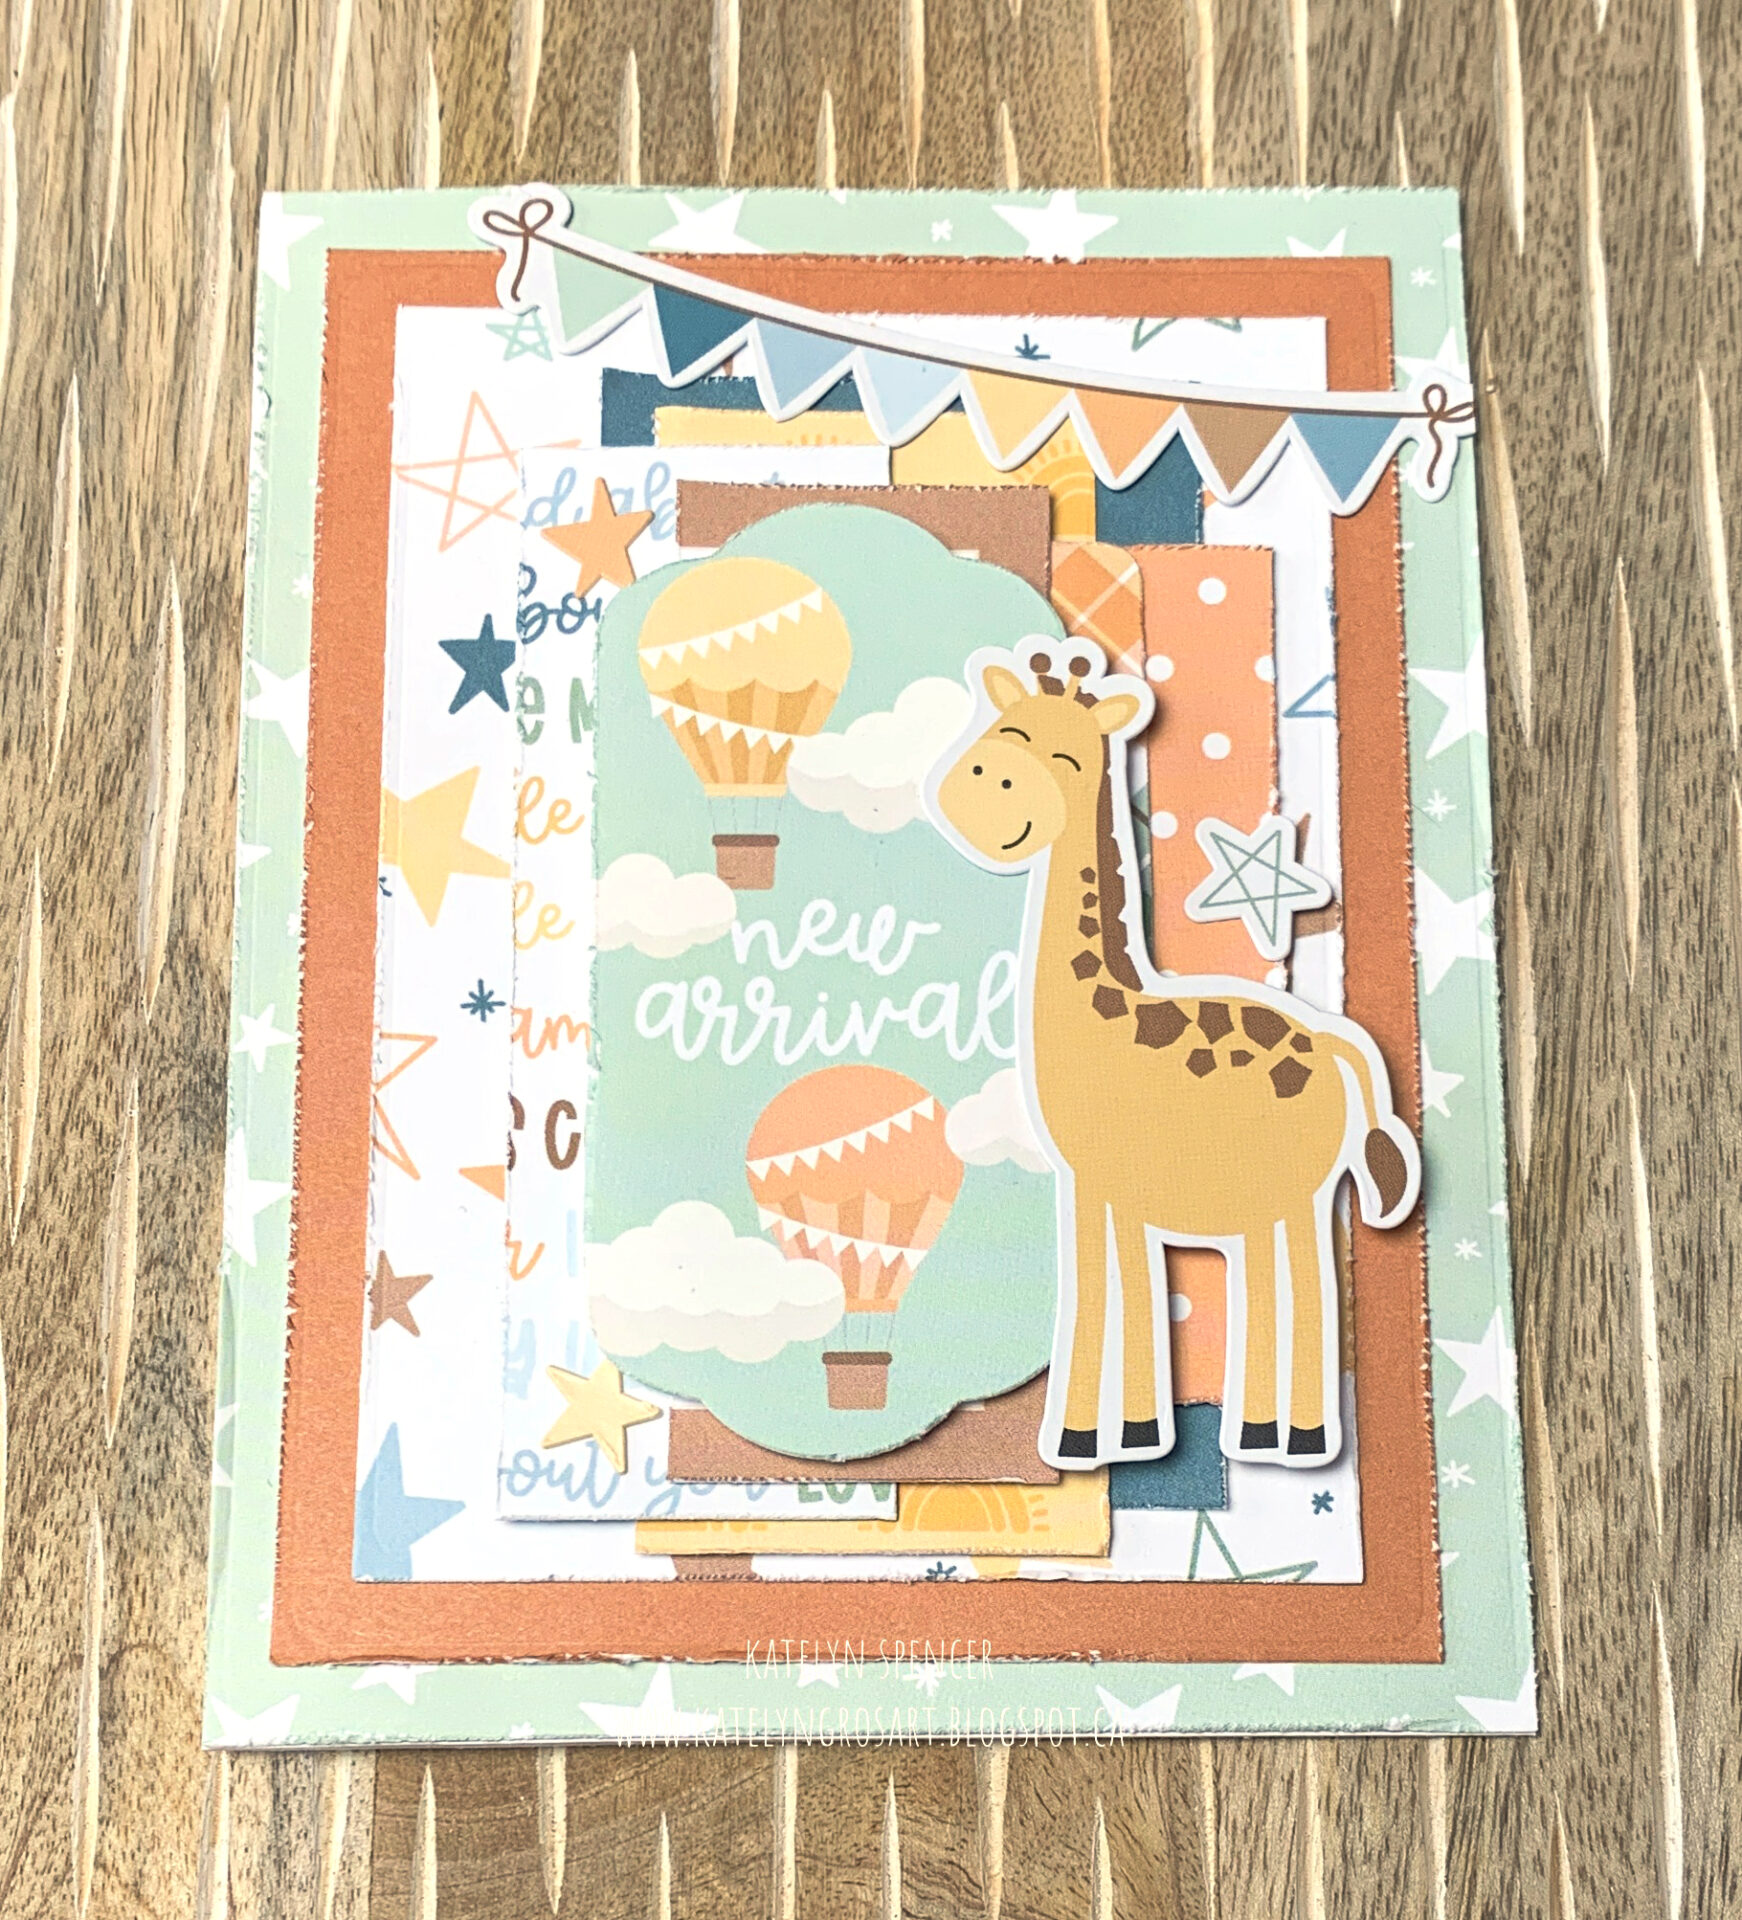 Out of the Our Baby Boy Patterned Paper Pack from Echo Park Paper, you’ll need the mint star paper and the multi coloured star paper. Die cut a 4 ¼” Fitted Rectangle from Elizabeth Craft Designs out of the mint star patterned paper. Die cut a 3 ¼” Fitted Rectangle from Elizabeth Craft Designs out of the multi coloured star paper. Distress the edges of both papers.
  Next, you’ll need the orange/white polka dot paper, sun paper, word paper and 6×4 Journaling Card paper out of the Our Baby Boy Paper Pack from Echo Park Paper. Cut the orange/white polka dot paper to 1 ½” x 3”. Cut the sun paper to 1 ½” x 4”. Cut the word paper to 1 ¼” x 3 ¾”. Cut the 6×4 journaling card that has blue on it to 2” x 4”. Distress the edges of all the pieces.
  Now, you’ll need the 3×4 Journaling Cards paper out of the Our Baby Boy Paper Pack from Echo Park Paper. Cut out the letter board 3×4 card. Cut the card in half. Distress the edges of the card.
  Out of the Our Baby Coordinating Solids Paper Pack from Echo Park Paper, you’ll need the burnt orange paper. Die cut a 3 ¾” Fitted Rectangle from Elizabeth Craft Designs out of the paper. Distress the edges of the paper.
  Next, you’ll need the Our Baby Ephemera from Echo Park Paper. Take out the New Arrival piece as well as the plaid frame. Cut the plaid frame in half.
  Use E-Z Runner from Scrapbook Adhesives by 3L to adhere the 3 ¾” rectangle to the 4 ¼” rectangle. Adhere the 3 ¼” rectangle to the 3 ¾” rectangle.
  Use E-Z Runner from Scrapbook Adhesives by 3L to adhere the 2” journaling card ¾” from the left and ¼” from the bottom of the 3 ¼” rectangle. Adhere the sun paper 7/8” from the left and 1/8” from the bottom of the 3 ¼” rectangle. Adhere the orange/white polka dot paper ¼” from the right and 7/8” from the top of the 3 ¼” rectangle. Adhere the word paper 3/8” from the left and ¼” from the bottom of the 3 ¼” rectangle.
  Use E-Z Runner from Scrapbook Adhesives by 3L to adhere the plaid frame ¼” from the right and 1/8” from the top of the letter board half. Adhere the letter board half 1” from the left and 3/8” from the bottom of the 3 ¼” rectangle.
  Use 3D Foam Squares from Scrapbook Adhesives by 3L to adhere the New Arrival piece ¾” from the left and 3/8” from the bottom of the 3 ¼” rectangle. Now, you’ll need the Our Baby Boy Cardstock Sticker from Echo Park Paper. Use 3D Foam Squares from Scrapbook Adhesives by 3L to adhere the giraffe to the right of the new arrival piece as desired. Stick the pennant banner sticker to the top right corner of the card front.
  To finish the card, cut a cardcase out of Super Stock from Creative Scrapbooker Magazine that measures 4 ¼” x 11”, score at 5 ½”. Use E-Z Runner Adhesive from Scrapbook Adhesives by 3L to adhere the card front to the card base.
Now we are going to move on to the Bundle of Joy Card. 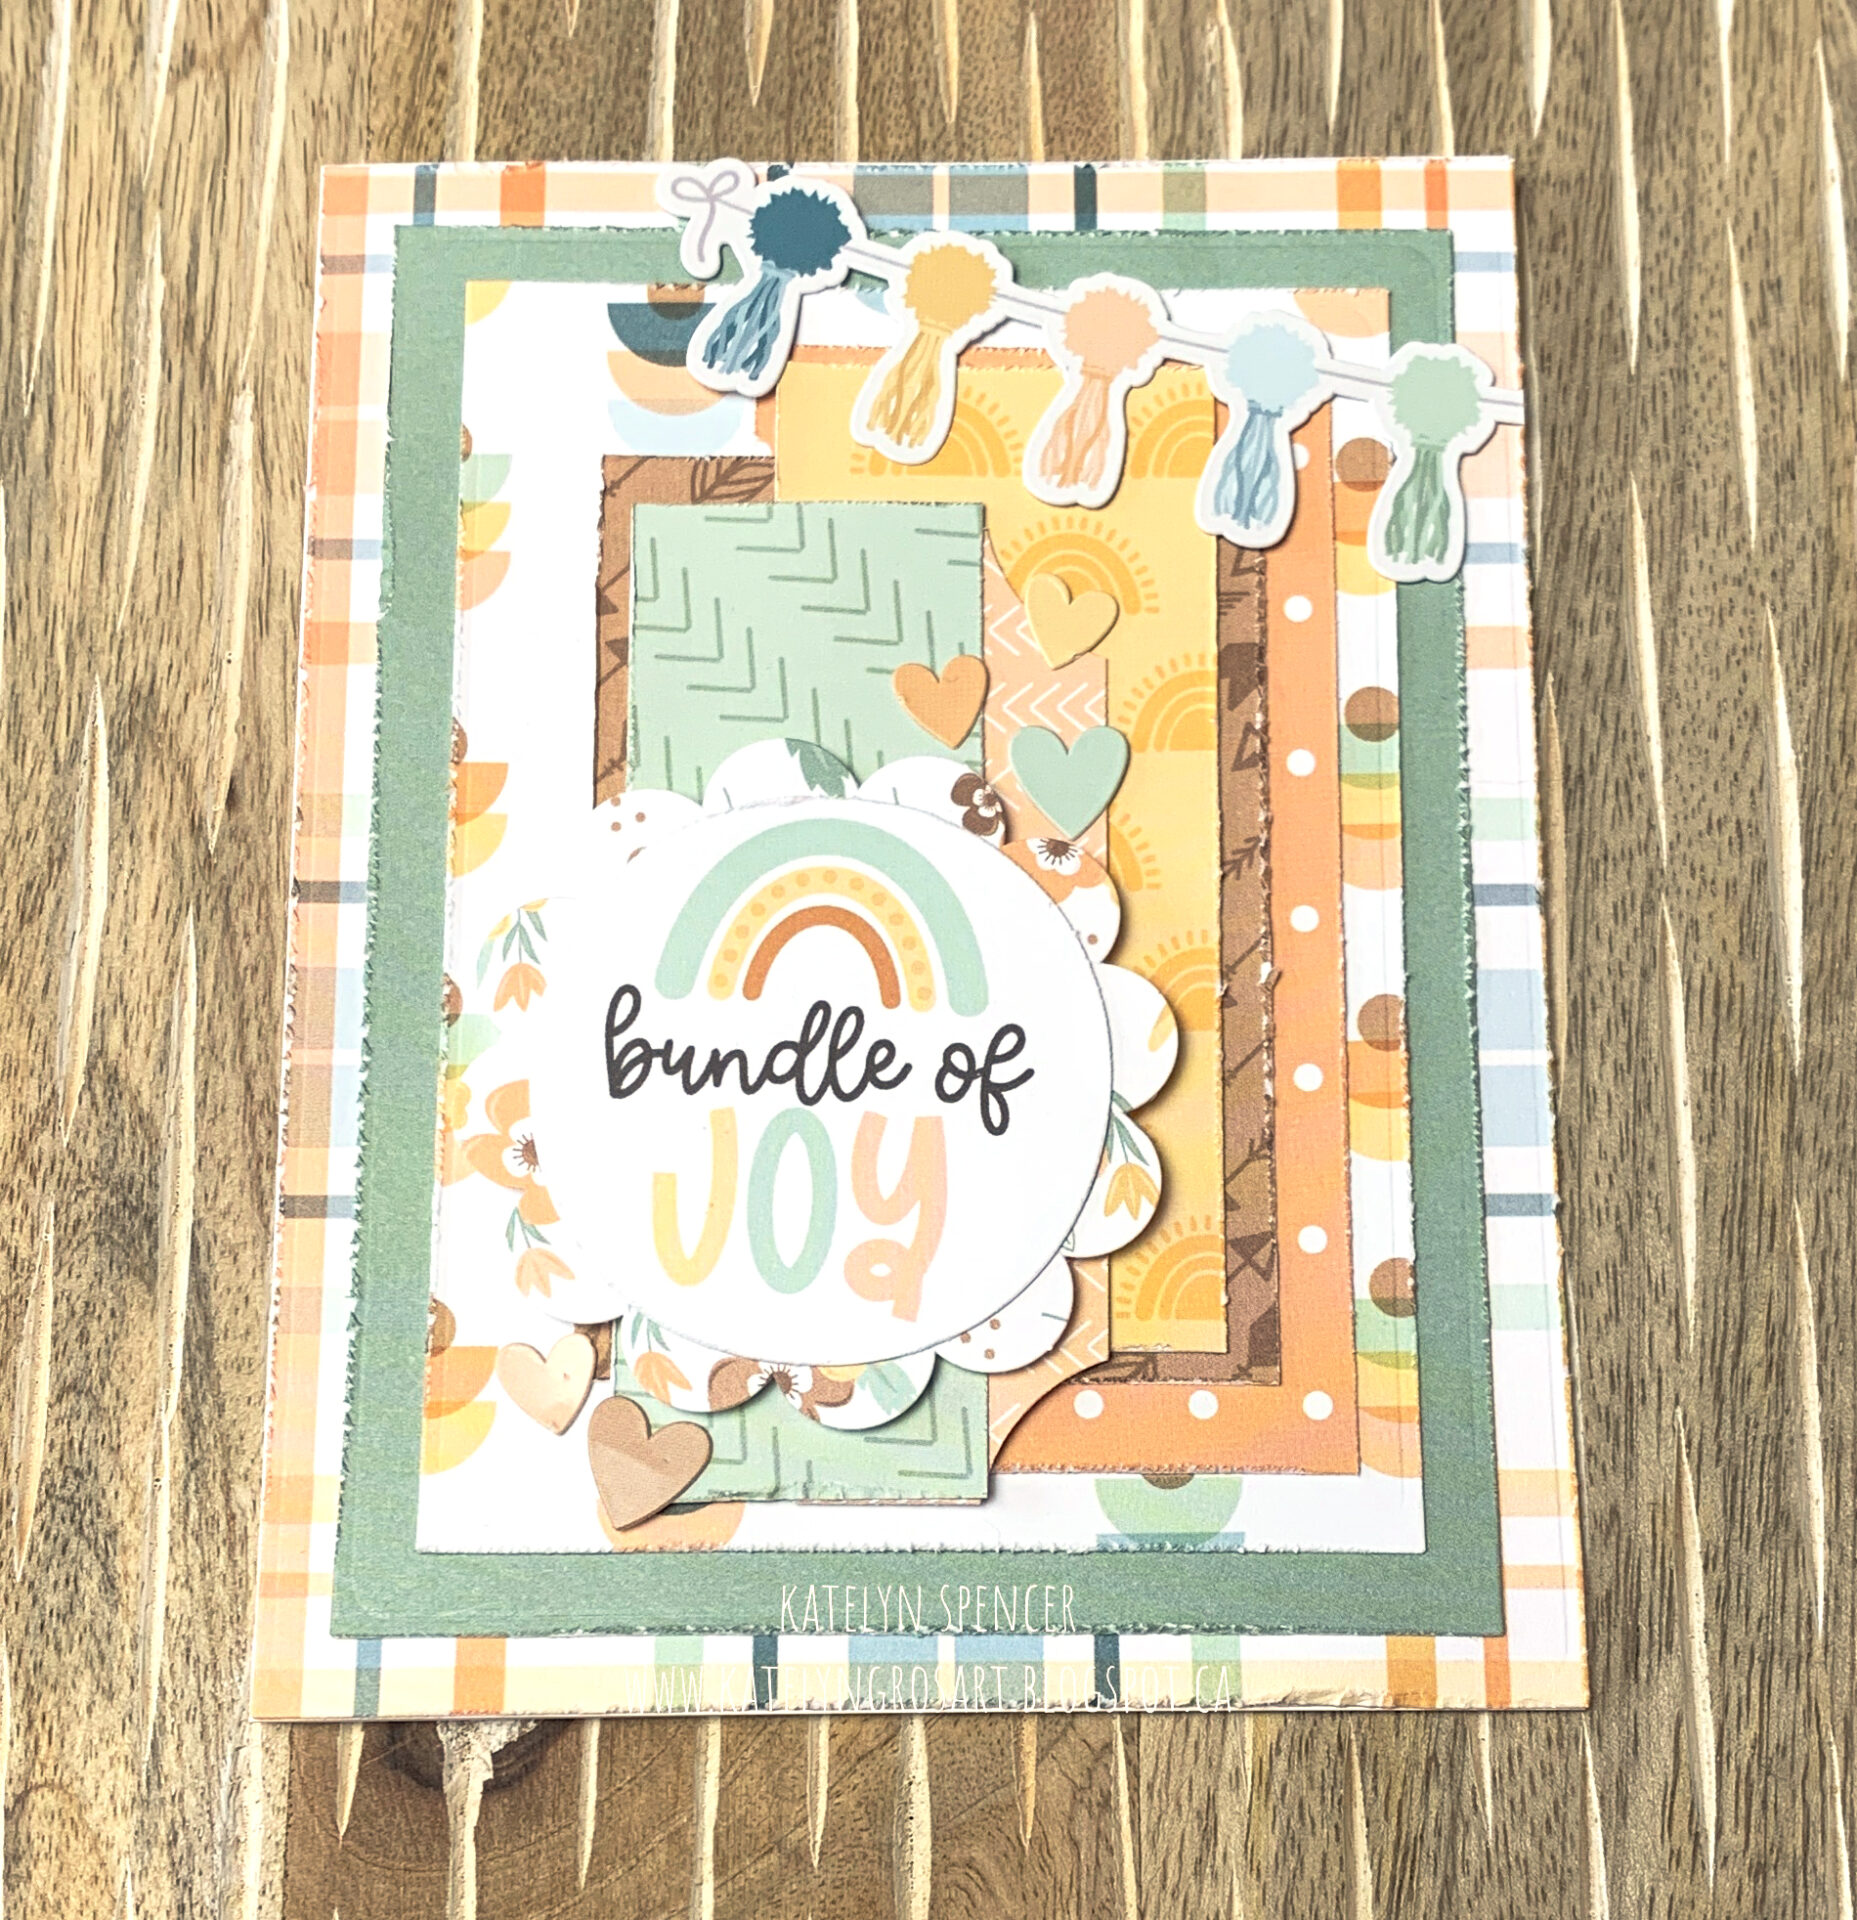 Out of the Our Baby Boy Patterned Paper Pack from Echo Park Paper, you’ll need the plaid paper and the multi coloured half circle paper. Die cut a 4 ¼” Fitted Rectangle from Elizabeth Craft Designs out of the plaid paper patterned paper. Die cut a 3 ¼” Fitted Rectangle from Elizabeth Craft Designs out of the multi coloured half circle paper. Distress the edges of both papers.
  Next, you’ll need the orange/white polka dot paper, sun paper, brown arrow paper and green arrow paper out of the Our Baby Boy Paper Pack from Echo Park Paper. Cut the orange/white polka dot paper to 2” x 4”. Cut the sun paper to 1 ½” x 3 ½”. Cut the brown arrow paper to 2 ¼” x 3 ¼”. Cut the green arrow paper to 1 ¼” x 3 ½”. Distress the edges of all the pieces.
  Out of the Our Baby Coordinating Solids Paper Pack from Echo Park Paper, you’ll need the light green paper. Die cut a 3 ¾” Fitted Rectangle from Elizabeth Craft Designs out of the paper. Distress the edges of the paper.
  Next, you’ll need the Our Baby Ephemera from Echo Park Paper. Take out the Bundle of joy circle, flower scallop circle and pink arrow frame. Cut the pink arrow frame in half.
  Use E-Z Runner from Scrapbook Adhesives by 3L to adhere the 3 ¾” rectangle to the 4 ¼” rectangle. Adhere the 3 ¼” rectangle to the 3 ¾” rectangle.
  Use E-Z Runner from Scrapbook Adhesives by 3L to adhere the orange/white polka dot paper ¼” from the right and ¼” from the bottom of the 3 ¼” rectangle. Adhere the brown arrow paper ½” from the right and ½” from the bottom of the 3 ¼” rectangle. Adhere the sun dot paper 5/8” from the right and 5/8” from the top of the 3 ¼” rectangle.
 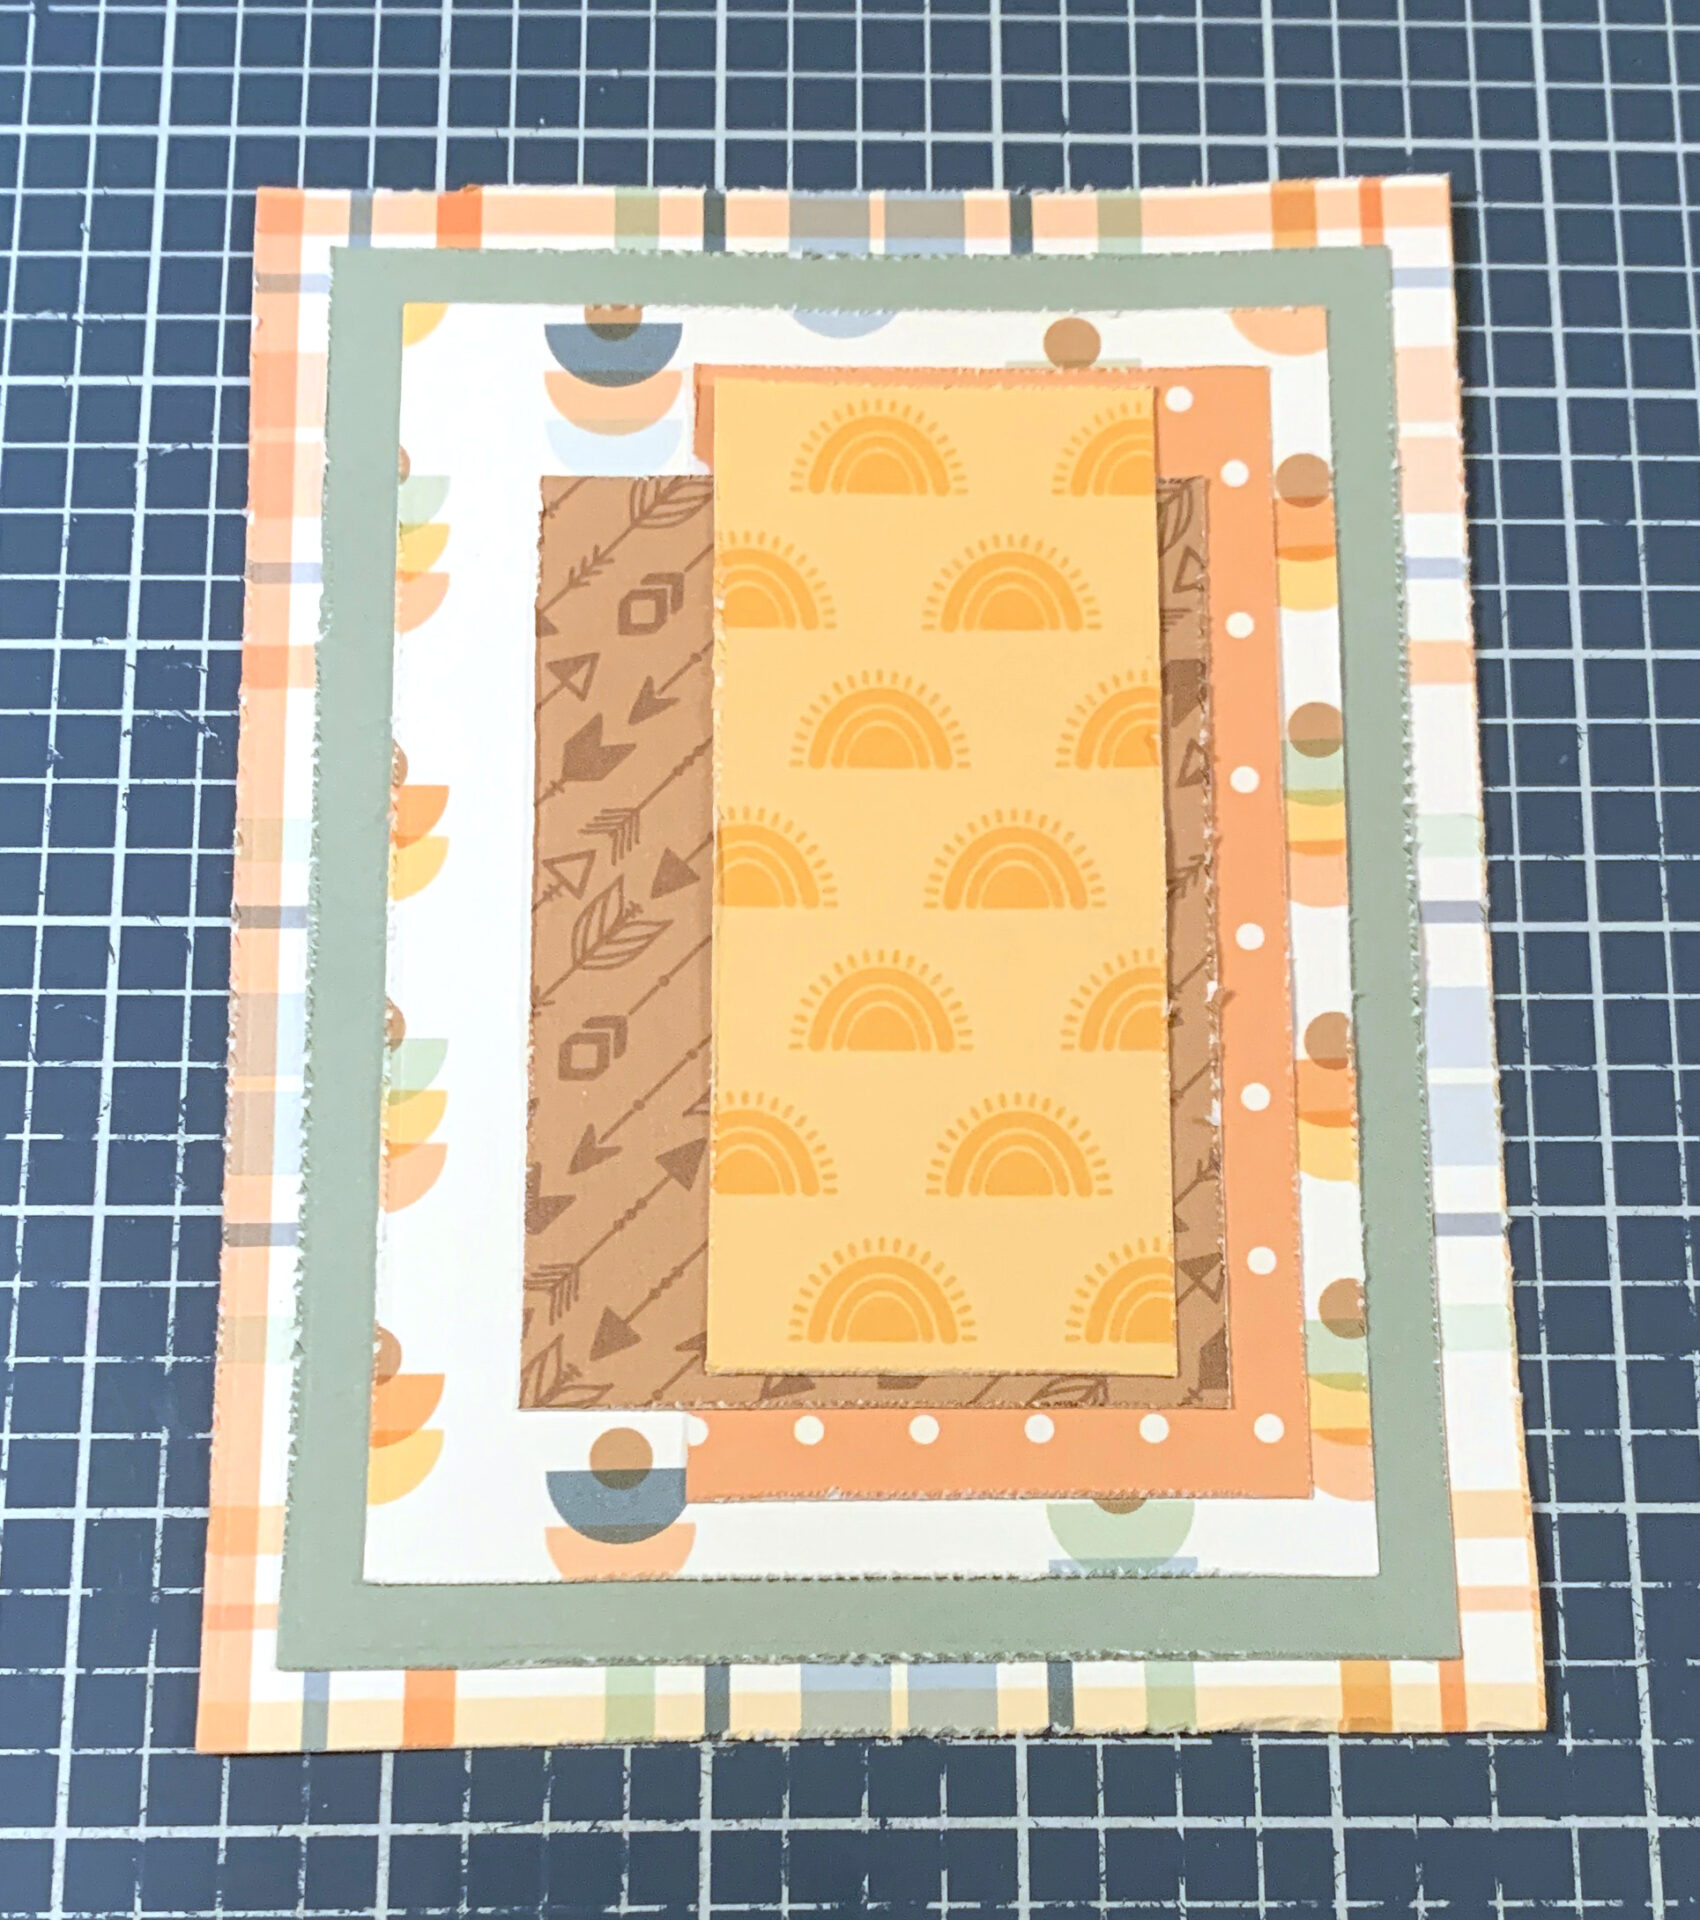 Use E-Z Runner from Scrapbook Adhesives by 3L to adhere the pink arrow frame 3/8” from the right and 1/8” from the top of the green arrow paper. Adhere the green arrow paper 5/8” from the left and 1/8” from the bottom of the 3 ¼” rectangle. Adhere the bundle of joy circle to the flower scallop circle. Use 3D Foam Squares from Scrapbook Adhesives by 3L to adhere the flower scallop circle 1/8” from the left and 3/8” from the bottom of the 3 ¼” rectangle.
  Now, you’ll need the Our Baby Boy Cardstock Sticker from Echo Park Paper. Stick the tassell banner sticker to the top right corner of the card front, trim the banner as needed. Stick five hearts as desired around the flower scallop circle.
  To finish the card, cut a cardcase out of Superstock from Creative Scrapbooker Magazine that measures 4 ¼” x 11”, score at 5 ½”. Use E-Z Runner Adhesive from Scrapbook Adhesives by 3L to adhere the card front to the card base.
Here are some closeups of the finished cards.  Thank you for joining me today and taking the time to check out my blog.

You can find more of my work on my blog at: http://www.katelyngrosart.blogspot.ca
Echo Park Paper Co.:
Our Baby Coordinating Solids Paper Pack
Our Baby Boy Paper Pack
Our Baby Ehemera
Elizabeth Craft Designs: Fitted Rectangle Dies
Creative Scrapbooker Magazine: Super Stock
Scrapbook Adhesives by 3L: 3D Foam Squares and E-Z Runner Permanent Tape
Subscribe Today to Creative Scrapbooker Magazine

