


Hey Creative Scrapbooker Fans! I’m thrilled to be back on the blog today sharing with you my pretty wall hanging perfect for any area of your home. The jumping-off point for my project was the Botanical Garden collection from Carta Bella  Which I combined with some adhesive from Scrapbook Adhesives by 3L and ink from Ranger Ink, I was able to create this pretty Believe in Yourself Wall Hanging. You’ll want to grab a cup of your favourite Summer beverage as I share with you how to recreate my wall hanging at home.
 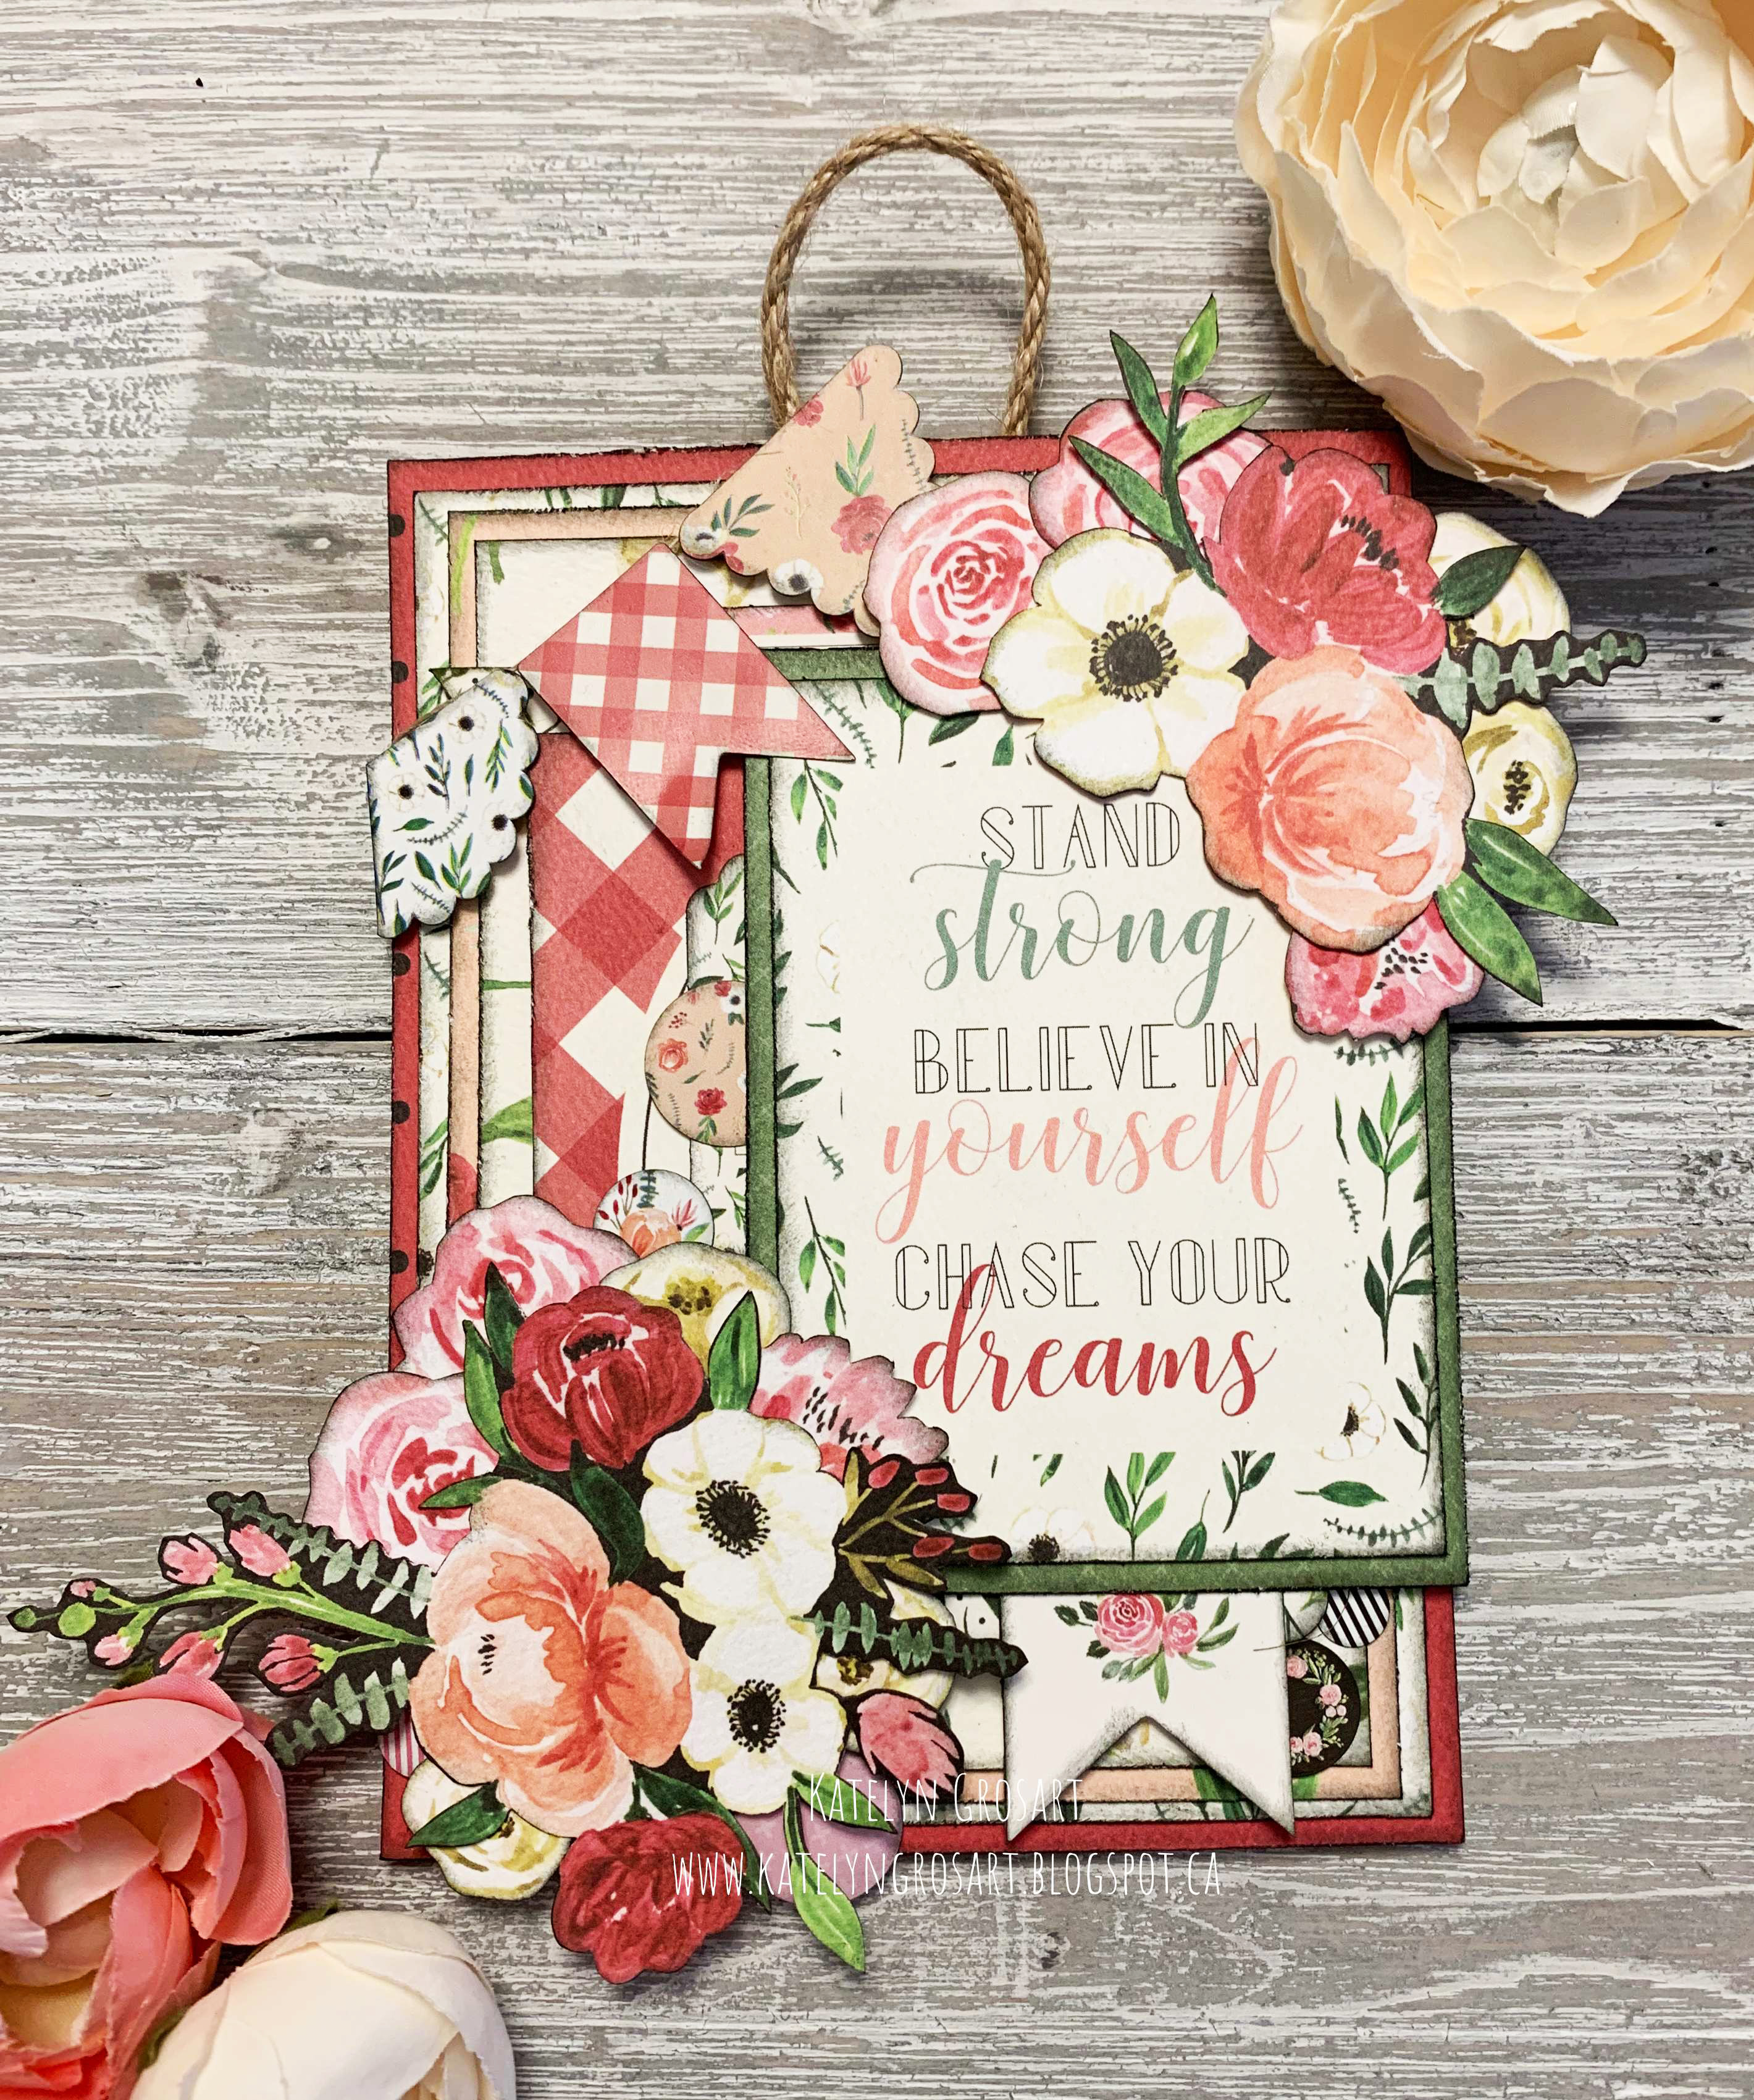 To start, you’ll need a stiff piece of chipboard that measures 4 ½” x 6”, I used an old bingo card.
  Choose the two-card cut apart papers out of the Botanical Garden Paper Pack from Carta Bella that has the Believe in Yourself card, a plain green one, and the pink plaid card. Cut out the three 3” x 4” cards. Cut the Believe in Yourself card down to 2 ¾” x 3 ¾”. Distress the edges of all three cards. Ink the edges of all three cards using Black Soot Distress Ink and a blending tool with foam from Ranger Ink.
  Choose one of the patterned paper pieces with the white flowers on it out of the Botanical Garden Paper Pack from Carta Bella. Cut the patterned paper down to 3 ¾” x 5 ¼”. Distress the edges. Ink the edges of the patterned paper using Black Soot Distress Ink and a blending tool with foam from Ranger Ink.
  Take the pink base with flowers patterned paper out of the Botanical Garden Paper Pack from Carta Bella. Cut two pieces, one that measures 4” x 5 ½” and the other that measures 4 ¼” x 5 ¾”. You’ll use the backside of the 4 ¼” piece. Distress the edges. Ink the edges of both patterned papers using Black Soot Distress Ink and a blending tool with foam from Ranger Ink.
  Take the pink/black polka dot paper out of the Botanical Garden Paper Pack from Carta Bella. Cut a piece out of the paper that measures 4 ½” x 6”. Distress the edges. Ink the edges of the paper using Black Soot Distress Ink and a blending tool with foam from Ranger Ink.
  Choose a couple of the flower patterned papers out of the Botanical Garden Paper Pack from Carta Bella. Fussy cut a total of two flower bunches and eleven flowers out. Ink the edges of the flowers using Black Soot Distress Ink and a blending tool with foam from Ranger Ink.
  Out of the Botanical Garden Ephemera package from Carta Bella, take out the leaf label and leaf banner. Ink the edges of the label and banner using Black Soot Distress Ink and a blending tool with foam from Ranger Ink.
  Out of the Botanical Garden Frames & Tags package from Carta Bella, take out the pink flower tag, leaf tag and friends banner. Ink the edges of the tags and banner using Black Soot Distress Ink and a blending tool with foam from Ranger Ink.
  To adhere the next four layers I used the Scrapbook Adhesives by 3L E-Z Runner Grand.
  Adhere the pink/black polka dot paper to the 4 ½” x 6” chipboard base. Adhere the leaf paper to the pink/black polka dot paper. Adhere the pink base flower paper to the leaf paper. Adhere the white flower paper to the pink base flower paper.
  The next two steps use E-Z Runner Grand from Scrapbook Adhesives by 3L. Adhere the leaf banner 1” from the top and ¼” from the left of the pink/black polka dot paper. Adhere the pink tag ¾” from the top and 1 ¼” from the left of the pink/black polka dot paper. Use 3D Foam square from Scrapbook Adhesives by 3L to adhere the 3” red plaid piece 5/8” from the left and 1 ¼” from the top of the pink/black polka dot paper.
  The next four steps use E-Z Runner Grand adhesive from Scrapbook Adhesives by 3L. Adhere the leaf tag 1 ¾” from the top and 1 ¼” from the left of the pink/black polka dot paper. Adhere the leaf label 7/8” from the bottom and ½” from the right of the pink/black polka dot paper. Adhere the friends banner 1/8” from the bottom and ¾” from the right of the pink/black polka dot paper. Adhere the Believe in Yourself card to the green card. Use 3D Foam squares and E-Z Runner Grand from Scrapbook Adhesives by 3L to adhere the green card 1 1/8” from the bottom and right to the edge of the right-hand side of the pink/black polka dot paper.
  Use 3D Foam squares and E-Z Runner Grand from Scrapbook Adhesives by 3L to adhere a flower bunch and five flowers in the top left-hand corner of the Believe in Yourself card. Use 3D Foam squares and E-Z Runner from Scrapbook Adhesives by 3L to adhere the other flower bunch and six flowers in the bottom left-hand corner of the Believe in Yourself Card.
  Off the sticker sheet out of the Botanical Garden Paper Pack from Carta Bella, you’ll need three of the banner stickers. Ink the edges of the banners using Black Soot Distress Ink and a blending tool with foam from Ranger Ink. Adhere to a piece of twine. Use 3D Foam squares from Scrapbook Adhesives by 3L to adhere the banner in the top left corner of wall hanging. Wrap the excess twine and adhere to the back of the wall hanging.
  Off the sticker sheet out of the Botanical Garden Paper Pack from Carta Bella, you’ll need six circle stickers.
  Ink the edges of the circles using Black Soot Distress Ink and a blending tool with foam from Ranger Ink. Adhere two circles to the bottom right side of the Believe card. Adhere three circles in amongst the flowers in the bottom left-hand corner of the Believe card. Adhere the last circle 1 1/8” from the left and 2 3/8” from the top of the pink/black polka dot paper.
  To finish the wall hanging, attach a piece of twine to the top of the wall hanging.
  Here are a few closeup photos of my finished Believe in Yourself Wall Hanging.
  Thanks for taking the time to check out my blog post. I hope that my Believe in Yourself Wall Hanging has inspired you to recreate your own at home. Supplies Used:
- Carta Bella: Botanical Garden Paper Pack, Botanical Garden Ephemera and Botanical Garden – Frames & Tags
- Ranger Ink: Black Soot Distress Ink and Blending Tool with Foam
- Scrapbook Adhesives by 3L: 3D Foam Squares and E-Z Runner Grand.
- Misc: Twine and Bingo Card
You can find more of my work on my blog at: http://www.katelyngrosart.blogspot.ca
Happy Creating!

Subscribe today to Creative Scrapbooker Magazine


3 Comments
Beautiful!!
Gorgeous, love all the different layouts.
That wall hanging is gorgeous!