


Hey Creative Scrapbooker Fans! For today’s blog post, I’m sharing with you my Do Everything With Love Tag. To create my tag, I’ve used a variety of dies from Elizabeth Craft Designs, patterned paper from Simple Stories, a variety of products from Ranger Ink, and adhesive from Scrapbook Adhesives by 3L. You’ll want to grab a cup of your favourite beverage and learn how to recreate my tag at home. 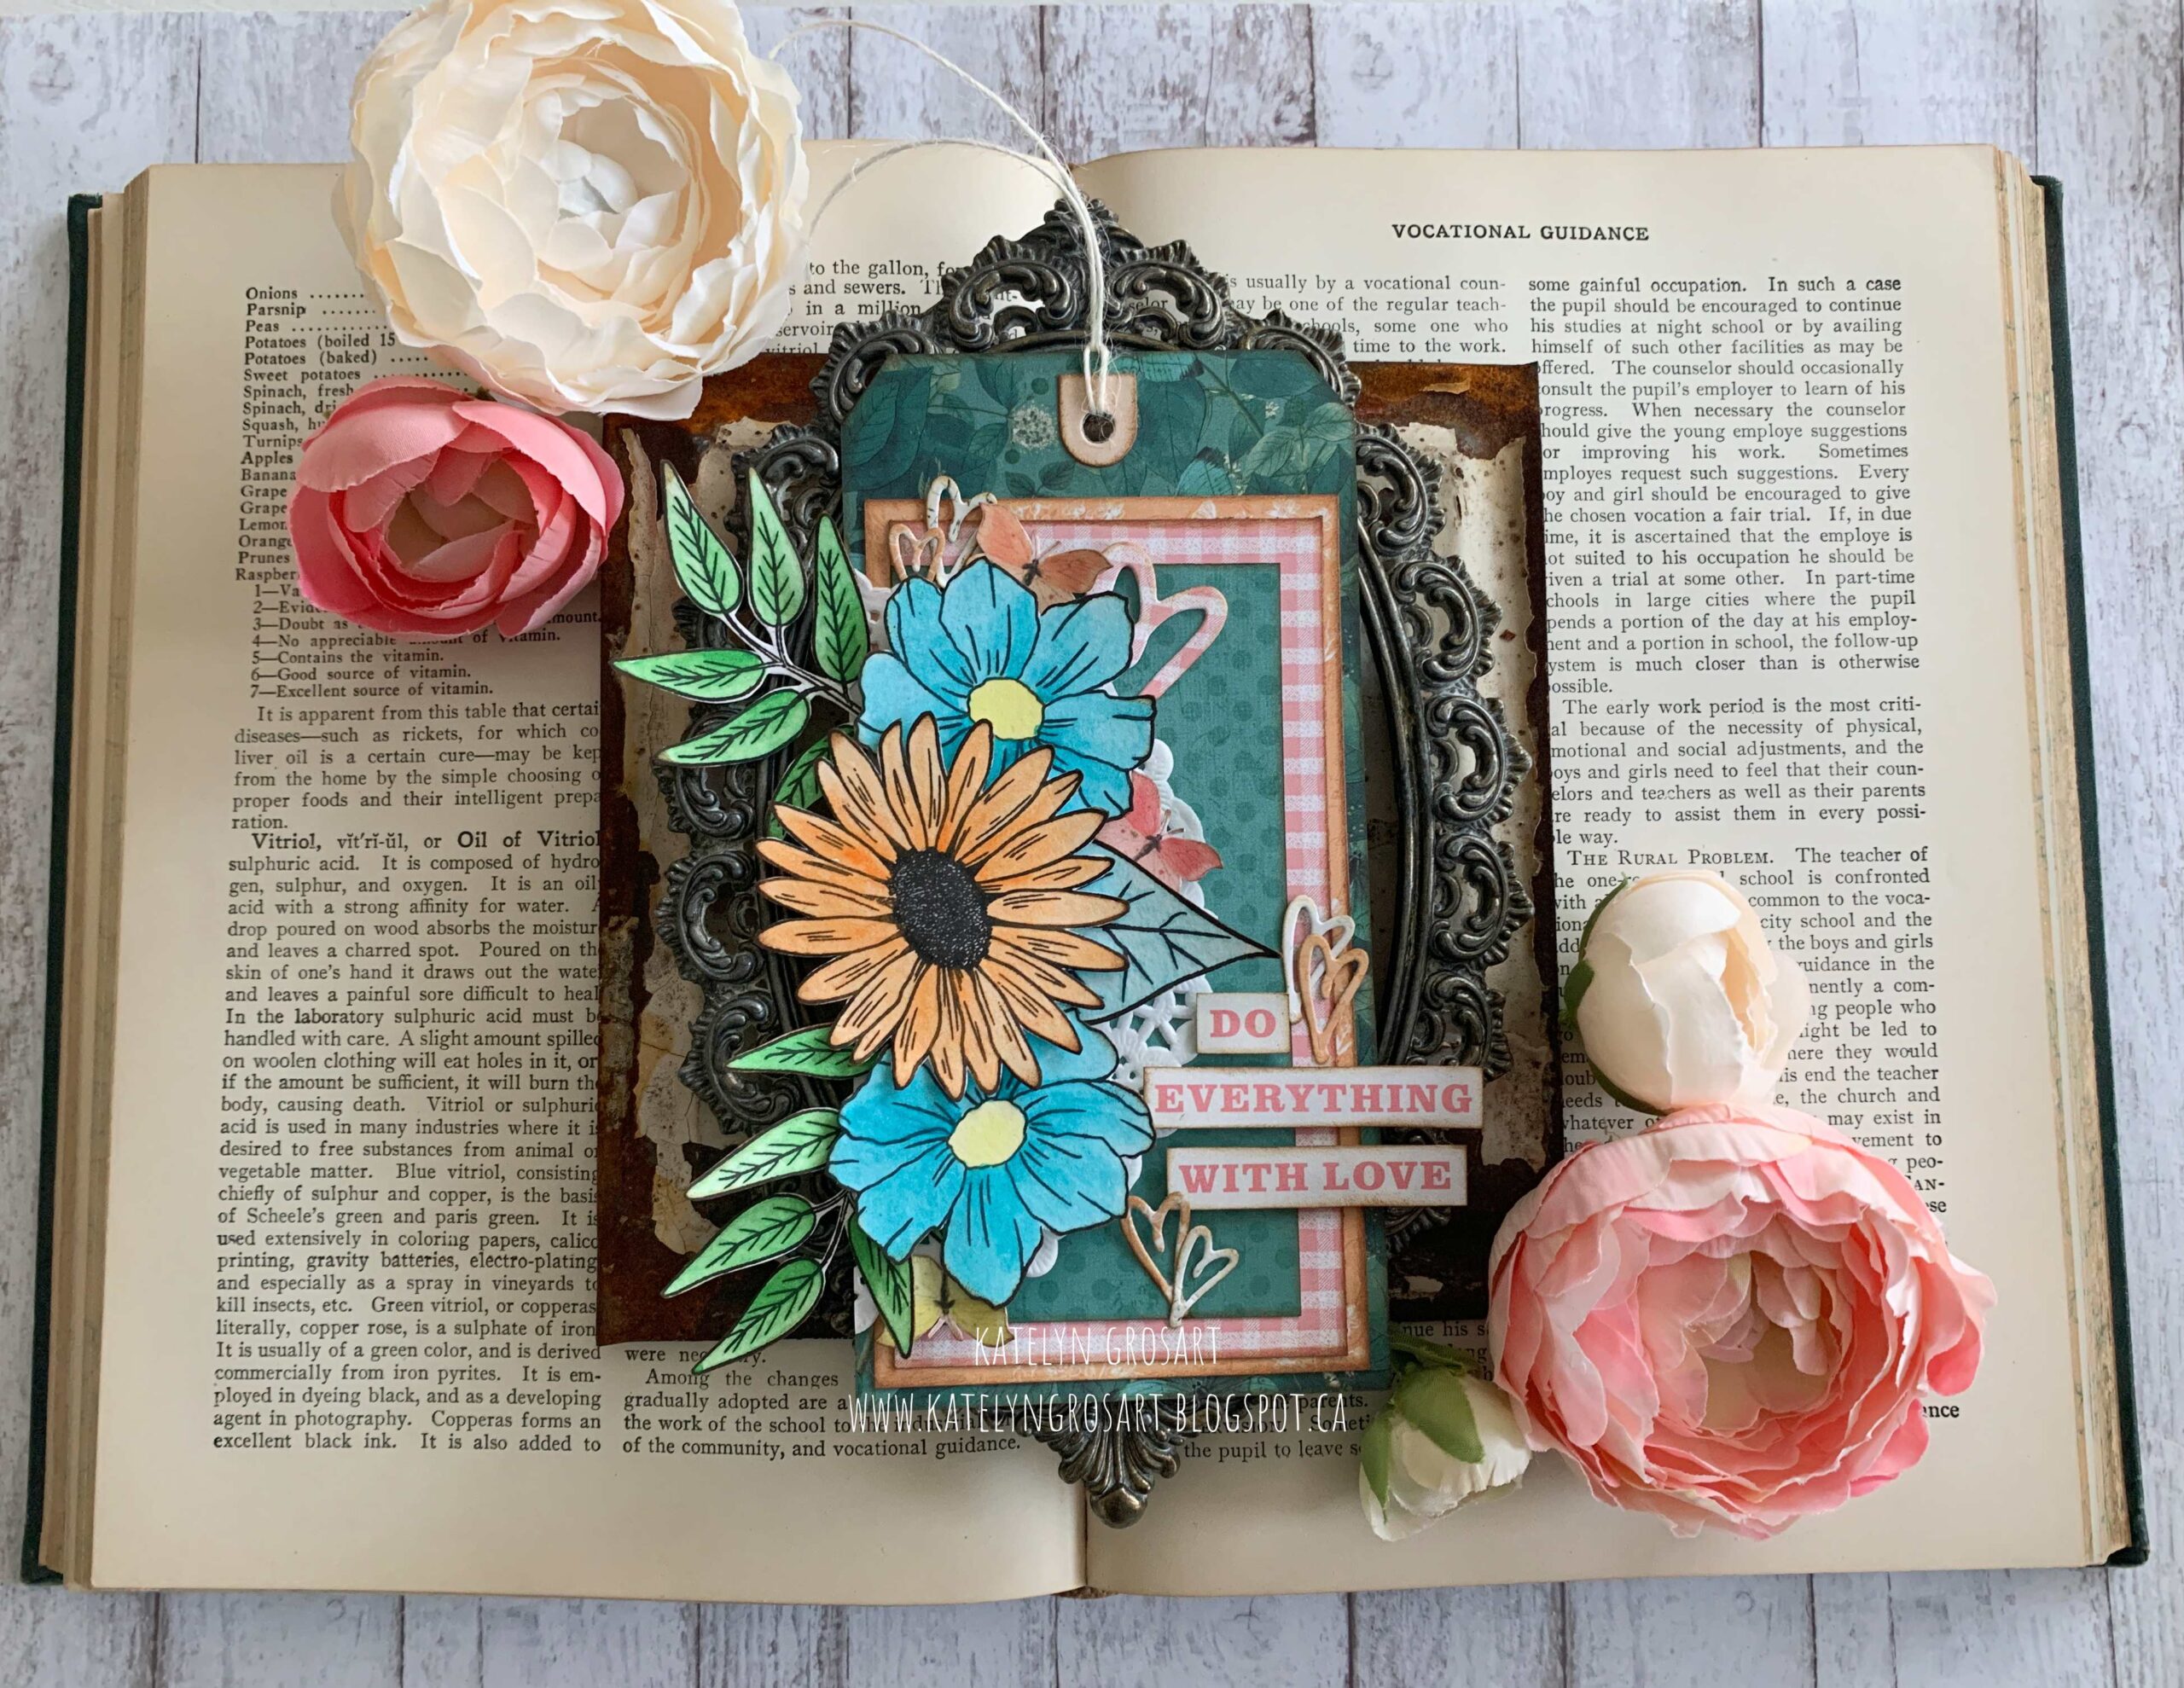 To start, you’ll need a tag that measures 3 1/8” x 6 ¼”. Select a piece of patterned paper out of the 6×8 Paper Pad – Simple Vintage Garden District from Simple Stories. Trace the tag around the piece of patterned paper. Cut the tag out. Punch a hole at the top of the patterned paper tag. Ink the edges of the tag using Walnut Stain Distress Ink and a blending tool with foam from Ranger Ink.
  Ink the edges of the tag using Walnut Stain Distress Ink and a blending tool with foam from Ranger Ink.
  Out of the same patterned paper pad from Simple Stories, choose two more pieces of patterned paper. Cut the first piece down to 2 7/8” x 5 ¼”. Cut the second piece down to 2 3/8” x 4 ½”. Ink the edges of all the papers using Walnut Stain Distress Ink and a blending tool with foam from Ranger Ink.
  You’ll need another piece of patterned paper, the butterfly paper out of the paper pad from Simple Stories. Fussy cut three butterflies from the paper. Flip the paper over and cut a piece that measures 2 3/8” x 4 ½”. Ink the edges of all the butterflies and patterned paper using Walnut Stain Distress Ink and a blending tool with foam from Ranger Ink.
  Choose one of the 3×4 cards out of the paper pad from Simple Stories. Cut the words from the card out. Ink the edges of the word strips using Walnut Stain Distress Ink and a blending tool with foam from Ranger Ink.
  Choose one of the reinforcements out of the Reinforcement Variety Pack from Elizabeth Craft Designs. Die cut the reinforcement from a piece of patterned paper out of the paper pad from Simple Stories. Ink the edges of the reinforcement using Walnut Stain Distress Ink and a blending tool with foam from Ranger Ink.
  Out of the Planner Essentials 20 – Half Heart Page Set from Elizabeth Craft Designs, you’ll need the heart. Die cut the heart out of one of the previously used patterned papers. Ink the edges of the heart using Walnut Stain Distress Ink and a blending tool with foam from Ranger Ink.
  Out of the Sidekick Essentials 2 from Elizabeth Craft Designs, you’ll need the two hearts. Die cut the two hearts out of one of the previously used patterned papers, so you end up with a total of 3 hearts. Die cut the two hearts out again from one of the previously used patterned papers, so you end up with a total of 3 hearts. Ink the edges of all the hearts using Walnut Stain Distress Ink and a blending tool with foam from Ranger Ink.
  Choose two of the leaves out of the Garden Flowers Stamp Set from Elizabeth Craft Designs. Apply Jet Black Archival Ink from Ranger Ink to one of the leaves and stamp onto a piece of watercolour cardstock from Elizabeth Craft Designs. Reapply the ink to the leaf stamp and stamp onto the same piece of cardstock. Apply Jet Black Archival Ink from Ranger Ink to the other leaf stamp and stamp onto the same piece of cardstock. Using a waterbrush and Scribble Sticks 1 & 2 from Ranger Ink, colour in the leaves as desired. Once the leaves have dried, fussy cut them out. Ink the edges of the leaves using Walnut Stain Distress Ink and a blending tool with foam from Ranger Ink.
  Choose one of the large flowers out of the Garden Flowers Stamp Set from Elizabeth Craft Designs. Apply Jet Black Archival Ink from Ranger Ink to the flower and stamp onto a piece of watercolour cardstock from Elizabeth Craft Designs. Choose one of the flowers out of the A Field of Flowers Stamp Set from Elizabeth Craft Designs. Reapply the ink to the flower stamp and stamp onto the same piece of cardstock. Using a waterbrush and Scribble Sticks 1 & 2 from Ranger Ink, colour in the flowers as desired. Once the flowers have dried, fussy cut them out. Ink the edges of the flowers using Walnut Stain Distress Ink and a blending tool with foam from Ranger Ink.
  Cut a white doily in half.
  Using E-Z Runner from Scrapbook Adhesives by 3L, adhere the patterned paper tag to the tag. Adhere the 2 7/8” patterned paper piece to the tag. Adhere the 2 5/8” patterned paper piece to the 2 7/8” patterned paper piece. Adhere the 2 3/8” patterned paper piece to the left hand side of the 2 5/8” patterned paper piece, leaving an even amount at the top and bottom.
  Use E-Z Runner from Scrapbook Adhesives by 3L to adhere the doily to the left hand side of the tag. Use Dodz from Scrapbook Adhesives by 3L to adhere the reinforcement circle over top of the circle on the tag.
  Use Foam Squares from Scrapbook Adhesives by 3L to adhere the three flowers as desired over top of the doily. Using E-Z Runner from Scrapbook Adhesives by 3L, adhere the leaves in amongst the flowers.
  In the top portion of the flowers, adhere the large heart, a medium heart, a small heart and butterfly as desired using Dodz from Scrapbook Adhesives by 3L. In the middle of the tag, use Dodz from Scrapbook Adhesives by 3L to adhere a butterfly in amongst the flowers and leaf. Use Foam Squares from Scrapbook Adhesives by 3L to adhere the word strips 1” from the bottom of the tag, they will hang over the right edge of the tag. Adhere the remaining hearts in amongst the word strips using Dodz from Scrapbook Adhesives by 3L.
 In the bottom left side of the tag, use Dodz from Scrapbook Adhesives by 3L to adhere the last butterfly in amongst the flowers and leaf.
  To finish the tag, tie a piece of white twine through the top of the tag.
  Here are a few closeup photos of my Do Everything With Love Tag.
  Thank you for joining me today and taking the time to check out my blog post. I hope that my Do Everything With Love Tag has inspired you to recreate your own at home.
SUPPLIES:
Ranger Ink: Jet Black Archival Ink, Distress Ink – Walnut Stain, Blending Tool with Foam and Dina Wakley Media – Scribble Sticks Sets #1 & #2
Elizabeth Craft Designs: Reinforcement Variety Pack, Sidekick Essentials 2, Planner Essentials 20 – Half Heart Page Set, A Field of Flowers, Garden Flowers and Watercolour Cardstock
Simple Stories: 6×8 Paper Pad – Simple Vintage Garden District
Scrapbook Adhesives by 3L: 3D Foam Squares, Dodz and E-Z Runner Permanent Tape
Misc: Tag, White Doily and White Twine
You can find more of my work on my blog at http://www.katelyngrosart.blogspot.ca
Happy Creating!

Subscribe today to Creative Scrapbooker Magazine


1 Comment
Thanks so much for directions for tag,enjoyed making it!