


 Hello crafty friends! Tracy McLennon here, and today I have a pretty little card to share and a few little step by step tips on simple colouring technique. The stamps and coordinating dies are from Picket Fence Studios. The Que Sera, Sera collection.
  Here are all of the details.
Step one is to stamp the images you would like to use onto white cardstock using Ranger Jet Black Archival Ink.  Now I gathered the colours that I wanted to use on my images. A little trick of mine, is that I keeping the backing from my favourite Scrapbook Adhesives by 3L Foam Squares. They can be used as blending surfaces. I always have a little pile of them at my desk for just this purpose.
  Often when I am colouring I like to add colour straight to cardstock in the areas where I want the colour the darkest. Here is an image of that first step.
  I started with the green leaves. Add green marker to the blending surface (repurposed adhesive sheet). Then using a waterbrush pick-up the colour and add the the images in layers until you get the desired blend. You can even come back once what you’ve coloured has dried to add more colour.
  Next with the pink, and using the same technique.
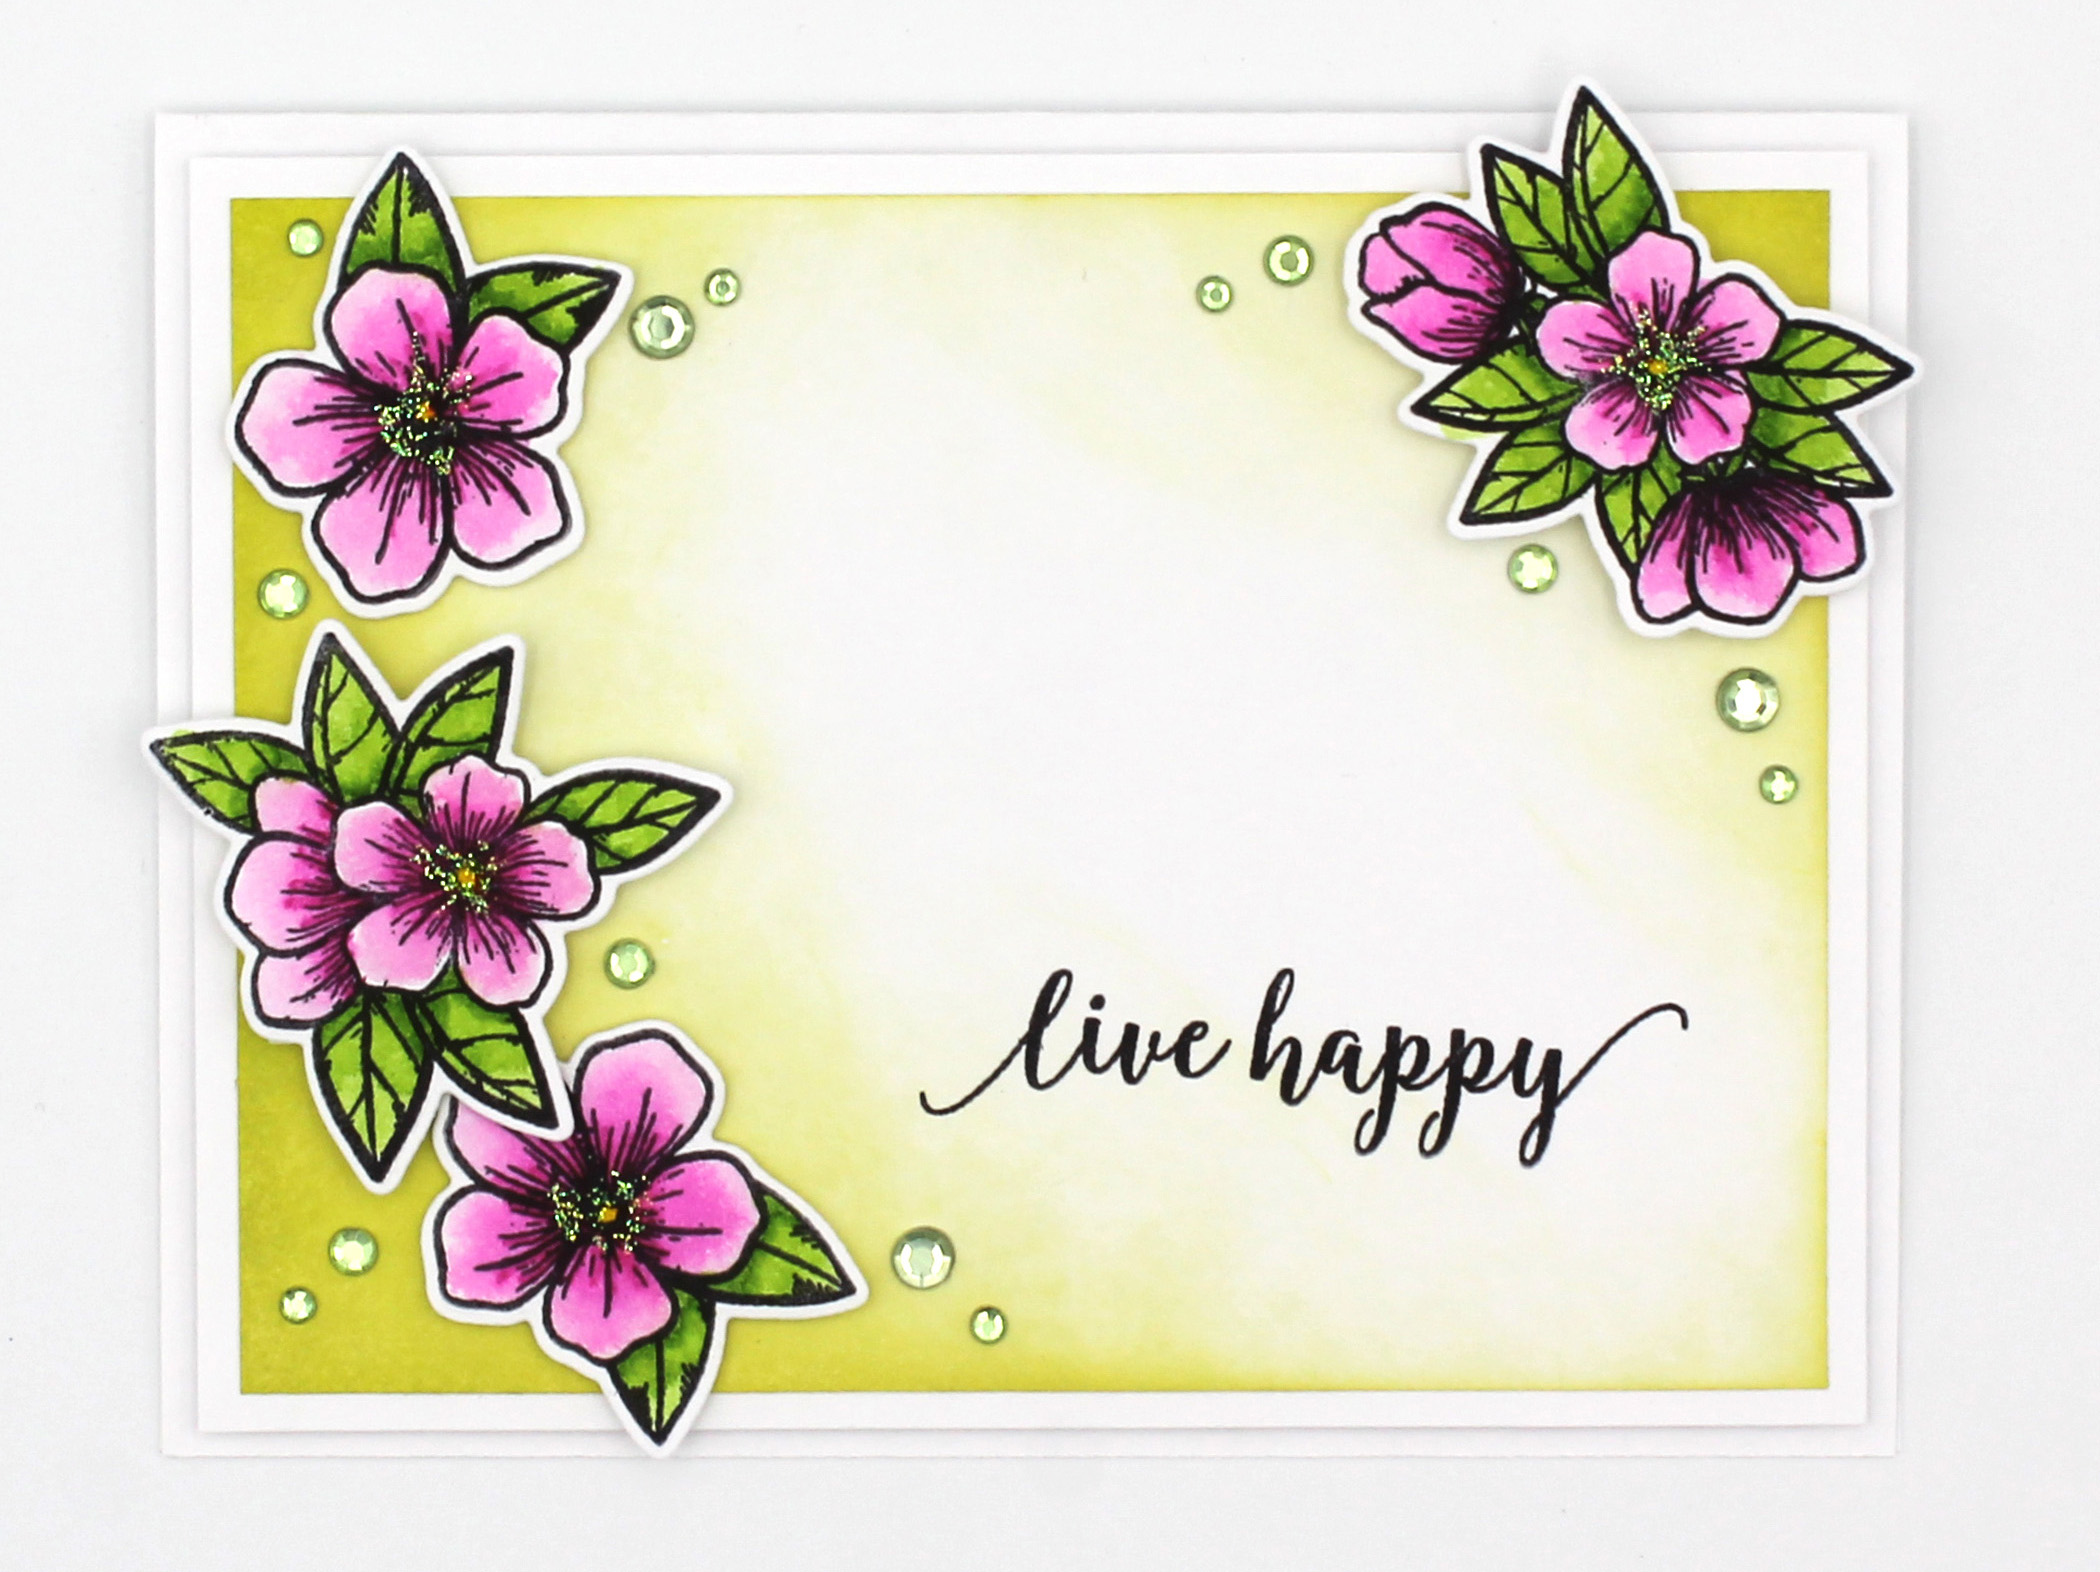
  Using the coordinating Picket Fence Studios dies, I cut out my coloured flowers. Shout out to the Simple Stories washi tape that keeps everything in place.
  Now it’s time to cut my card layers, all from white cardstock. The card base is A2, 8.5×5.5 and fold it in half. Cut a piece that is 4×5.25 and another that is 3.75×5.
  Using a blending brush and Distress Oxide Ink- Twister Citron, I blended the edges of the smallest white cardstock layer.
  Stamp the sentiment onto the card front using the same Archival Jet Black ink. Adhere the card front to the next cardstock layer using regular adhesive. Then adhere to the card base using 3D Foam Squares. Add the flowers to the card using a mixture of Thin 3D Foam Squares and regular 3D Foam Squares.
  Now it’s time to add some sparkle. I added Stickles to the middle of the flowers and I added gems around the flower clusters.
  Thanks so much for stopping by!
Tracy

To see more of Tracy’s work visit her blog – Scrappy Chick Designs
Join us in the Village!


1 Comment
So pretty and elegant!