


Hey Creative Scrapbooker Fans!
Katelyn Grosart here today on the Creative Scrapbooker Magazine blog. I am excited to be sharing with you a baby themed project. With spring being here, it means that flowers are blooming and babies are arriving. For me, I always find it challenging to create a baby card because it’s one of those types of cards that you don’t need often. So, by using the adorable Oh Baby! line from Simple Stories, a variety of chipboard pieces from Southern Ridge Trading Company, Embossing Powder from Emerald Creek Craft Supplies, Ink from Ranger Ink, adhesive from Scrapbook Adhesives by 3L and Super Stock Cardstock from Creative Scrapbooker Magazine, I was able to create this cute Welcome Home Little One Card. You’ll want to grab a cup of your favourite spring beverage as I share with you how to recreate my Welcome Home Little One Card at home.
Start by adhering seven banner stickers from the Oh Baby! 4X6 Sticker Sheets from Simple Stores to a piece of scrap paper. Cut the banners out. Ink the edges of the banners using Ground Espresso Distress Ink and a blending tool with foam from Ranger Ink. Adhere the banners to a piece of twine using Ultra Thin Adhesive Dots from Scrapbook Adhesives by 3L. 
From the Oh Baby! 4X6 Sticker Sheets from Simple Stores adhere the plaid heart, the plaid strip, the flower strip, the blue ruler, the “welcome home” and “little one” stickers to a piece of scrap paper. Cut the stickers out. Ink the edges of the stickers using Ground Espresso Distress Ink and a blending tool with foam from Ranger Ink.
Take out one Queen’s Anne Drop and the Mina Heart out of the package from Southern Ridge Trading Company. Cut the Mina Heart in half. Apply Emboss It Ink from Ranger Ink to each chipboard piece. Sprinkle Pastel Pink Embossing Powder from Emerald Creek Craft Supplies overtop of each chipboard piece. Emboss with a heat tool.
Next, you’ll need to pull out a doily from the package.
From the Oh Baby! Bits & Pieces pack from Simple Stories, take out two butterflies, the yellow decorative saying, seven flowers, the starburst image, two sets of two hearts and one set of three hearts. Cut the yellow decorative saying in half. Cut around all the images so the white isn’t showing except for the bunch of two flowers and the bunch of three flowers. Ink the edges of all the fussy cut images using Ground Espresso Distress Ink and a blending tool with foam from Ranger Ink.
From the Bundle of Joy paper from the Oh Baby! collection by Simple Stories, fussy cut two rulers out. Trim one of the rulers down to 4 3/4” and cut the other ruler down to 4 1/2”. Ink the edges of the rulers using Ground Espresso Distress Ink and a blending tool with foam from Ranger Ink.
From the So Sweet paper from the Oh Baby! collection by Simple Stories, trim one piece that measures 4 1/2” x 6 1/2”. Cut a second piece that measures 3 1/4” x 4 1/4”. Ink the edges of the papers using Ground Espresso Distress Ink and a blending tool with foam from Ranger Ink.
From the Adorable paper from the Oh Baby! collection by Simple Stories, trim a piece that measures 4 1/4” x 6 1/4”. Ink the edges of the papers using Ground Espresso Distress Ink and a blending tool with foam from Ranger Ink.
Cut a piece of the Precious paper from the Oh Baby! Collection by Simple Stories that measures 4 3/4” x 6 3/4”. Ink the edges of the patterned paper using Ground Espresso Distress Ink and a blending tool with foam from Ranger Ink.
From the 4×6 Vertical Elements paper from the Oh Baby! collection by Simple Stories, cut out the Oh Baby and a second card as you’ll use the back side. Cut the second card to 3 3/4” x 5 3/4”. Ink the edges of the papers using Ground Espresso Distress Ink and a blending tool with foam from Ranger Ink.
From the 3×4 Elements paper from the Oh Baby! collection by Simple Stories, cut out the “and the adventure begins” card. Ink the edges of the papers using Ground Espresso Distress Ink and a blending tool with foam from Ranger Ink.
Using EZ Runner from Scrapbook Adhesives by 3L, adhere the large pink dot paper to the striped woodgrain paper. Adhere the plaid paper to the pink dot paper.
Using EZ Runner from Scrapbook Adhesives by 3L, adhere the multi-dot paper to the Oh Baby Card. Adhere the Oh Baby Card to the plaid paper. Using EZ Runner from Scrapbook Adhesives by 3L, adhere the 4 3/4” ruler 1 1/2” from the bottom of the striped paper. Adhere the 4 1/2” ruler 1 1/4” from the bottom of the striped paper.
Use 3D Foam Squares from Scrapbook Adhesives by 3L, to adhere the doily in the middle of the card front. Adhere the Mina Heart chipboard pieces to the doily.
Use EZ Runner and 3D Foam Squares from Scrapbook Adhesives by 3L, to adhere one of the yellow decorative halves 1” from the bottom of the striped paper. Use EZ Runner and 3D Foam Squares from Scrapbook Adhesives by 3L, to adhere one of the yellow decorative halves 1/2” from the top of the striped paper. Adhere the plaid sticker 3/4” from the top of the striped paper.
Using EZ Runner from Scrapbook Adhesives by 3L, adhere the “and the adventure begins” card to the small pink dotted paper piece. Adhere the flower sticker 5/8” from the bottom of the pink dotted paper piece on the left-hand side. Adhere the Queen Anne’s Drop at the bottom of the small pink dotted paper piece. Use EZ Runner and 3D Foam Squares from Scrapbook Adhesives by 3L, to adhere the small pink dotted paper overtop of the Mina Heart. Make sure that you can still see parts of the Mina Heart. Adhere the blue sticker ruler 1/8” from the bottom of the small pink dotted paper.
Use Adhesive dots from Scrapbook Adhesives by 3L to adhere the banner to the top of the card front.
In the top left hand corner of the card front, use EZ Runner and 3D Foam Squares from Scrapbook Adhesives by 3L to adhere a two bunch of flowers, a pair of hearts, three single flowers and one butterfly. Use 3D Foam Squares from Scrapbook Adhesives by 3L to adhere the three bunch of hearts overtop of the heart on the “and the adventure begins” card. Adhere the “welcome home” and “little one” words to the right of the flowers.
In the bottom right-hand corner of the card front, use EZ Runner and 3D Foam Squares from Scrapbook Adhesives by 3L to adhere the large flower bunch, a pair of hearts, the plaid heart, the rest of the flowers, the leaf and two butterflies.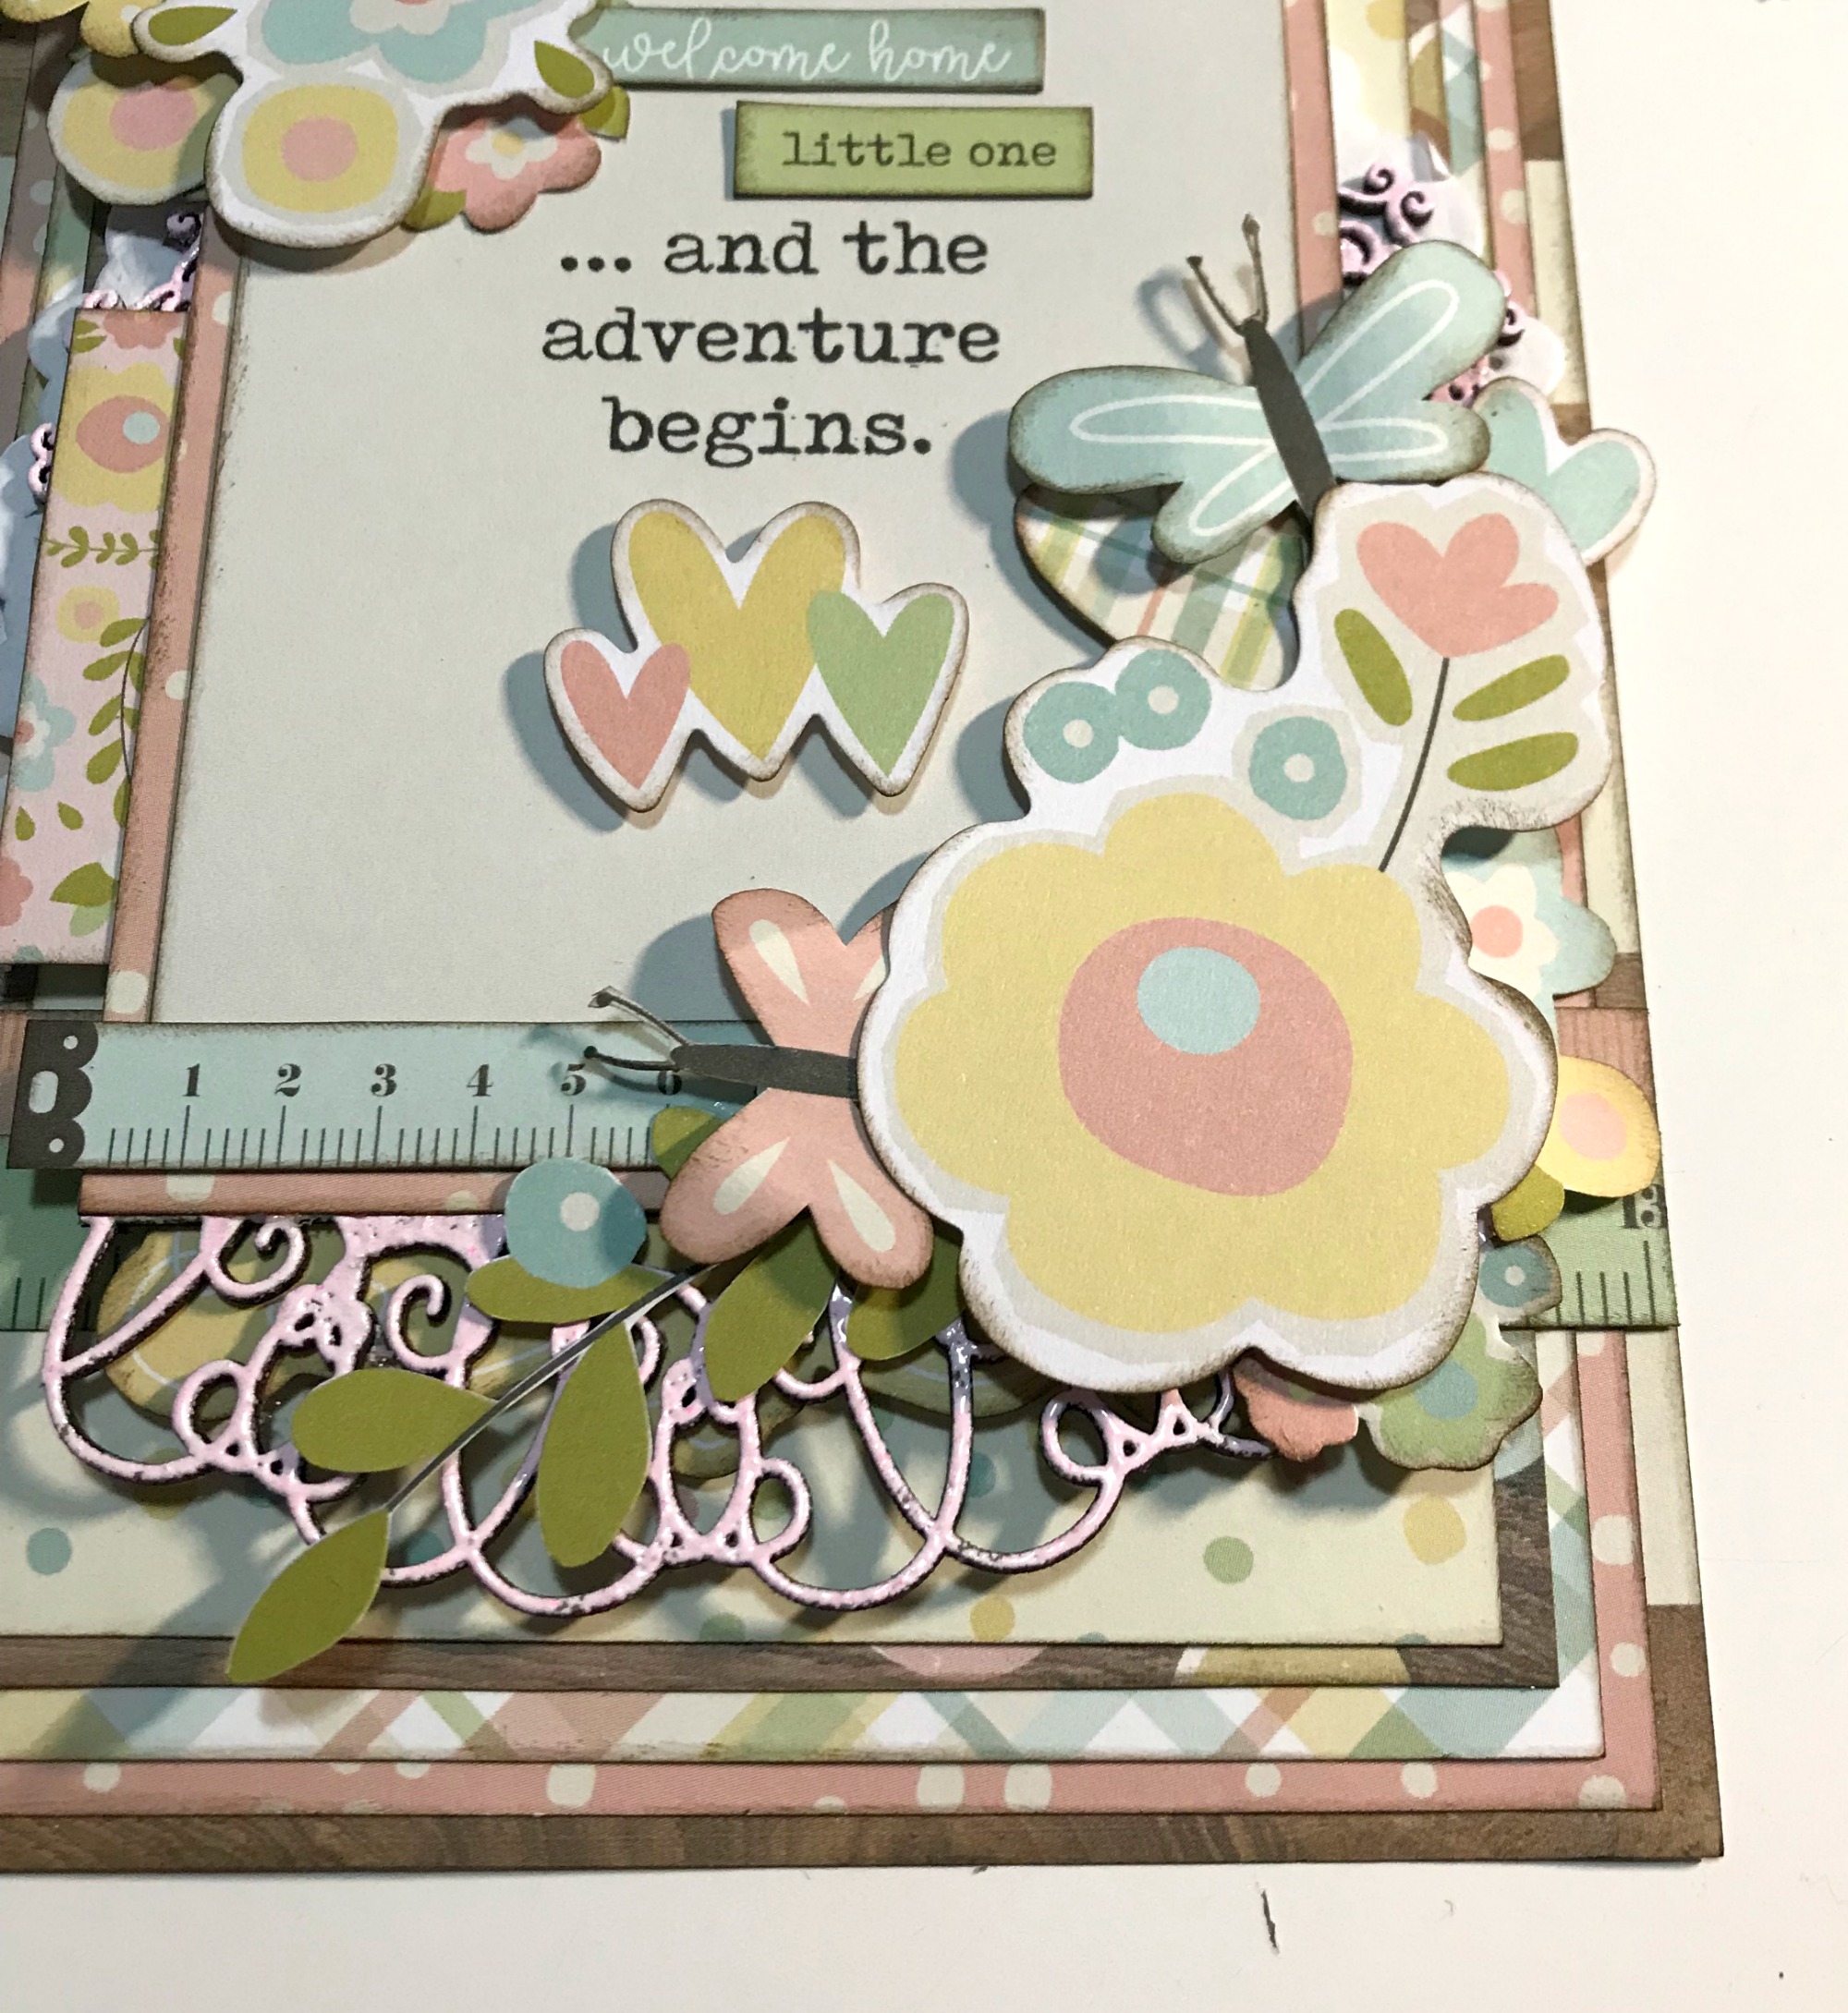
Cut a cardbase out of Superstock cardstock from Creative Scrapbooker Magazine, that measures 7” x 10”, score at 10”. Use EZ Runner from Scrapbook Adhesives by 3L to adhere the card front to the cardbase. Thanks for taking the time to check out my blog post. I hope that my Welcome Home Little One Card has inspired you to make your own at home.
Supplies Used:
– Creative Scrapbooker Magazine: Super Stock Cardstock
– Emerald Creek Craft Supplies: Pastel Pink Embossing Powder
– Ranger Ink: Distress Ink – Ground Espresso, Blending Tool with Foam and Emboss It Ink
– Scrapbook Adhesives by 3L: Adhesive Dots – Ultra Thin, Adhesive Dots – Micro, 3D Foam Squares and EZ Runner
– Simple Stories: Oh Baby! – So Sweet, Precious, Adorable, 3×4 Elements, 4×6 Vertical Elements, 4×6 Sticker Sheets and Bits & Pieces
– Southern Ridge Trading Company: Queen Anne’s Drop and Mina Heart
– Misc: Doilies
You can find more of my work on my blog at http://www.katelyngrosart.blogspot.ca
Happy Creating!

SUBSCRIBE TODAY to Creative Scrapbooker Magazine


4 Comments
AWESOME card!!!! LOVE the color’s.
So much gorgeous layering on this lovely card.
Beautiful card! Such fun embellishing! So different to see a baby card not in the traditional colors!
I am just in love with this card. I don’t have all the ingredients that you have to work with but I think I have enough and using some other creations, and some die cuts that I have I think I can put together a cute card for my soon to be born grandson. You ladies that put up these cards and scrapbook pages are so inspiring I just love being able to look at what you come up with…love getting the emails. Thanks so much…not sure if I can post what I make, but just know that I appreciate the inspiration…mine is a grandson so already will be working in shades of blue…