


Hey Creative Scrapbooker Fans! For today’s blog post, I’m sharing with you my Be Mine Treat Bag perfect for putting treats in for Valentine’s Day. To create my treat bag, I’ve used a variety of products from Ranger Ink, 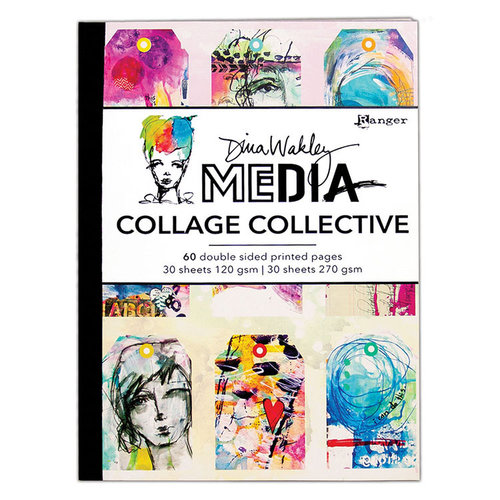 Dies from Elizabeth Craft Designs,
  Stamps from Wild Whisper Designs,
  Super Stock Cardstock from Creative Scrapbooker Magazine,
  and adhesive from Scrapbook Adhesives by 3L.
  You’ll want to grab a cup of your favourite beverage and learn how to recreate my treat bag at home.
  To start, you’ll need a treat bag. Ink the edges of the treat bags using Walnut Stain Distress Ink and a Blending Tool with Foam from Ranger Ink.
  Choose two papers out of Dina Wakley’s Collage Collective Book from Ranger Ink. Die cut a 3” Stitched Rounded Rectangle from Elizabeth Craft Designs out of one of the papers. Die cut a 2 ½” Stitched Rounded Rectangle from Elizabeth Craft Designs out of the other paper. Distress the edges of the rectangles. Ink the edges of the rectangles using Walnut Stain Distress Ink and a Blending Tool with Foam from Ranger Ink.
  Die cut the large tag found in the Planner Essentials – 2 Die from Elizabeth Craft Designs out of a piece of Super Stock Cardstock from Creative Scrapbooker Magazine. Choose one of the stamps out of Dina Wakley’s Textures stamp from Ranger Ink. Apply Candied Apple Distress Oxide Ink from Ranger Ink to the stamp and stamp onto the tag. Reapply ink to the stamp as needed and continue to stamp the tag. Distress the edges of the tag. Ink the edges of the tag using Walnut Stain Distress Ink and a blending tool with foam from Ranger Ink.
  Next, you’ll need a doily.
  Out of Dina Wakley’s Gals & Borders Stamp from Ranger Ink, you’ll need the heart border. Apply Jet Black Archival Ink from Ranger Ink to the heart border stamp and stamp onto a piece of Cotton Watercolor Paper from Ranger Ink. Colour the heart border using Scribble Sticks 2 from Ranger Ink and a waterbrush. Fussy cut the heart border out. Ink the edges of the heart border using Walnut Stain Distress Ink and a blending tool with foam from Ranger Ink.
  Out of Dina Wakley’s Collaged Hearts Stamp from Ranger Ink, you’ll need two of the hearts. Apply Jet Black Archival Ink from Ranger Ink to the heart stamps and stamp onto a piece of Cotton Watercolor Paper from Ranger Ink. Colour the hearts in using Scribble Sticks 1 & 2 from Ranger Ink and a waterbrush. Fussy cut the hearts out. Ink the edges of the hearts using Walnut Stain Distress Ink and a blending tool with foam from Ranger Ink.
  Using the Capital Letters Stamp Set from Wild Whisper Designs, you’ll need to get the letters that spell out Be Mine. Apply Worn Lipstick Distress Oxide Ink from Ranger Ink to the letters and stamp onto a piece of Cotton Watercolor Paper from Ranger Ink. Cut the Be and Mine out. Ink the edges of the two words using Walnut Stain Distress Ink and a blending tool with foam from Ranger Ink.
  Use E-Z Runner Adhesive from Scrapbook Adhesives by 3L to adhere the 3” stitched rounded rectangle ½” from the left and ½” from the bottom of the bag. Adhere the heart border 2 5/8” from the right and ¼” from the bottom of the bag.
  Use 3D Foam Squares from Scrapbook Adhesives by 3L to adhere the tag 3/8” from the left and 1” from the bottom of the bag. Use EZ Runner Adhesive from Scrapbook Adhesives by 3L to adhere the doily to the tag as desired. To finish the tag, tie a piece of twine through the hole at the top of the tag.
  Use E-Z Runner Adhesive from Scrapbook Adhesives by 3L to adhere the 2 ½” stitched rounded rectangle 5/8” from the left and 5/8” from the bottom of the bag. Use 3D Foam Squares and E-Z Runner Adhesive from Scrapbook Adhesives by 3L to adhere the two hearts as desired on the 2 ½” rectangle and the tag.
  Use E-Z Runner Adhesive and 3D Foam Squares from Scrapbook Adhesives by 3L to adhere the Be Mine Words on the right-hand side of the treat back as desired.
  Here are a few close-up photos of my treat bag.
  Thank you for joining me today and taking the time to check out my blog post. I hope that my Be Mine Treat Bag has inspired you to recreate your own at home.
You can find more of my work on my blog at http://www.katelyngrosart.blogspot.ca
Happy Creating!

Supplies Used:
Ranger Ink: Distress Ink – Walnut Stain, Distress Oxide Ink – Candied Apple & Worn Lipstick, Scribble Sticks 1 & 2, Cotton Watercolor Paper, Textures, Gals & Borders, Collaged Hearts, Collage Collective Book, Jet Black Archival and Blending Tool with Foam
Elizabeth Craft Designs: Stitched Rounded Rectangle and Planner Essentials – 2
Wild Whisper Designs: Capital Letters Stamp Set
Creative Scrapbooker Magazine: Super Stock Cardstock
Scrapbook Adhesives by 3L: 3D Foam Squares and E-Z Runner Permanent Tape
Misc: Treat Bag, Doily, and Twine


