


Create your own embellishments and patterned paper Cathie Allan style!

SUPPLIES: Creative Scrapbooker Super Stock, Impression Obsession stamps and dies, Paper Artsy stamps, VersaColor ink, Tombow Markers, Ranger Clear Embossing Pad, Tsukineko Fantastix blending tool, recycled heavy plastic pieces, disposable eyeliner applicator, Tonic Studios Nuvo Crystal drops, Ecstasy Crafts Peragamo vellum, Scrapbook Adhesives by 3L 3D Foam Adhesive, Sookwang Double-Sided Tape.
INSTRUCTIONS
1. Stamp the Impression Obsession background stamp using VersaFine black ink on a piece of Creative Scrapbooker Super Stock. This panel will be cut into design elements when assembling the layout at the end. Set panel aside.  2.Apply Split Pea VersaColor ink on a piece of recycled plastic. Mist with water.
 3. Place a second piece of recycled plastic on top and move the ink around with your finger.
 4. Pull the two pieces apart. We have just created TWO stamps.
 5. Gently stamp the green-coloured plastic on a piece of Super Stock. Clean the plastic pieces.
 6. Repeat Steps 2 to 5 using Orange, Opera Pink, and Cyan VersaColor ink.
 7. Use a ruler and marker to create a frame, and edge the piece of Super Stock. Set aside.
 8. Using an Impression Obsession die, die cut a variety of foliage from Super Stock. Set aside.
 9. On a piece of Super Stock, use a blending brush to create a rainbow strip of colours—starting with Cyan, then Opera Pink, then Orange, and ending with Split Pea VersaColor ink. Take time to gently blend the colours where they meet.
 10. On the rainbow panel, stamp the large flower stamp, using Opera Pink Versacolor over the pink stripe. Repeat with Split Pea over the green section and Cyan over the blue section. Set aside.
 11. Stamp the large flower stamp, using black VersaFine ink on a piece of Super Stock. Use your finger to liberally cover the entire flower with clear, slow-drying, embossing ink. This allows for beautiful ink blending.
 12. Dip the end of a disposable eyeliner applicator into the Opera Pink VersaColor ink. Trace around the outside of the petals.
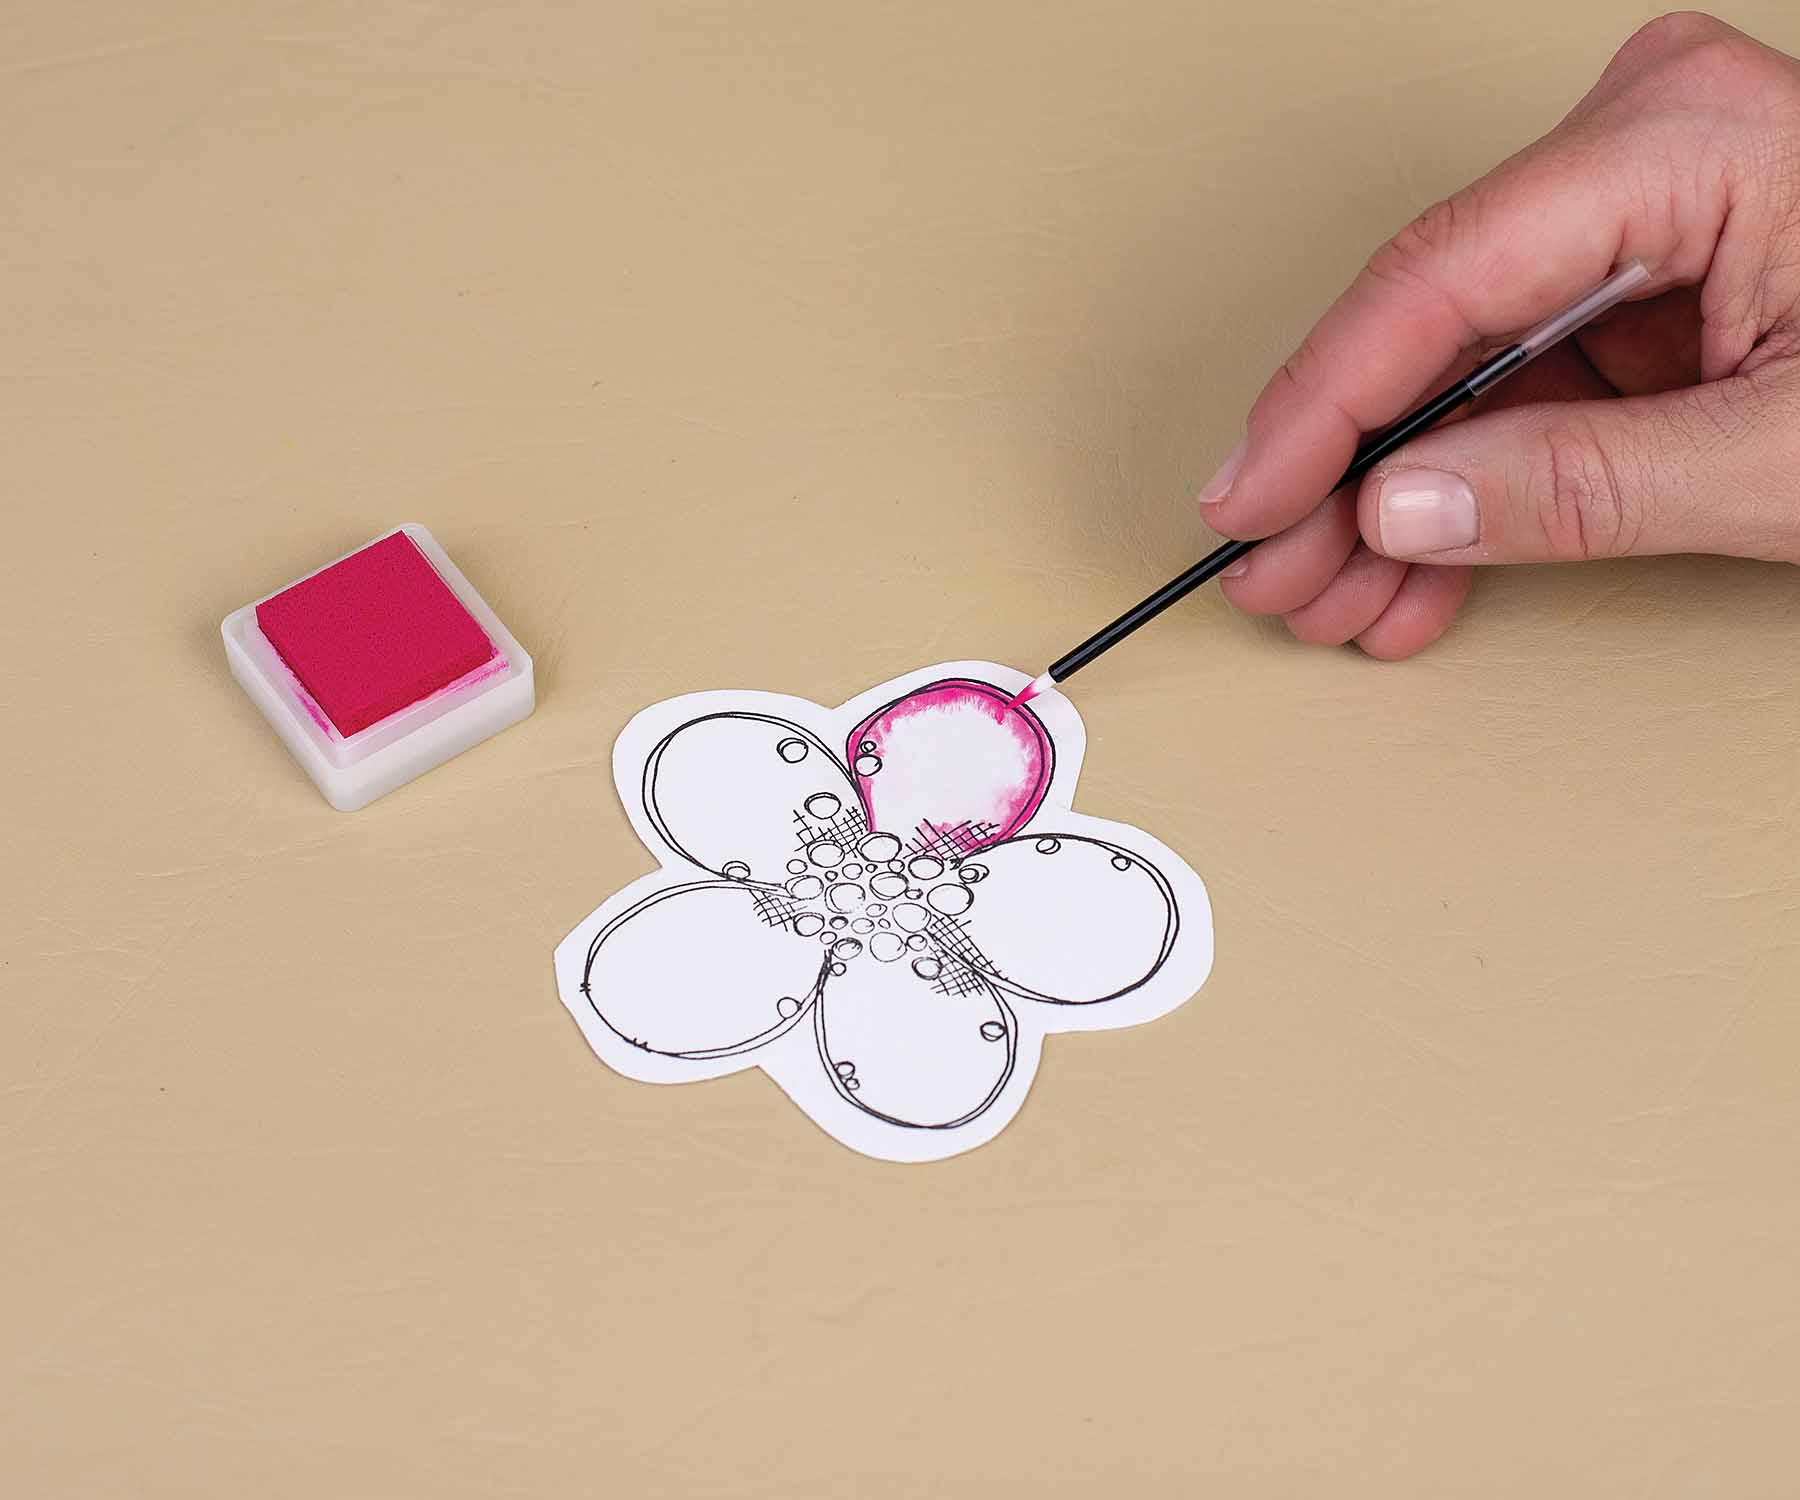 13. Blend the ink inside the petals, using a Fantastix blending tool. Dip in the pink and clear embossing pad as needed. Colour all the petals.
 14. Colour the dots with a marker. Fussy cut the flower. Repeat this process to create as many flowers as you like in as many variations of the colours that you like. Set aside.
 15. Repeat this colouring process with a large decorative flower stamp. After colouring, fussy cut the element. Set aside.
 16. Now the fun! Add photos to your background. Adhere the elements set aside in each step. Use 3D adhesive wherever you like.
  17. Add many layers. Decorate with Tonic Studios Nuvo Drops. Create the perfect title just for you.
 Cathie Allan is a regular writer and designer for Creative Scrapbooker Magazine. Cathie’s designs and step-by-step tutorials are featured in EACH issue of Creative Scrapbooker Magazine.
Don’t Miss a Single Issue – SUBSCRIBE TODAY!


2 Comments
Pingback: Add Bright Colors to a Layout with Ink Pads – Scrap Booking
Pingback: Add Bright Colors to a Layout with Ink Pads – Scrap Booking – While Windows Shopping