


Create a Stunning Butterfly Card with Therm O Web Deco Foil
Get ready to add some shimmer and shine to your card-making projects! In this tutorial, we’ll show you how to create a gorgeous butterfly card using Therm O Web foil products. This project, crafted by the talented Karla Yungwirth, showcases the magic of Therm O Web Deco Foil Toner Card Fronts, iCraft Deco Foil Brutus Monroe Magical Monarch die set, stamp set, and coordinating stencil. Follow along and bring a touch of elegance to your card designs.
 Materials Used:
- Therm O Web Deco Foil Toner Card Fronts
- Therm O Web iCraft Deco Foil Brutus Monroe Magical Monarch die set, stamp set, and coordinating stencil
- Therm O Web iCraft Memory Tape Runner
- Therm O Web Gina K. Designs Fancy Foils
- Therm O Web iCraft Pixie Tape
- Therm O Web Deco Foil Craft & Carrier Sheets
- Prism Studio Stitched Scalloped Rectangle Die Set
- Prism Studio Cardstock
- Prism Studio ink Blending Brushes
- Prism Studio Bone Folder
- Therm O Web iCraft Ultra Bond Liquid Adhesive
- Therm O Web iCraft 3D Foam Tape
- The Robin’s Nest Creative Dew Drops
- OLFA Scissors
- Ranger Tim Holtz Distress Oxide Ink
- Ranger Tim Holtz Distress Ink
- Ranger Emboss It Clear Ink
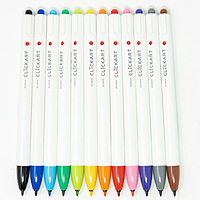
- Zebra ClickArt Retractable Markers
- Altenew Stampwheel
- Strathmore Bristol Smooth Paper
- WOW! Embossing Glitter Powder
- Laminator
Step-by-Step Guide to Making a Therm O Web Deco Foil Card
- Prepare Your Card Base: Start by cutting a piece of Prism Studio Cardstock to your desired card size. Use the Prism Studio Stitched Scalloped Rectangle Die Set to create a decorative border for your card front.

- Apply Deco Foil: Select your Therm O Web Deco Foil Toner Card Front and apply Therm O Web Gina K. Designs Fancy Foils using a laminator. This will give your card a beautiful, foiled background.

- Create the Butterflies: Use the Therm O Web iCraft Deco Foil Brutus Monroe Magical Monarch die set, stamp set, and coordinating stencil to create stunning butterflies. Blend colors using Prism Studio ink Blending Brushes and add shimmer with WOW! Embossing Glitter Powder.

- Assemble the Card: Adhere the foiled card front to your card base using Therm O Web iCraft Memory Tape Runner. Arrange and attach the butterflies and additional embellishments, such as The Robin’s Nest Creative Dew Drops, with Therm O Web iCraft Ultra Bond Liquid Adhesive and 3D Foam Tape for added dimension.

- Finishing Touches: Add final details using Zebra ClickArt Retractable Markers and Ranger Tim Holtz Distress Oxide Ink. Enhance the design with embossed elements using Ranger Emboss It Clear Ink.
Watch the Full Tutorial
For a detailed walkthrough, watch the video tutorial by Karla Yungwirth. She demonstrates each step, from start to finish, so you can follow along and create your own beautiful butterfly card.
This project combines the elegance of butterflies with the shimmer of Deco Foil, resulting in a card that’s perfect for any occasion. Happy crafting!

WIN WIN WIN a $500 Gift Card from Ranger just by sharing your project featuring Tim Holtz Distress Products! YAHOOO!
CLICK HERE for mor information and to enter TODAY! 

