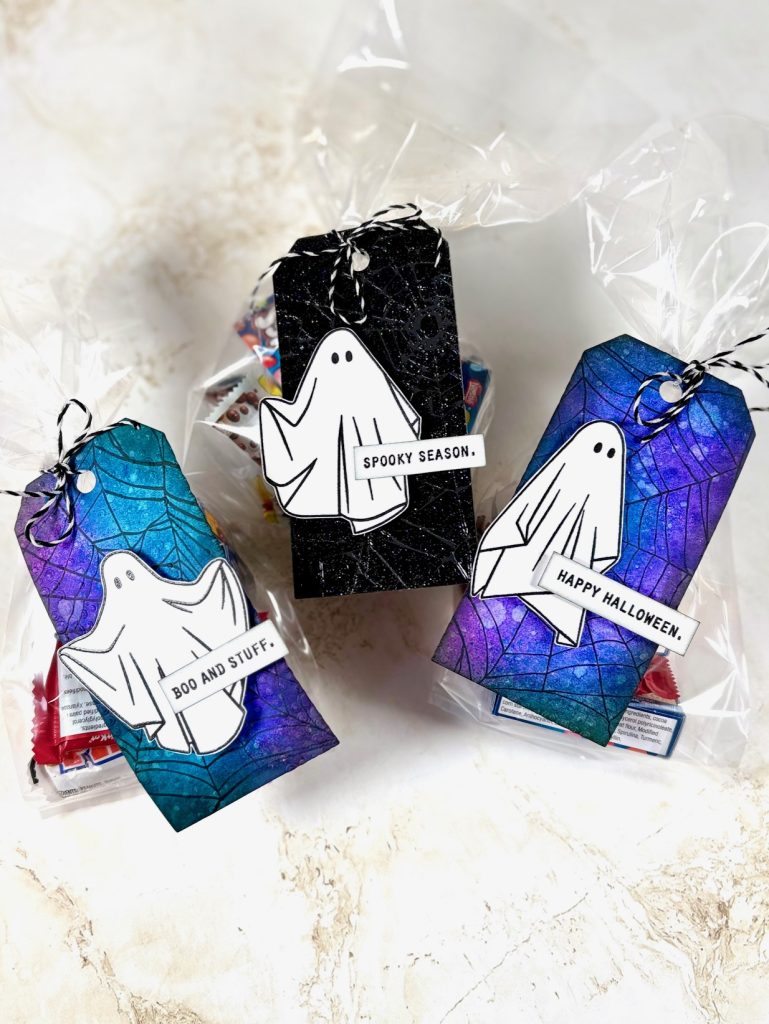
Spooky Treat Tags are the perfect Halloween project to show off your creativity and favorite products from Stampers Anonymous and Ranger! For today’s blog I will share the step-by-step photos and easy instructions to help you craft these eerie and fun tags — ideal for dressing up your Halloween treat bags. I started out by pulling out two favourite Halloween stamp sets by Tim Holtz for Stampers Anonymous — Boo Crazy CMS495 and Spooky Spirits CMS492 — and let them inspire these playful ghostly creations. How to Create the Spooky Treat Tags Stamp the BackgroundStamp the cobweb image from Boo Crazy CMS495 onto Ranger Mixed Media cardstock using Ranger Black Soot Archival Ink. Die Cut Tag, Stamp and EmbossUse the Sizzix Tag Collection die set to create the tag shape. Stamp a variety of ghost images and sentiments from Spooky Spirits CMS492. Heat set with Ranger Clear Embossing Powder. Cut…
A chapter has ended — and what a beautiful story it has been. On October 15, 2025, we announced that Creative Scrapbooker Magazine will be publishing its final issue, the Winter 2025 edition. This decision comes with full hearts, deep gratitude, and an overwhelming sense of pride for the 20 years of creativity we’ve shared together. From a spark of an idea around a campfire to a beloved quarterly magazine that inspired readers across Canada, the United States, and beyond — this has been a journey built on passion, community, and the joy of handmade art. Reflecting on Two Decades of Creativity Over the past 20 years, Creative Scrapbooker Magazine has filled homes, classrooms, and craft rooms with ideas, laughter, and inspiration. Together, we’ve celebrated thousands of scrapbook layouts, cards, and mixed media projects. We’ve shared techniques from some of the most talented artists in the paper crafting world and…
If you love creative backgrounds, this Masking Fall Leaves technique by Nicole Wright is for you! Featured in the Fall 2024 issue of Creative Scrapbooker Magazine, this project shows you how to create a layered autumn background using Ranger Distress Spray Stains. The results are vibrant, textured, and full of fall magic. Grab your copy today for more inspiring ideas just like this! Step 1: Die Cut and Mask Die cut several assorted leaves from watercolour paper and cut a mask to match your image size.Place a few leaves on a Super Stock 12” x 12” paper, layer the mask on the leaves, and spray your lightest Ranger Distress Spray Stain. Step 2: Add Depth with a Darker Shade Remove both the mask and leaves. Shift the leaves to a new position and repeat the first step, this time using a slightly darker Ranger Distress Spray Stain. Spray around the…
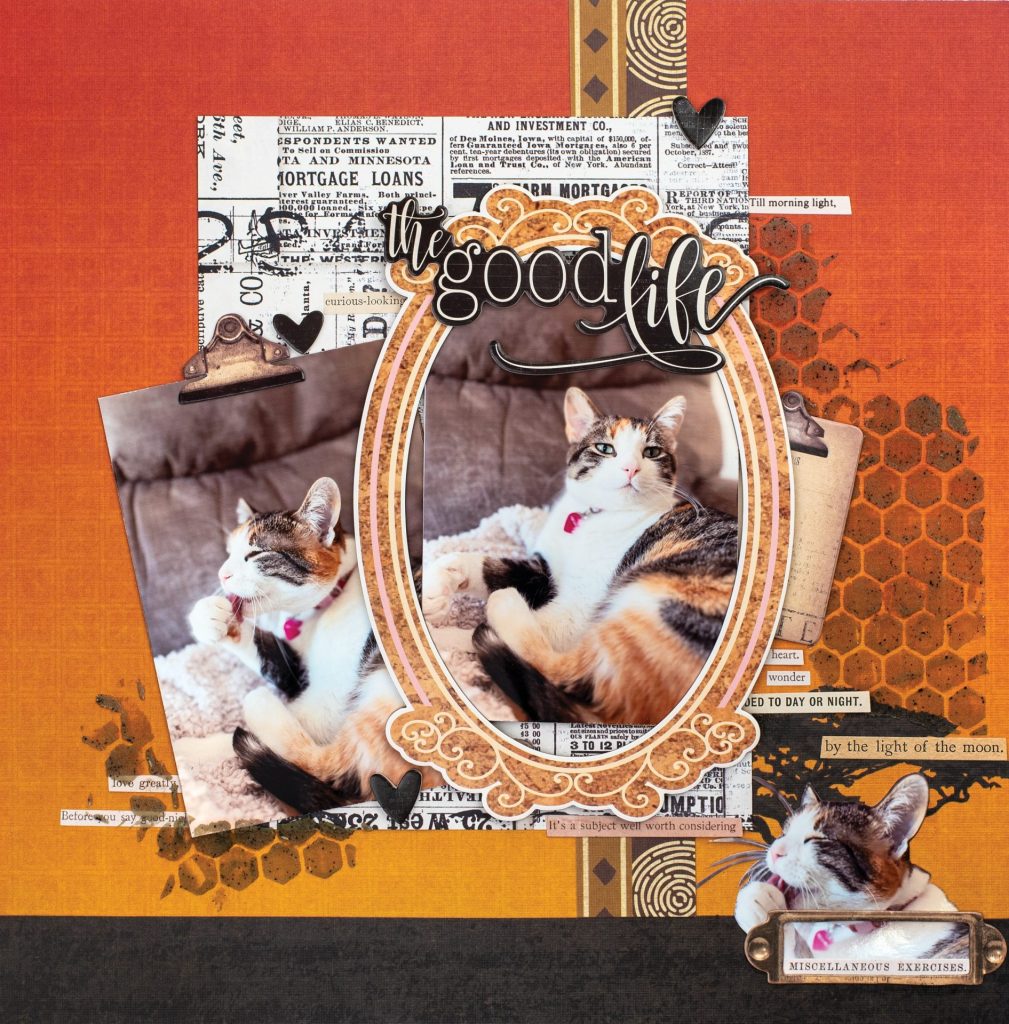
Welcome to The Good Life, where naps are an art form and texture steals the show! Designer Desiree Saskiw captured her pampered feline’s best “I run this house” poses in a warm, layered layout that’s equal parts cozy and cool. Desiree reached for her Ranger Distress Grit Paste – Crypt and the Stampers Anonymous Tim Holtz Honeycomb Stencil to create that perfectly imperfect background texture. The subtle raised hexagons add just enough grunge to balance out the soft, snuggly photos — proving that even the fluffiest cat deserves a little edge. The layout’s fiery oranges and vintage neutrals come together with Simple Stories and DCWV patterned papers, plus a sprinkle of Tim Holtz Idea-ology stickers and dimension from Scrapbook Adhesives by 3L. The result? A purr-fectly balanced mix of grit, warmth, and feline fabulousness. So grab your stencils, your pastes, and maybe your favorite nap buddy — because The Good…
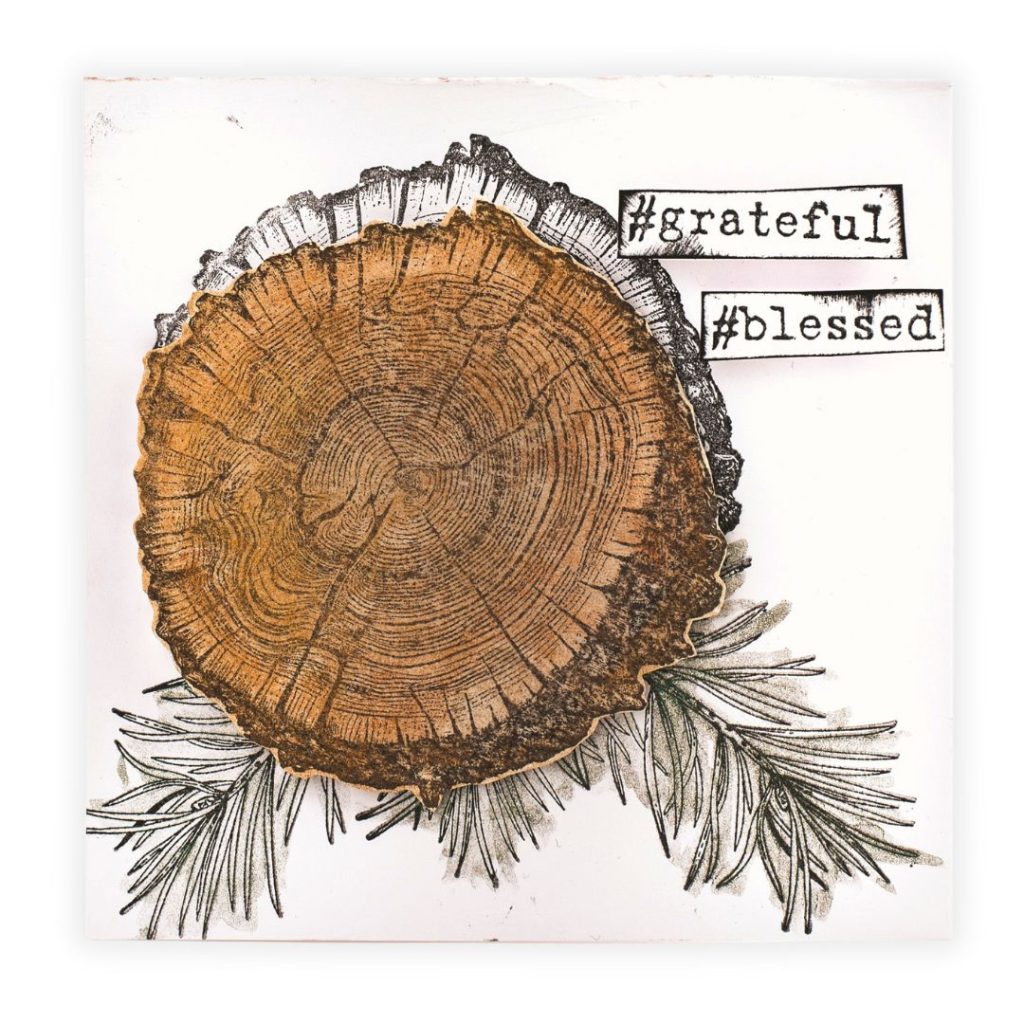
If you’re looking for a rustic yet elegant handmade card idea, this project by designer Nicole Wright is the perfect inspiration. Using the Stampers Anonymous Tim Holtz Forest Floor Set 2 stamp set, Nicole created a stunning wood slice focal point that combines stamping and watercolouring techniques. Follow the step-by-step instructions below to recreate this project at home. Supplies Used – Stampers Anonymous Tim Holtz Forest Floor Set 2 stamp set – Creative Scrapbooker Super Stock cardstock – Ranger Archival Ink (Jet Black) – Ranger Tim Holtz Distress Spritz (Fossilized Amber, Rusty Hinge) – Ranger Dina Wakely Media Brush – Scrapbook Adhesives by 3L 3D Foam Squares – OLFA Scissors Step-by-Step Instructions Step 1: Create Your Card Base Cut Creative Scrapbooker Super Stock cardstock to 10″ x 5″ and fold in half to create a 5″ x 5″ card base. Ink the wood slice stamp from the Stampers Anonymous Tim…
Are you looking for watercolor cardmaking inspiration? Karla Yungwirth shares a stunning handmade card using the Art Impressions Encouragement Collection in this step-by-step video tutorial. Featuring beautiful floral stamps, patterned paper, and Zebra Pen ClickArt markers, this project is perfect for cardmakers of all levels. What You’ll Learn in This Tutorial ✅ How to create effortless watercolor effects with Art Impressions Rubber Stamps✅ Blending techniques using Zebra Pen ClickArt markers✅ Layering patterned paper for added dimension✅ Must-have crafting tools from OLFA and Scrapbook Adhesives by 3L✅ Finishing touches with Ranger Ink & Tonic Studios Whether you’re new to cardmaking or an experienced crafter, this tutorial is packed with creative ideas to inspire your next project. Ready to try this beautiful technique? Get ready for the watercolor cardmaking inspiration video by Karla Yungwirth! Grab a coffee and get ready to have some FUN! https://www.youtube.com/watch?v=dNyfPflzlZE Let us know in the comments how…
Want to make your holiday cards extra special this year? Stamping on patterned paper is such a fun and simple way to create unique designs that wow your friends and family! In this latest Technique Tasters video, Karla Yungwirth from Creative Scrapbooker Magazine shares her step-by-step process for making gorgeous Christmas cards full of color, sparkle, and festive charm. Karla uses some of her favorite crafting tools and supplies from brands like Unity Stamp Co., Lindy’s Gang, Simple Stories, and more to create cards that are full of layers and personality. Whether you’re a seasoned cardmaker or just getting started, you’ll pick up lots of ideas to try in your own crafting. Here’s What You’ll Learn: How to stamp on patterned paper to create eye-catching backgrounds. Tips for layering stamps, inks, and embellishments for that perfect holiday look. Fun ways to use shimmer sprays, embossing powders, and adhesives to add…
Hey Creative Scrapbooker Fans! Today, I’m thrilled to share how I created this Merry Little Christmas Card. This project features a blend of products from Ranger Ink, Creative Scrapbooker Magazine’s Super Stock, Penny Black dies, and Scrapbook Adhesives by 3L. Follow along as I guide you through the steps to craft this festive card. Grab your favorite drink, and let’s dive in! Step 1: Create the Card Base and Window Cut a piece of Super Stock from Creative Scrapbooker Magazine to 4” x 5 ¼”. Place the Woodgrain Circle Die by Penny Black 3/8” from the top and ½” from the right of the cardstock. Run the piece through your die-cutting machine. Step 2: Prepare the Background Cut a se piece of Super Stock to 4 ¼” x 5 ½” for the card base. Die-cut the Tree Trio from Penny Black out of Super Stock. Blend Vintage Photo Distress Oxide…
Good Morning! Kim here, haven’t seen you for a bit! Last December I officially backed away from Design Team assignments, life was taking up too much time and creative deadlines were harder to meet! I promised Jackie & Katharina that I was still their biggest fan and would send along a blog post whenever time permitted…so here I am! I find myself using up a lot of mixed media stash that I have these days; and there is a lot! This fun card for my nephew is a perfect example. I will often sit a have a gel plate printing session with my Ranger inks, paints and gel plates, they continue to be my favourites. Once complete I store all my prints in a ziplock bag to use in my art journal, card making and scrapbooking projects. That being said I cannot tell you exactly my process for the background,…


