


Using watercolor pencils and a waterbrush is the absolute easiest way to color detailed stamped images. Adding shading and highlights using this technique has never been easier! I like to use a fine tip waterbrush pen and I dip it in water rather than filling it up with water. So really you could use a fine tip paintbrush instead! Here is the card I created. 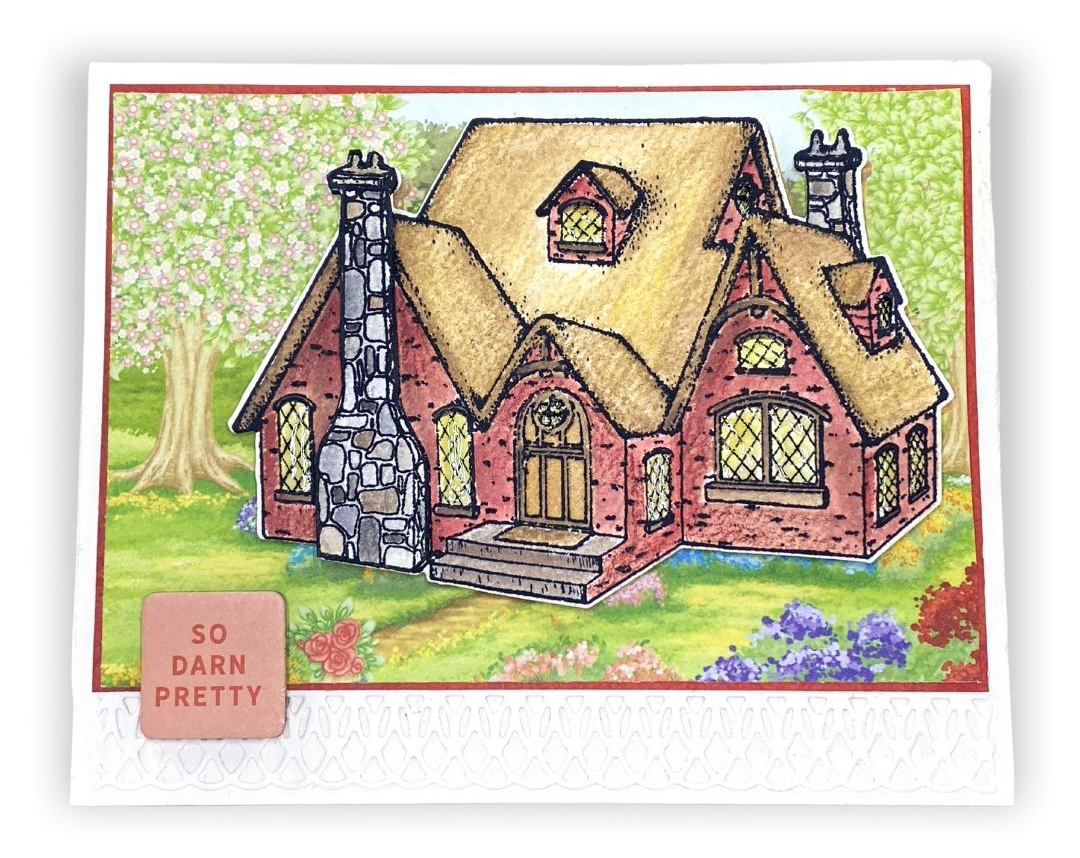 I am SERIOUSLY in love with this stamp set from Heartfelt Creations.
  Cottages are super trendy right now in the crafting world and this is one of my favourite designs.
To create this card…
Using the Heartfelt Creations Countryside Cottage stamp, stamp onto a piece of watercolor paper. I used Ranger Archival ink so that the ink doesn’t run when I add water. Stamp the image using a stamping platform. Do not remove the stamp from the platform as you will re-stamp the image once you have colored it in. Using Tonic Studios Nuvo watercolor pencils, gently color the cottage with a LIGHT shade of pencil. Do not push too hard.
  Spread the color around with a wet waterbrush. Add more highlights and colors in this manner or by wetting the waterbrush and THEN taking the color directly from the watercolor pencils. Keep going until you are happy with the results. Place the fully colored image back in your stamping platform and stamp once again using Ranger Archival ink. This makes the image POP! Remove the colored cottage from the platform. Place another piece of watercolor paper in your stamp platform and stamp the cottage image once again with Ranger Archival ink. This time only color the chimney section of the cottage stamp. Once colored over stamp again with Ranger Archival ink. Remove from the stamping platform. Using the coordinating Heartfelt Creations dies cut out both the cottage from the image you created first AND then cut out the chimney from the second image you created.
  Using Scrapbook Adhesives by 3L 3D foam squares adhere the chimney on top of the chimney you created in the first image. This gives a really cool 3D effect.
  Cut out a piece of patterned paper from the Heartfelt Creations Countryside Cottage collection. I chose one that has a cottage on it. I then adhered the stamped cottage right over top the cottage on the piece of patterned paper using Scrapbook Adhesives by 3L 3D Foam Squares.
  Next, I framed the entire piece with a second, red piece of patterned paper from the Heartfelt Creations Countryside Cottage collection. I created a much bigger card base from white cardstock. I adhered the cottage base to the upper part of the white card base using the Scrapbook Adhesives by 3L E-Z Saures tape runner.
  I then used a retired Heartfelt Creations border die, cut out a lacey border, and adhered it to the bottom of the white card base. I wanted the windows to glow so I added some Ranger Glossy Accents to them all.
  The sentiment is a self-adhesive chipboard title from Ali Edwards.
That is all there is to it!
Have a look at this Fastforward of me putting the card together.
Now if I could just visit a cottage like this – I would invite you all over for a cup of coffee! 🙂
Have a super-duper Tuesday everyone!
Cheers

Subscribe today to Creative Scrapbooker Magazine- CLICK HERE 

