


Hey Creative Scrapbooker Fans! For today’s blogpost, I’m sharing with you how to create this Skull Wall Hanging which uses a variety of stamps and stencils from Stampers Anonymous, Dies from Elizabeth Craft Designs, a variety of products from Ranger Ink, patterned paper from Wild Whisper Designs and adhesives from Scrapbook Adhesives by 3L. You’ll want to grab a cup of your favourite fall beverage and learn how to recreate my wall hanging at home. 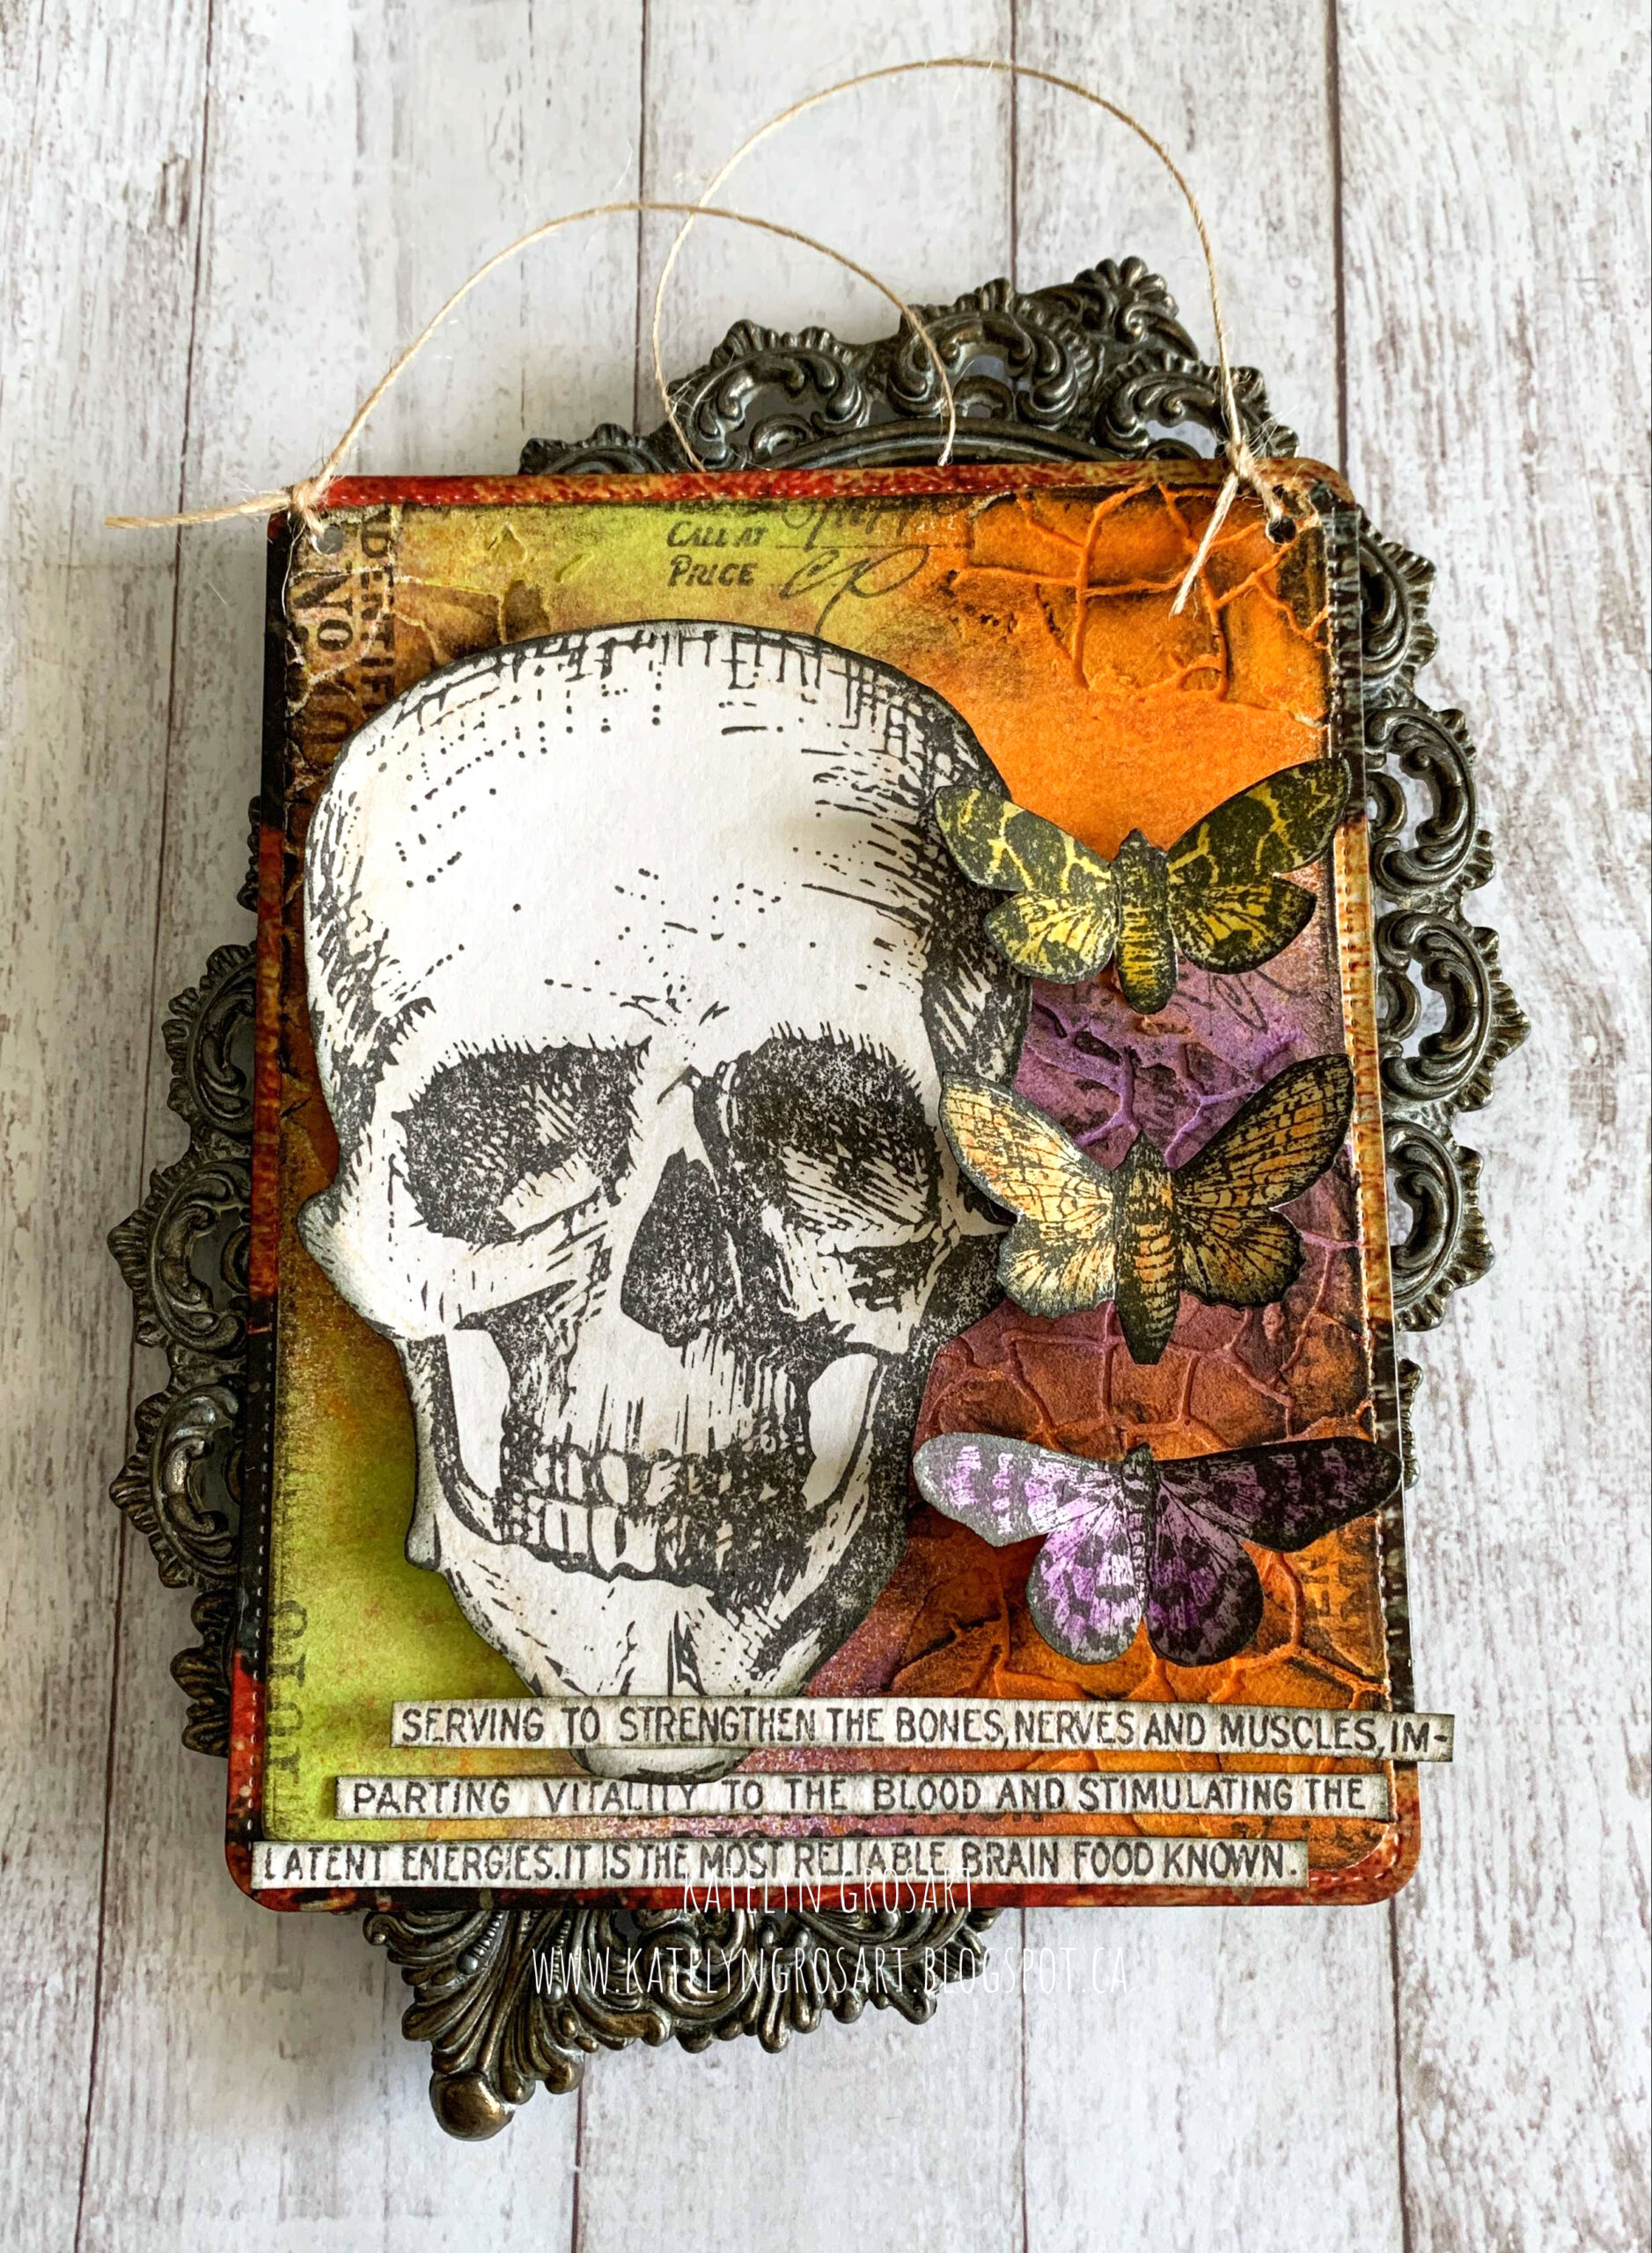 To start, you’ll need to die cut a 4 1/4” Fitted Rounded Rectangle from Elizabeth Craft Designs out of a piece of Distress Watercolour Cardstock from Ranger Ink.
  Place the Crackle Stencil from Stampers Anonymous in the top left side of the rectangle.
  Using a palette knife and Distress Texture Paste – Grave from Ranger Ink, put the texture paste through the stencil.
  Repeat this step for the top right and bottom right corners of the wall hanging. Allow time for the texture paste to dry.
  Once the texture paste has dried, spritz Twisted Citron, Carved Pumpkin and Wilted Violet Distress Spray Stain from Ranger Ink on the rectangle.
  After the spray has dried, you’ll need the Rest In Peace Stamp Set by Tim Holtz for Stampers Anonymous.
  Take the identification and one of the other stamps out. Apply Jet Black Archival Ink from Ranger Ink to the identification stamp and stamp randomly on the rectangle as desired.
  You’ll need to stamp a total of seven times. Reapply ink as needed. Apply Jet Black Archival Ink from Ranger Ink to the other stamp and stamp randomly on the rectangle as desired. You’ll need to stamp a total of three times. Reapply ink as needed.
  Using a Black Soot Distress Crayon from Ranger Ink, rub the crayon along the edges of the rectangle as well as in the cracks of the stencil as desired. Set the rectangle aside.
  Out of the Fall/Halloween Paper Pack by Pam Bray Designs from Wild Whisper Designs, you’ll need to choose one of the patterned papers.
  Die cut a 4 1/2” Stitched Rounded Rectangle from Elizabeth Craft Designs out of the patterned paper. Ink the edges of the paper using Black Soot Distress Ink and a blending tool with foam from Ranger Ink.
  Next, you’ll need the Rest In Peace Stamp Set from Stamper Anonymous. From the stamp set, you’ll need the skull and the serving to strengthen stamps. Apply Jet Black Archival Ink from Ranger Ink to both stamps and stamp onto a piece of Distress Watercolour Cardstock from Ranger Ink. Using a Antique Linen Distress Crayon from Ranger Ink and a waterbrush, colour the skull and put a bit of a wash over the serving to strengthen stamp.
 Fussy cut the skull out and cut the serving to strengthen image into three strips. Ink the edges of the skull and strips using Black Soot Distress Ink and a blending tool with foam from Ranger Ink.
  Now, you’ll need the Moth Study Stamp Set from Stamper Anonymous. From the stamp set, you’ll need to choose three of the butterfly stamps. Apply Jet Black Archival Ink from Ranger Ink to all three butterflies and stamp onto a piece of Distress Watercolour Cardstock from Ranger Ink. Using Wilted Violet, Spiced Marmalade and Fossilized Amber Distress Crayons from Ranger Ink and a waterbrush, colour each of the butterflies.
 Fussy cut the three butterflies out. Ink the edges of the butterflies using Black Soot Distress Ink and a blending tool with foam from Ranger Ink.
  Use E-Z Runner from Scrapbook Adhesives by 3L to adhere the 4 1/4” rectangle to the 4 1/2” rectangle.
  Use 3D Foam Squares from Scrapbook Adhesives by 3L to adhere the skull to the left-hand side of the 4 1/4” rectangle as desired.
  Use 3D Foam Squares from Scrapbook Adhesives by 3L to adhere the three butterflies to the right of the skull as desired. Once adhered, fold up the wings on the butterflies to give them some extra dimension.
  Use E-Z Runner and 3D Foam Squares from Scrapbook Adhesives by 3L to adhere the three word strips to the bottom portion of the wall hanging as desired.
  To finish the wall hanging, punch two holes at the top. Tie a piece of twine through the two holes to create the hanger for your wall hanging.
  Here are a few closeup photos of my wall hanging.
Thank you for joining me today and taking the time to check out my blog post. I hope that my Skull Wall Hanging has inspired you to recreate your own at home.
Happy Creating!

You can find more of my work on my blog at: http://www.katelyngrosart.blogspot.ca
Supplies Used:
- Stampers Anonymous: Moth Study, Rest In Peace and Crackle Stencil
- Elizabeth Craft Designs– : Stitched Indented Rectangle and Fitted Indented Rectangle
- Ranger Ink: Distress Ink – Black Soot, Distress Spray Stain – Twisted Citron, Carved Pumpkin & Wilted Violet, Distress Crayons – Antique Linen, Black Soot, Wilted Violet, Spiced Marmalade & Fossilized Amber, Blending Tool with Foam, Distress Texture Paste – Grave, Distress Watercolour Cardstock and Jet Black Archival Ink
- Scrapbook Adhesives by 3L: 3D Foam Squares and E-Z Runner
- Wild Whisper Designs: Fall/Halloween Paper Pack by Pam Bray Designs
- Misc: Twine


1 Comment
Yassssss love it! Awesome crackle stencil! Perfect colors. Love that stamp set! Gorgeous decor piece!