


Hey there! It’s Noreen from OrganizedandCreativeMom.com here with some ideas for using not-so-standard sized papers to create standard 12” x 12” layouts. Creative Memories has an incredible line of products known as The Happy Album – a petite album that can be used as a journal, a planner or anything in between. New Happy Album Kits by Creative Memories are released each month and include various papers, embellishments, and instructions to create super cute spreads on the 6.75” x 10” Happy Album pages. They are so much fun! But sometimes I love the contents of the kits so much that I want to use them on my regular 12” x 12” scrapbook pages too. So, I’ve come up with two standard double-page spreads that make the most of the papers and stickers in the latest Happy Album Kit – #19 – leaving no paper scraps left behind! 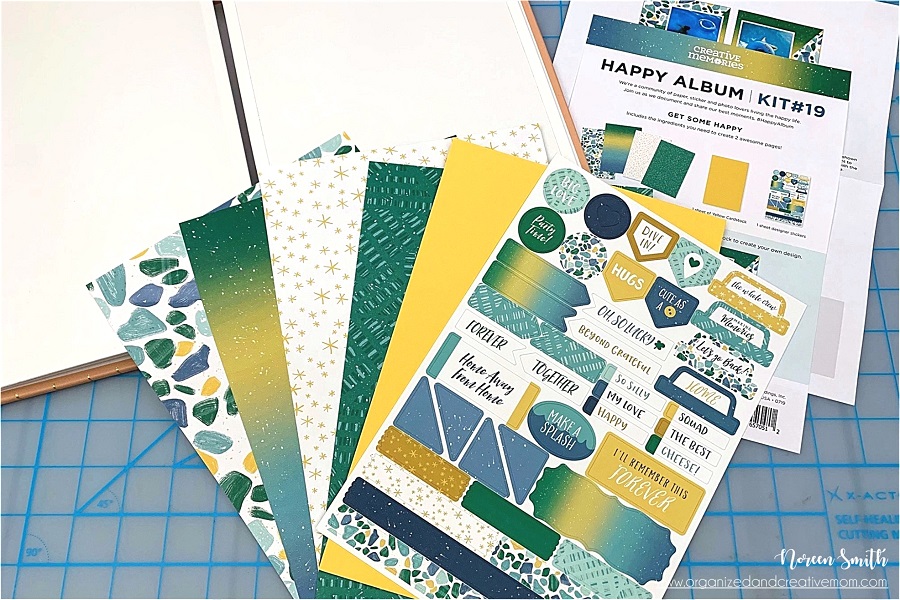 Since there are four 6.75” x 10” double-sided patterned papers and one 6.75” x 10” piece of solid cardstock in the kit, I designed my layouts to use two sheets on one and three on the other. I also used two pieces of 12’ x 12” Navy Cardstock for the base of each layout.
For the first layout, I cut one piece of the pebbles/stars paper following the cutting guide below. Then I cut one piece of the jade geometric paper in half to yield two 6.75” x 5” rectangles. 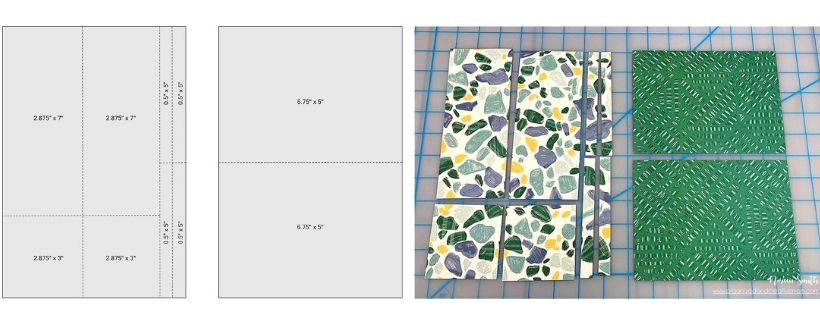 I flipped over the four narrow strips and the two small rectangles to reveal the star pattern on the opposite side of the pebbles paper and adhered all pieces to the layout base as shown below.
  Then I added photo spots cut from White Cardstock and decorated with the stickers included in the Happy Album Kit #19…the stickers I chose for this layout would be great for showcasing photos from a vacation or girls’ weekend! And while this layout can accommodate five standard 4” x 6”/6” x 4” photos and two small 2.5” x 2.75” photos, any of the photos could be replaced with a title or journaling card.
  I used the remaining two patterned papers and the solid mustard cardstock for the second layout. It was quick and easy to simply cut each paper in half either vertically or horizontally as shown below. (Tip: instead of measuring, an easy way to cut these or any papers in half is to gently fold corner to corner along one edge and cut at the fold line!)
 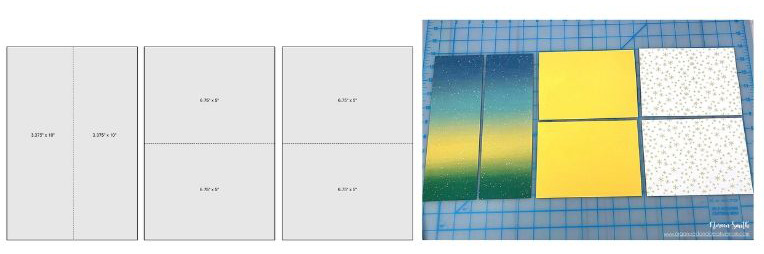 By just rearranging one of each of the strips and rectangles I was able to create two 10” x 10” blocks to adhere in the centre of each base page.
  I added spots for four standard 4” x 6”/6” x 4” photos and SIX 3” x 3” photos to this layout, but once again, any of the photos could be removed leaving space for a larger title or journaling. And, I still had more than enough stickers to decorate this layout with a “love” theme.
  I hope this inspires you to try the Happy Album Kits (or other non-standard papers!) on your 12” x 12” layouts! If you are looking for more inspiration this summer, I invite you to check out my online Summer Scrap Camp which continues through to August 30th. This is one Summer Camp you don’t want to miss…you can see all the details and register in the OCM Classroom.
All Creative Memories products featured in these projects are available in Canada on my CM website, and you can find CM advisors in the US and other countries by using the Advisor Lookup feature. Please drop by my blog, Facebook group, YouTube Channel or my Instagram feed for more ideas and inspiration – I create layout sketches, cards and other projects which showcase Creative Memories products & tools on a regular basis.
Happy Scrapping!

SUBSCRIBE TODAY to our quarterly publication – delivered right to your door


1 Comment
Great layouts! Thanks for sharing you cutting lines. Great way to get more use out of favorite paper that you only have a sheet or two of.