


Hi scrappy friends! Noreen Smith here to share a wonderful wintery layout with you today! Winter has definitely arrived where I live – we are in firmly the deep freeze, and we’ve already had over 10 inches of snow so far in November. But there’s no denying that a snowy day in Alberta – no matter how cold it is! – is beautiful, and I am lucky to live close to some of the most magical places to enjoy winter. I pulled out some photos of a winter getaway to the Chateau Lake Louise from a couple of years ago to use on this layout featuring the pretty Polar Lights collection from Creative Memories!  Here is my layout. I absolutely love this color combination of various shades of blue paired with turquoise, icy purple and a touch of neutral beige. It’s perfect to capture all the beautiful colors of winter in the Rockies!
This layout came together quickly with a few pieces of paper from the Polar Lights Designer Paper Pack, coordinating embellishments and the gorgeous flocked borders! Here’s the measurements and instructions:
- Use the turquoise snow paper for the base page. Cut a 3” x 12” strip from the multi-stripes paper with the 12” Trimmer and adhere it along the bottom edge of the base page with Tape Runner Adhesive.
- Flip the multi-stripes paper over and cut an 8.5” x 6.25” piece of the beige herringbone side. Mount one 4” x 6” photo and two 4” x 3” photos on it, leaving a .25” margin around and between photos. Place the photo block approximately 1.25” down from the top edge and in from the right-hand edge of the base page.
- Add the icicles flocked border to the top edge of the page, and the mountains flocked border above the striped paper strip. Adhere with Tape Runner Adhesive. Place the trees flocked border across the seam between the mountains border and the paper strip. Mount with Foam Squares Adhesive for added dimension and interest.
- Add snowflake die-cut embellishments to the left-hand side of the photo block, layering underneath and extending off the edge of the page. Snip off any extra and use on opposite side of photo block. Mount the title with Foam Squares.
- Use the Original Border Maker System with the Snowflake Circle Chain Border Maker Cartridge to punch a border from White Shimmer Cardstock. Set the punched border aside for another use and adhere the small punched-out snowflakes onto the layout for shimmery accents.
- Cut a beige grid journal card from the Polar Lights Variety Mat Pack in half and tuck under the trees border. Write journaling with the Icy Blue Micro-Tip pen and add a word-art sticker and punched-out snowflake to complete the cluster and finish the layout.
Here are some close-ups of the gorgeous, flocked borders and the shimmery punched snowflakes! 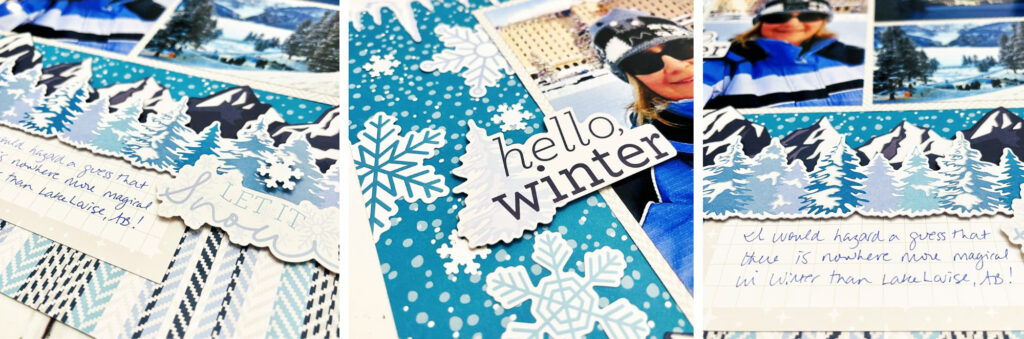 Do you love snow and winter like I do? If so, I hope you get a chance to work with the Polar Lights collection to document all the beauty of winter!

All supplies shown are available at www.creativememories.com, www.creativememories.ca, and www.creativememoriesau.com
SUBSCRIBE TODAY to Creative Scrapbooker Magazine


