


Hey Creative Scrapbooker Fans! For today’s blogpost, I’m sharing with you how I created these adorable Warm Winter Wishes Cards using the Echo Park Paper Co. Winterland Collection  I also used Super Stock from Creative Scrapbooker Magazine and adhesive from Scrapbook Adhesives by 3L. You’ll want to grab a cup of your favourite beverage and learn all about my cards at home.
 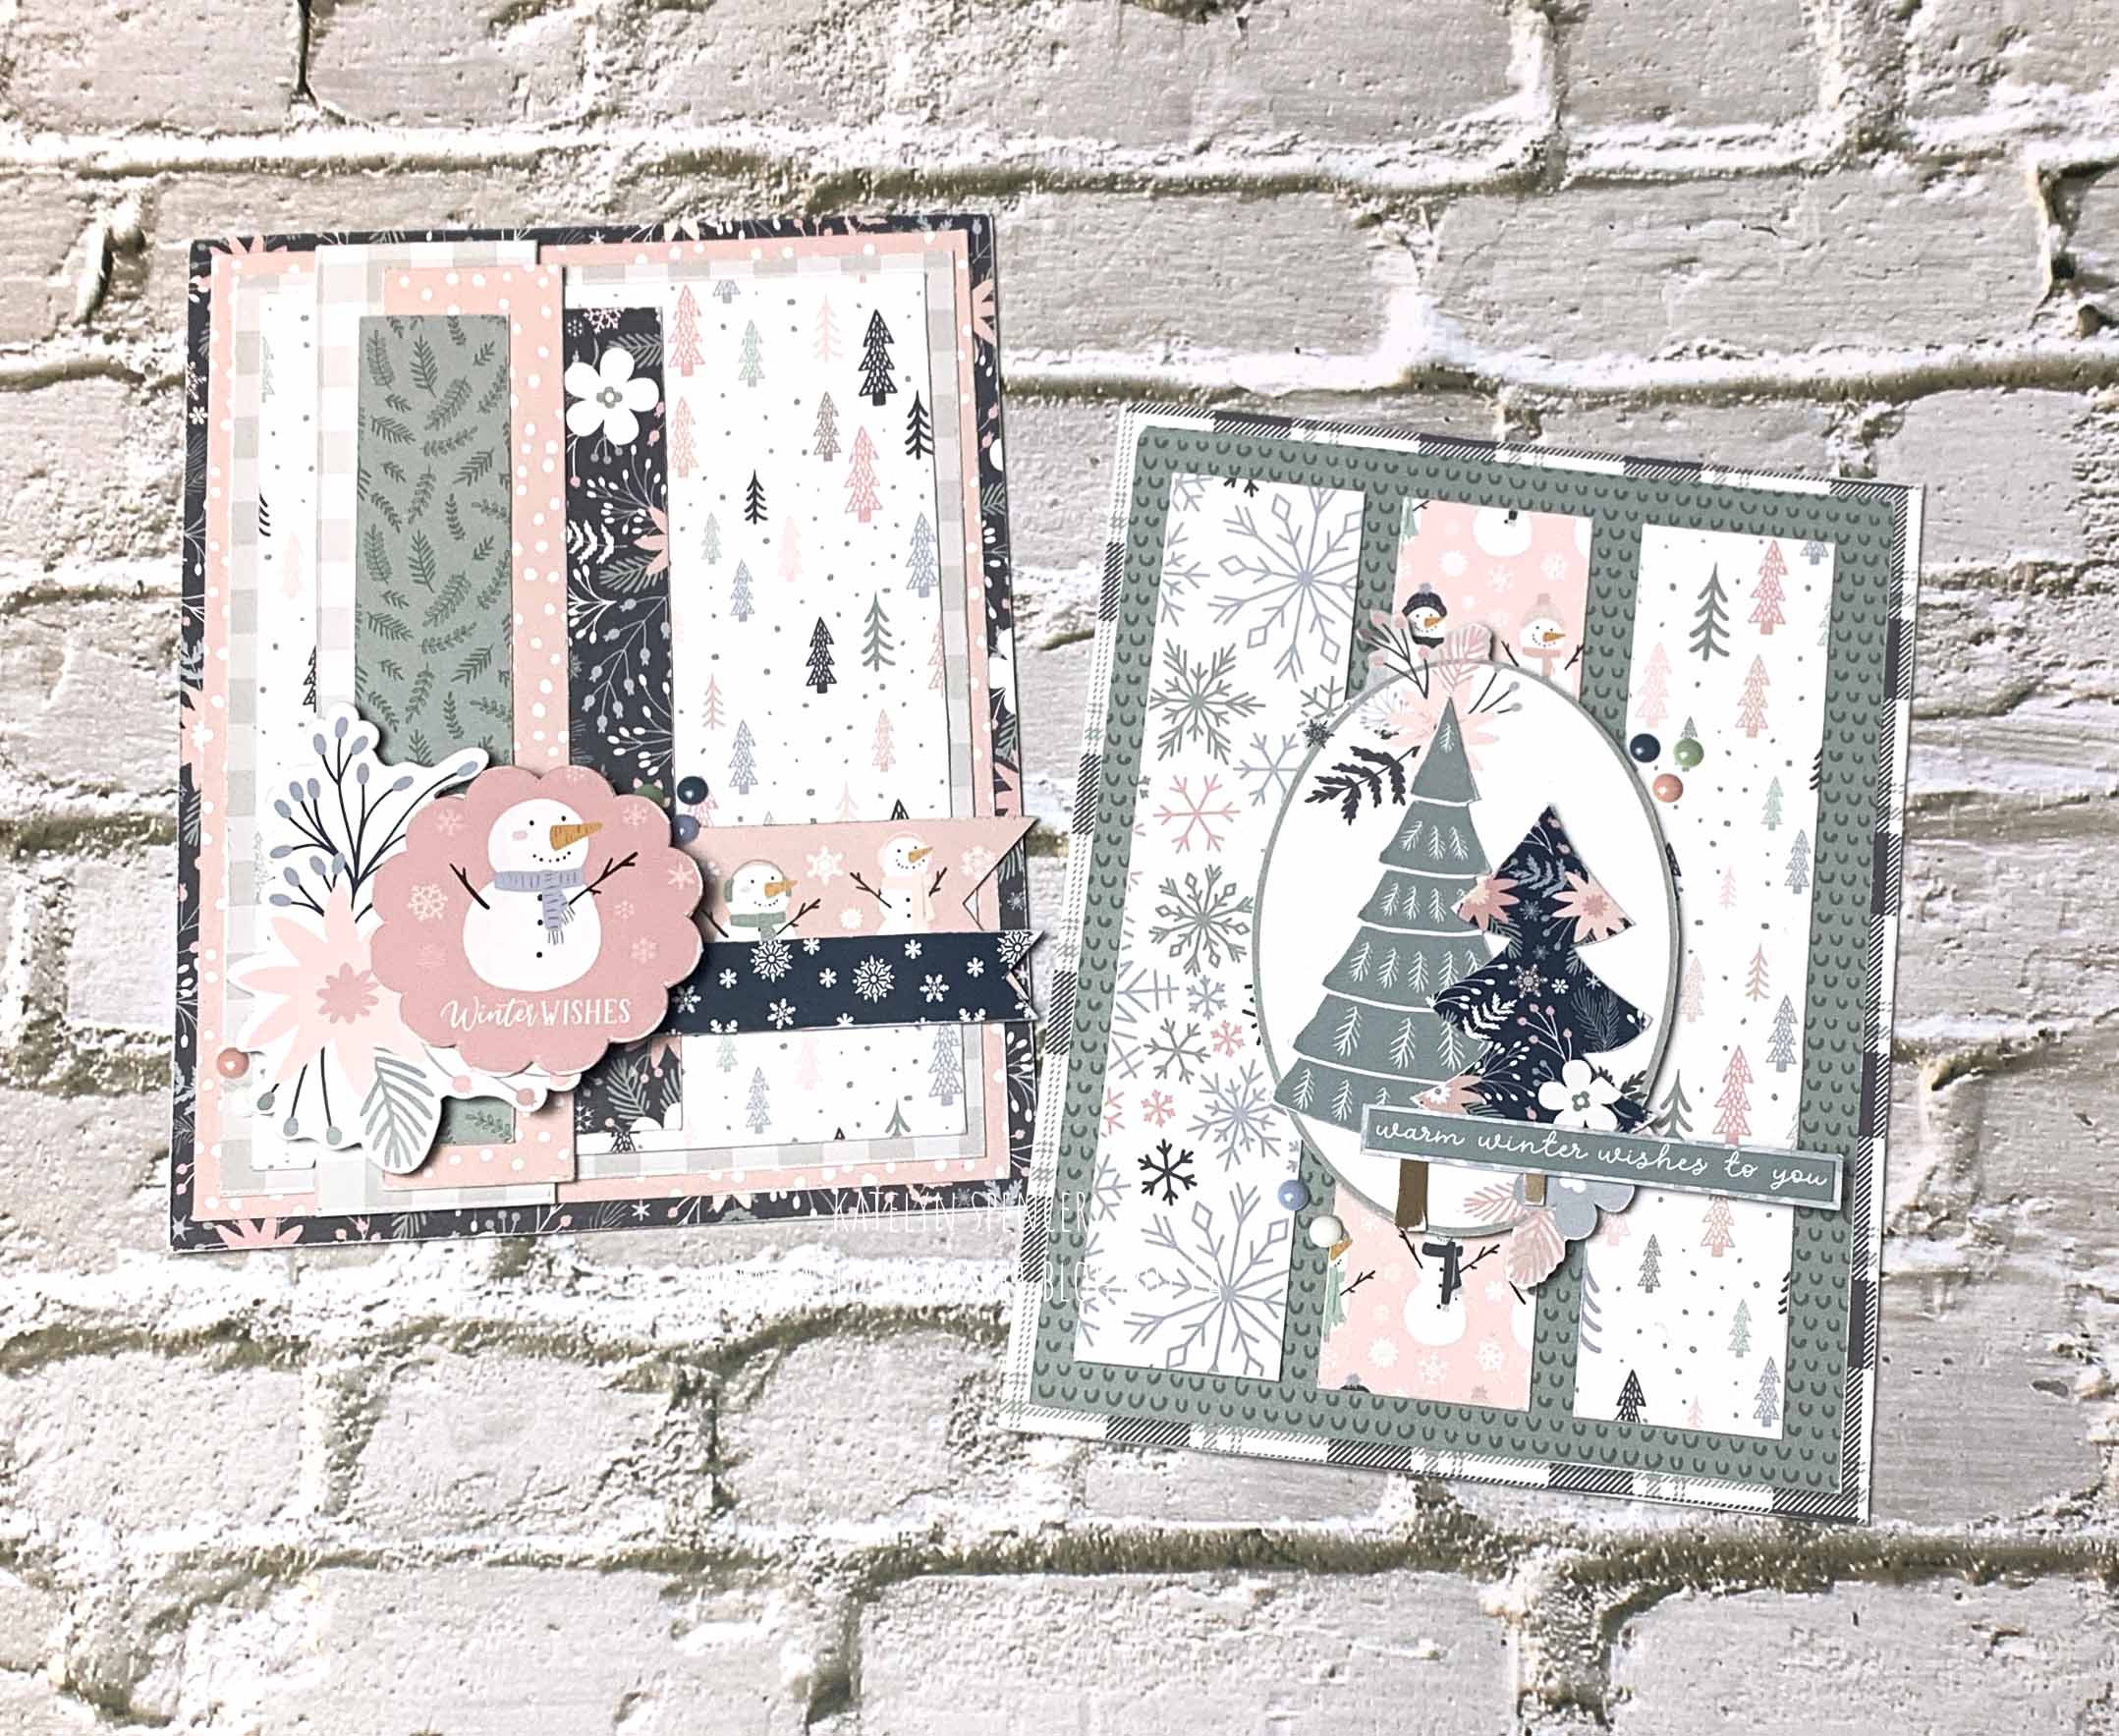 To start, we’ll create the Winter Wishes Card.
  The first five steps use the Winterland 6×6 Paper Pack from Echo Park Paper.
You’ll need the dark floral paper. Cut one piece that measures 4 ¼” x 5 ½” and cut a second piece that measures 1” x 4 ½”. Sand the edges of both papers. 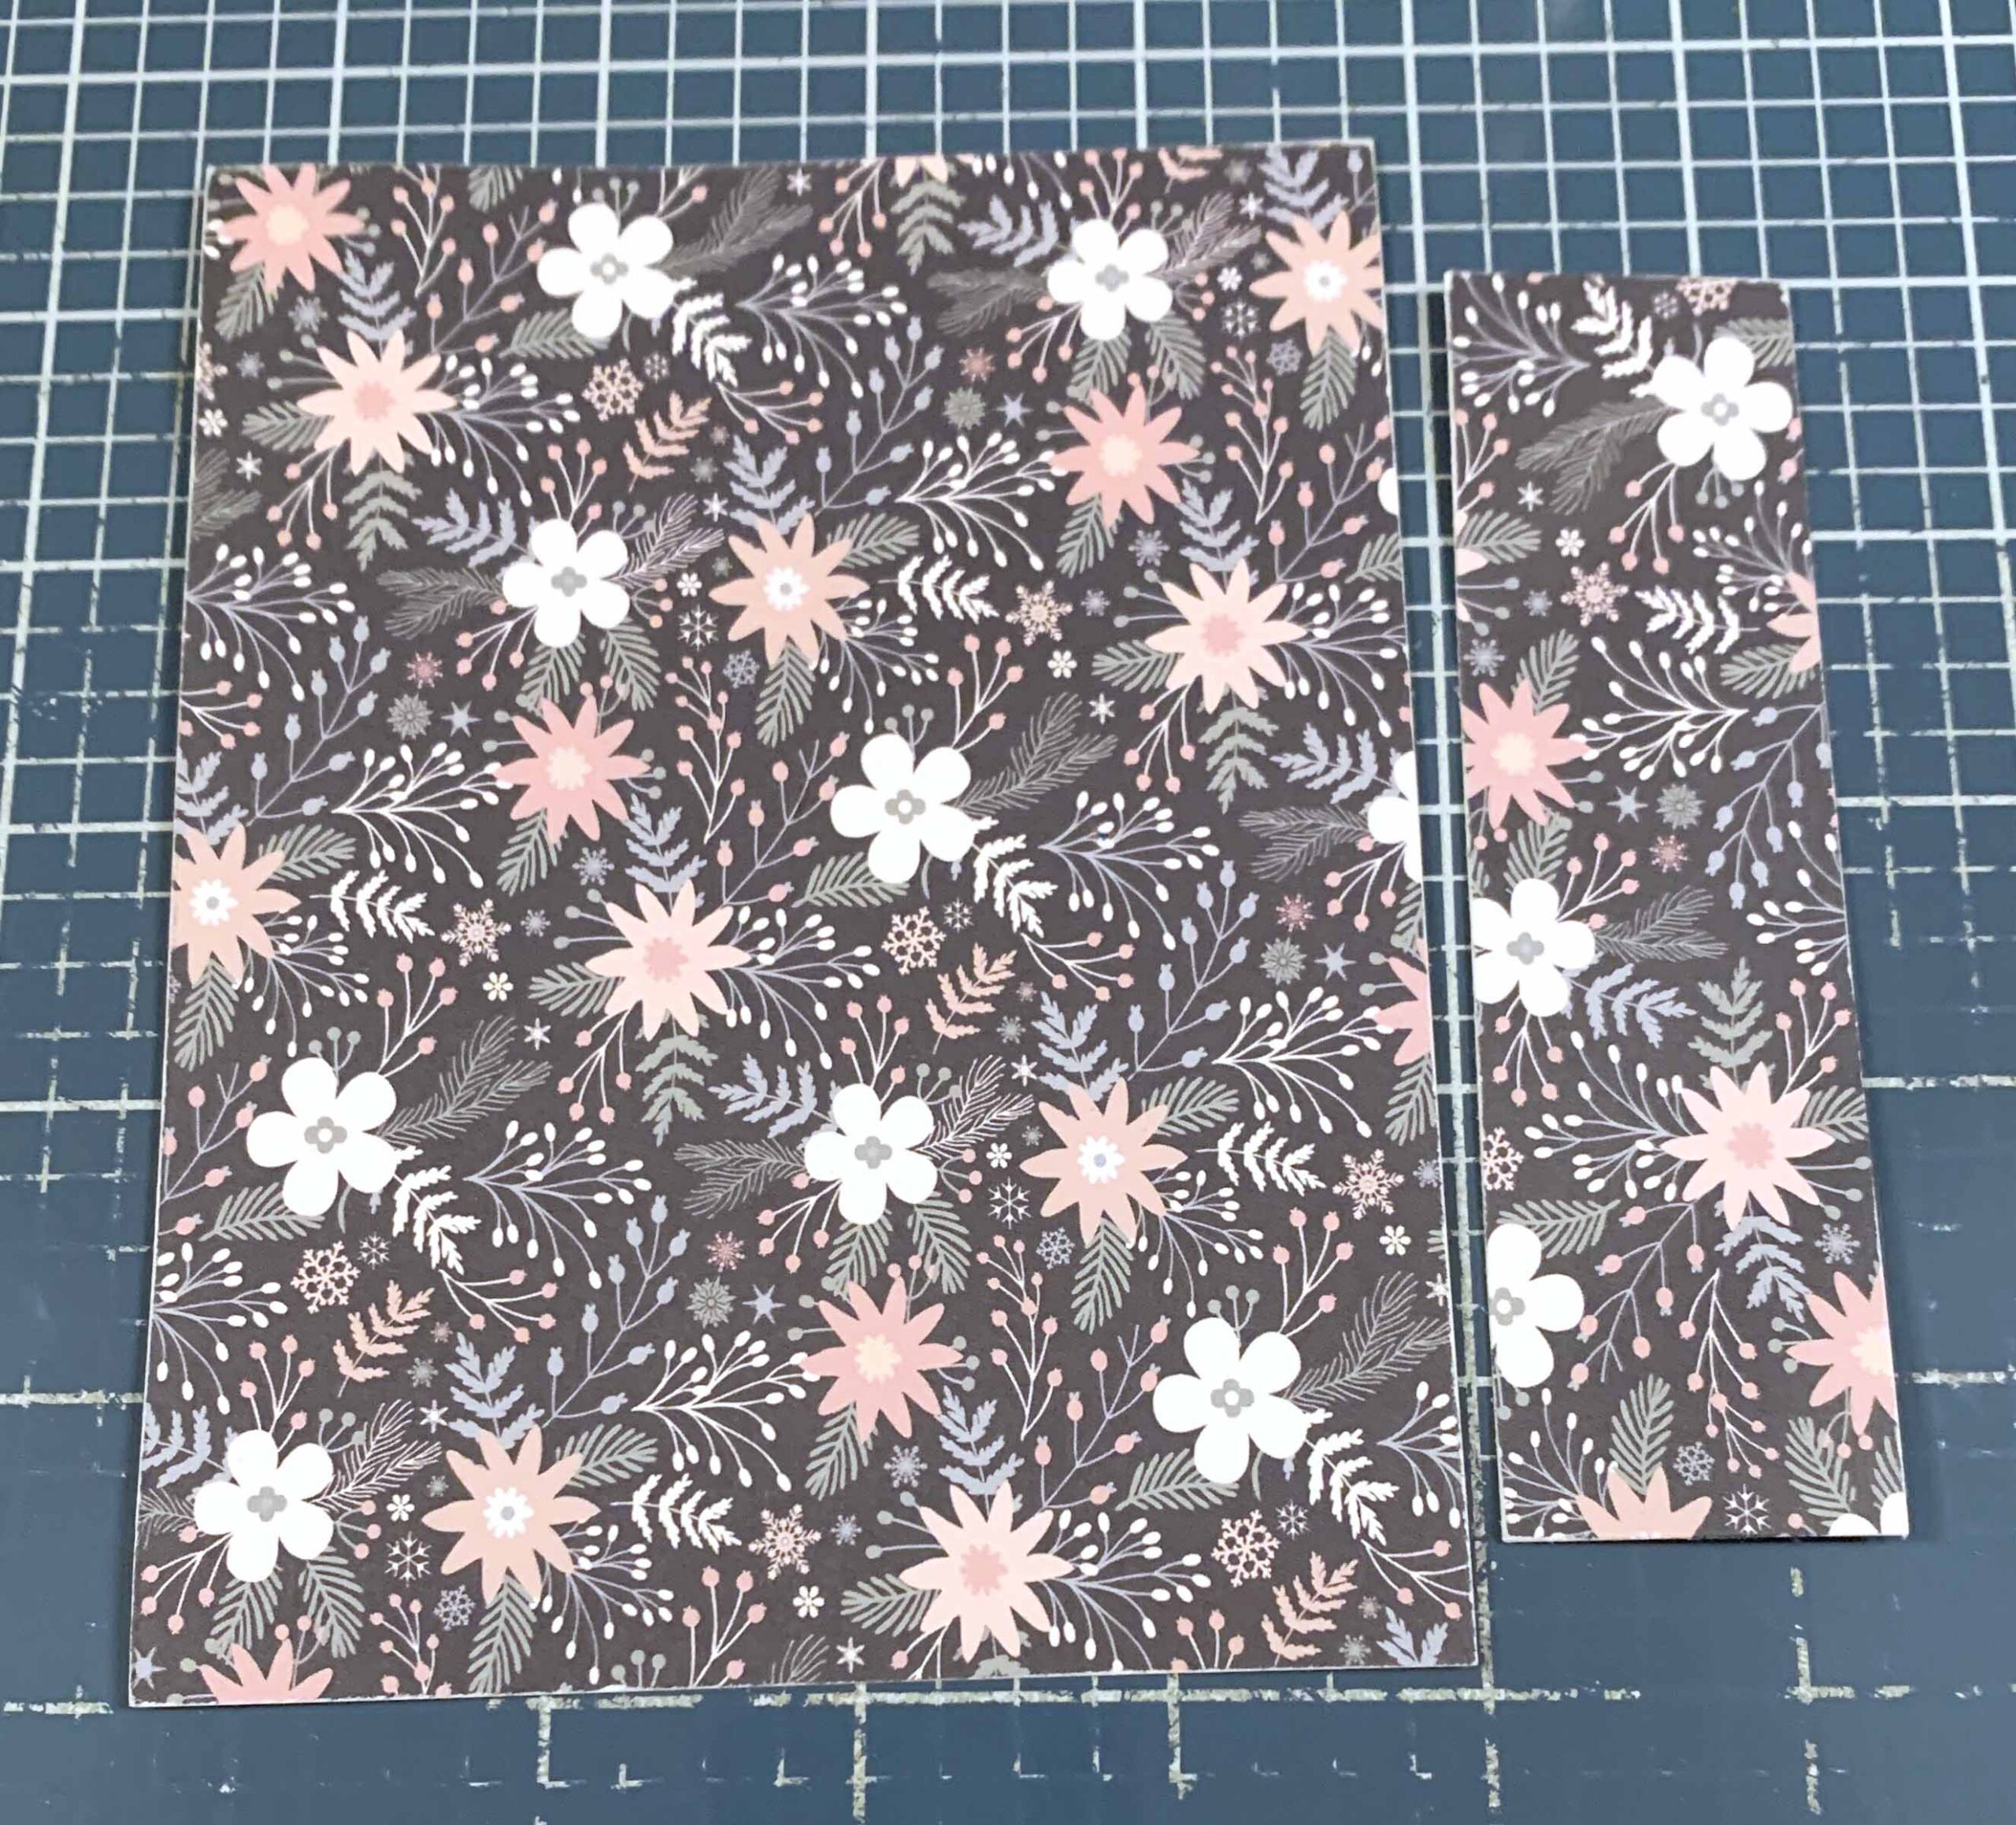 Next, you’ll need the pink dot paper. Cut one piece that measures 4” x 5 ¼” and cut a second piece that measures 7/8” x 5”. Sand the edges of both papers.
  Next, you’ll need the grey plaid paper. Cut one piece that measures 3 ¾” x 5” and cut a second piece that measures 1 1/8” x 5 ¼”. Sand the edges of both papers.
  From the tree paper, cut a piece that measures 3 ½” x 4 ¾”. Flip the paper over and cut a piece that measures ¾” x 4 ½”. Sand the edges of both papers.
 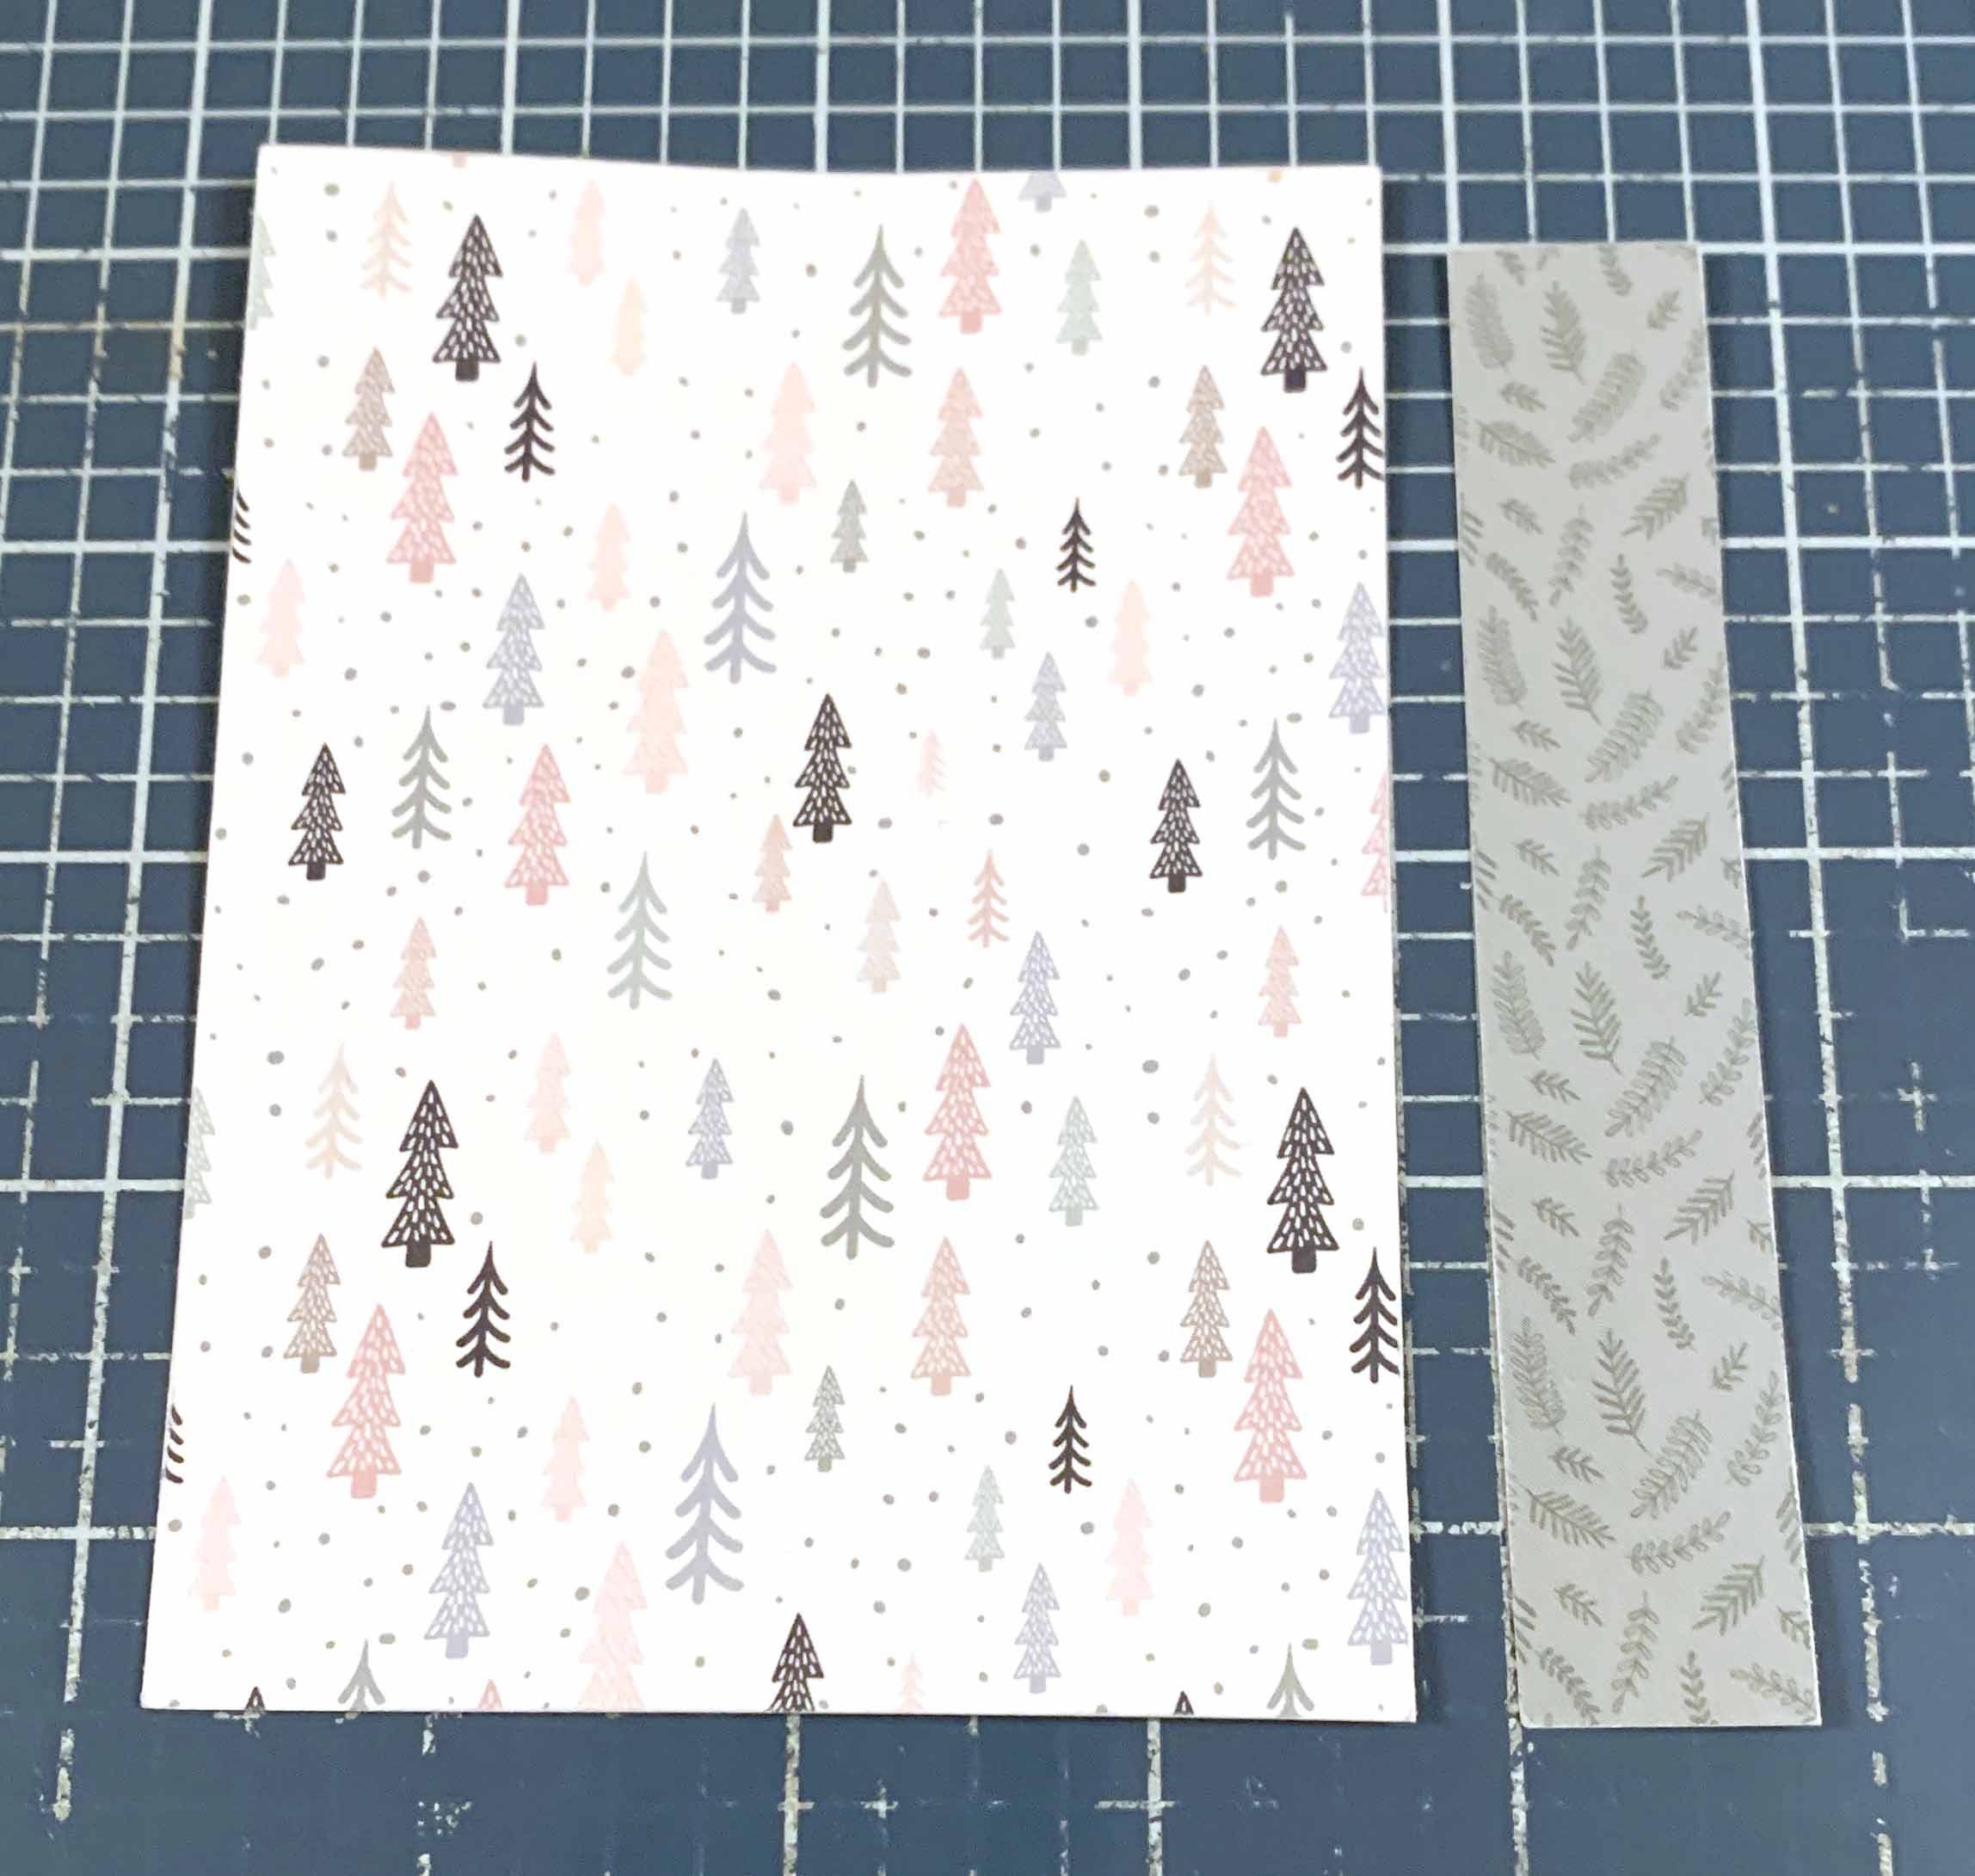 From the paper that has borders and 3×4 cards, cut the snowflake border out. Cut the strip down to 3 ½” and notch the right side of it. Sand the edges of the border strip.
 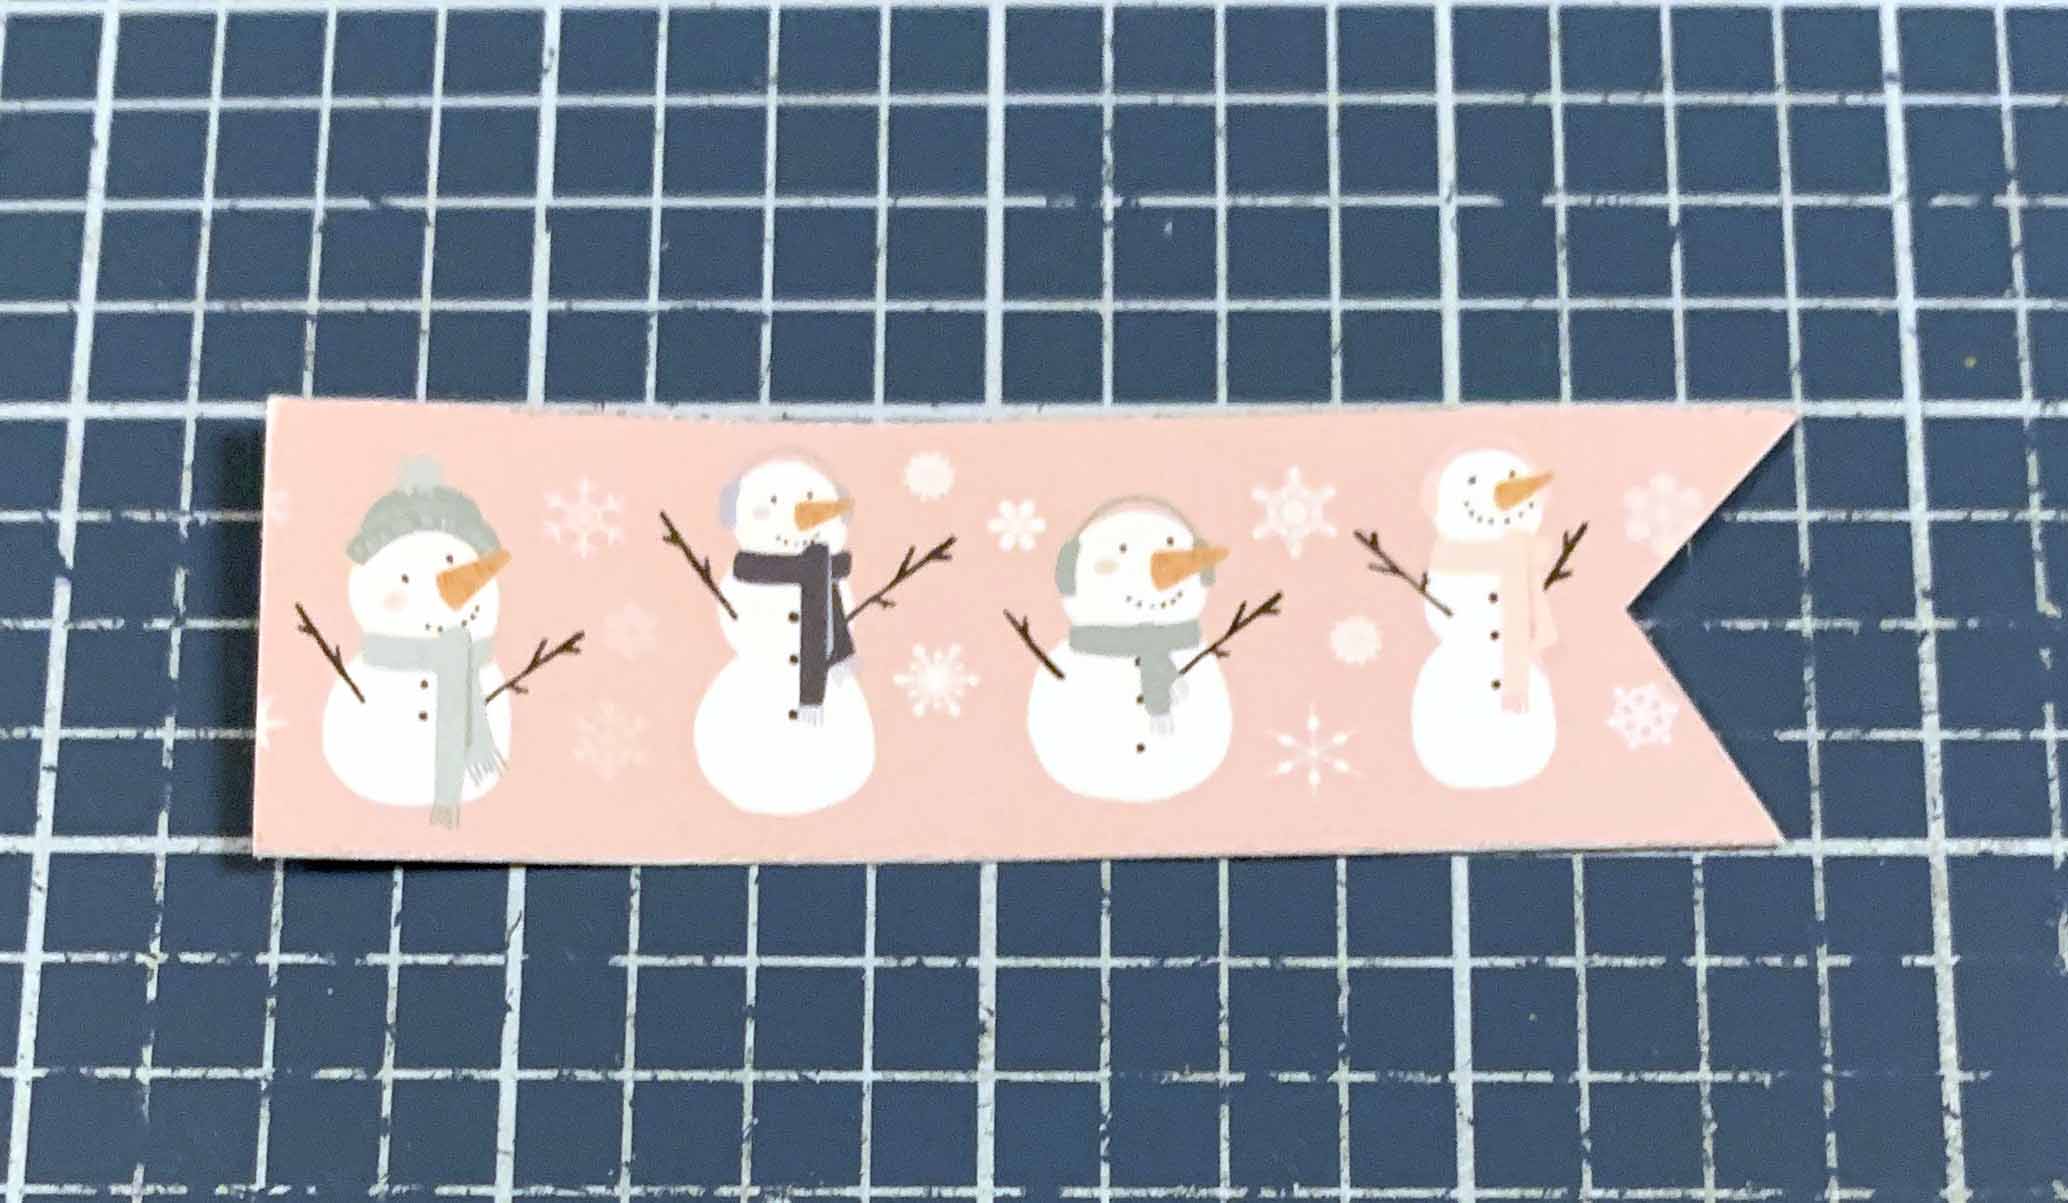 Off the Winterland Element Stickers from Echo Park Paper, stick the winter wishes and pink floral stickers to a piece of white cardstock. Cut the snowflake border to 3 ¾” and stick to the same piece of white cardstock. Cut around the winter wishes and pink floral images. Cut the snowflake border strip out and notch the right side. Sand the edges of all the images.
  The next three steps use 3D Foam Squares and E-Z Runner from Scrapbook Adhesives by 3L.
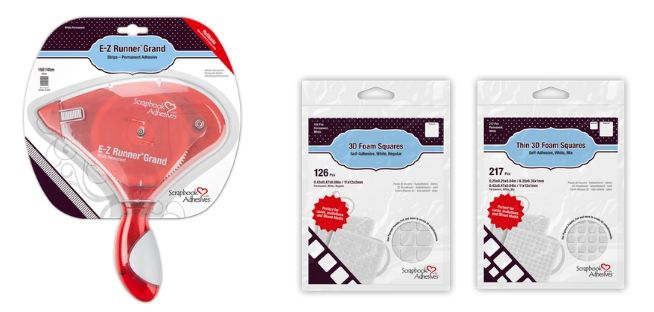
Use E-Z Runner to adhere the pink dot paper to the dark floral paper. Adhere the grey plaid paper to the pink dot paper. Adhere the three papers to the grey plaid paper. 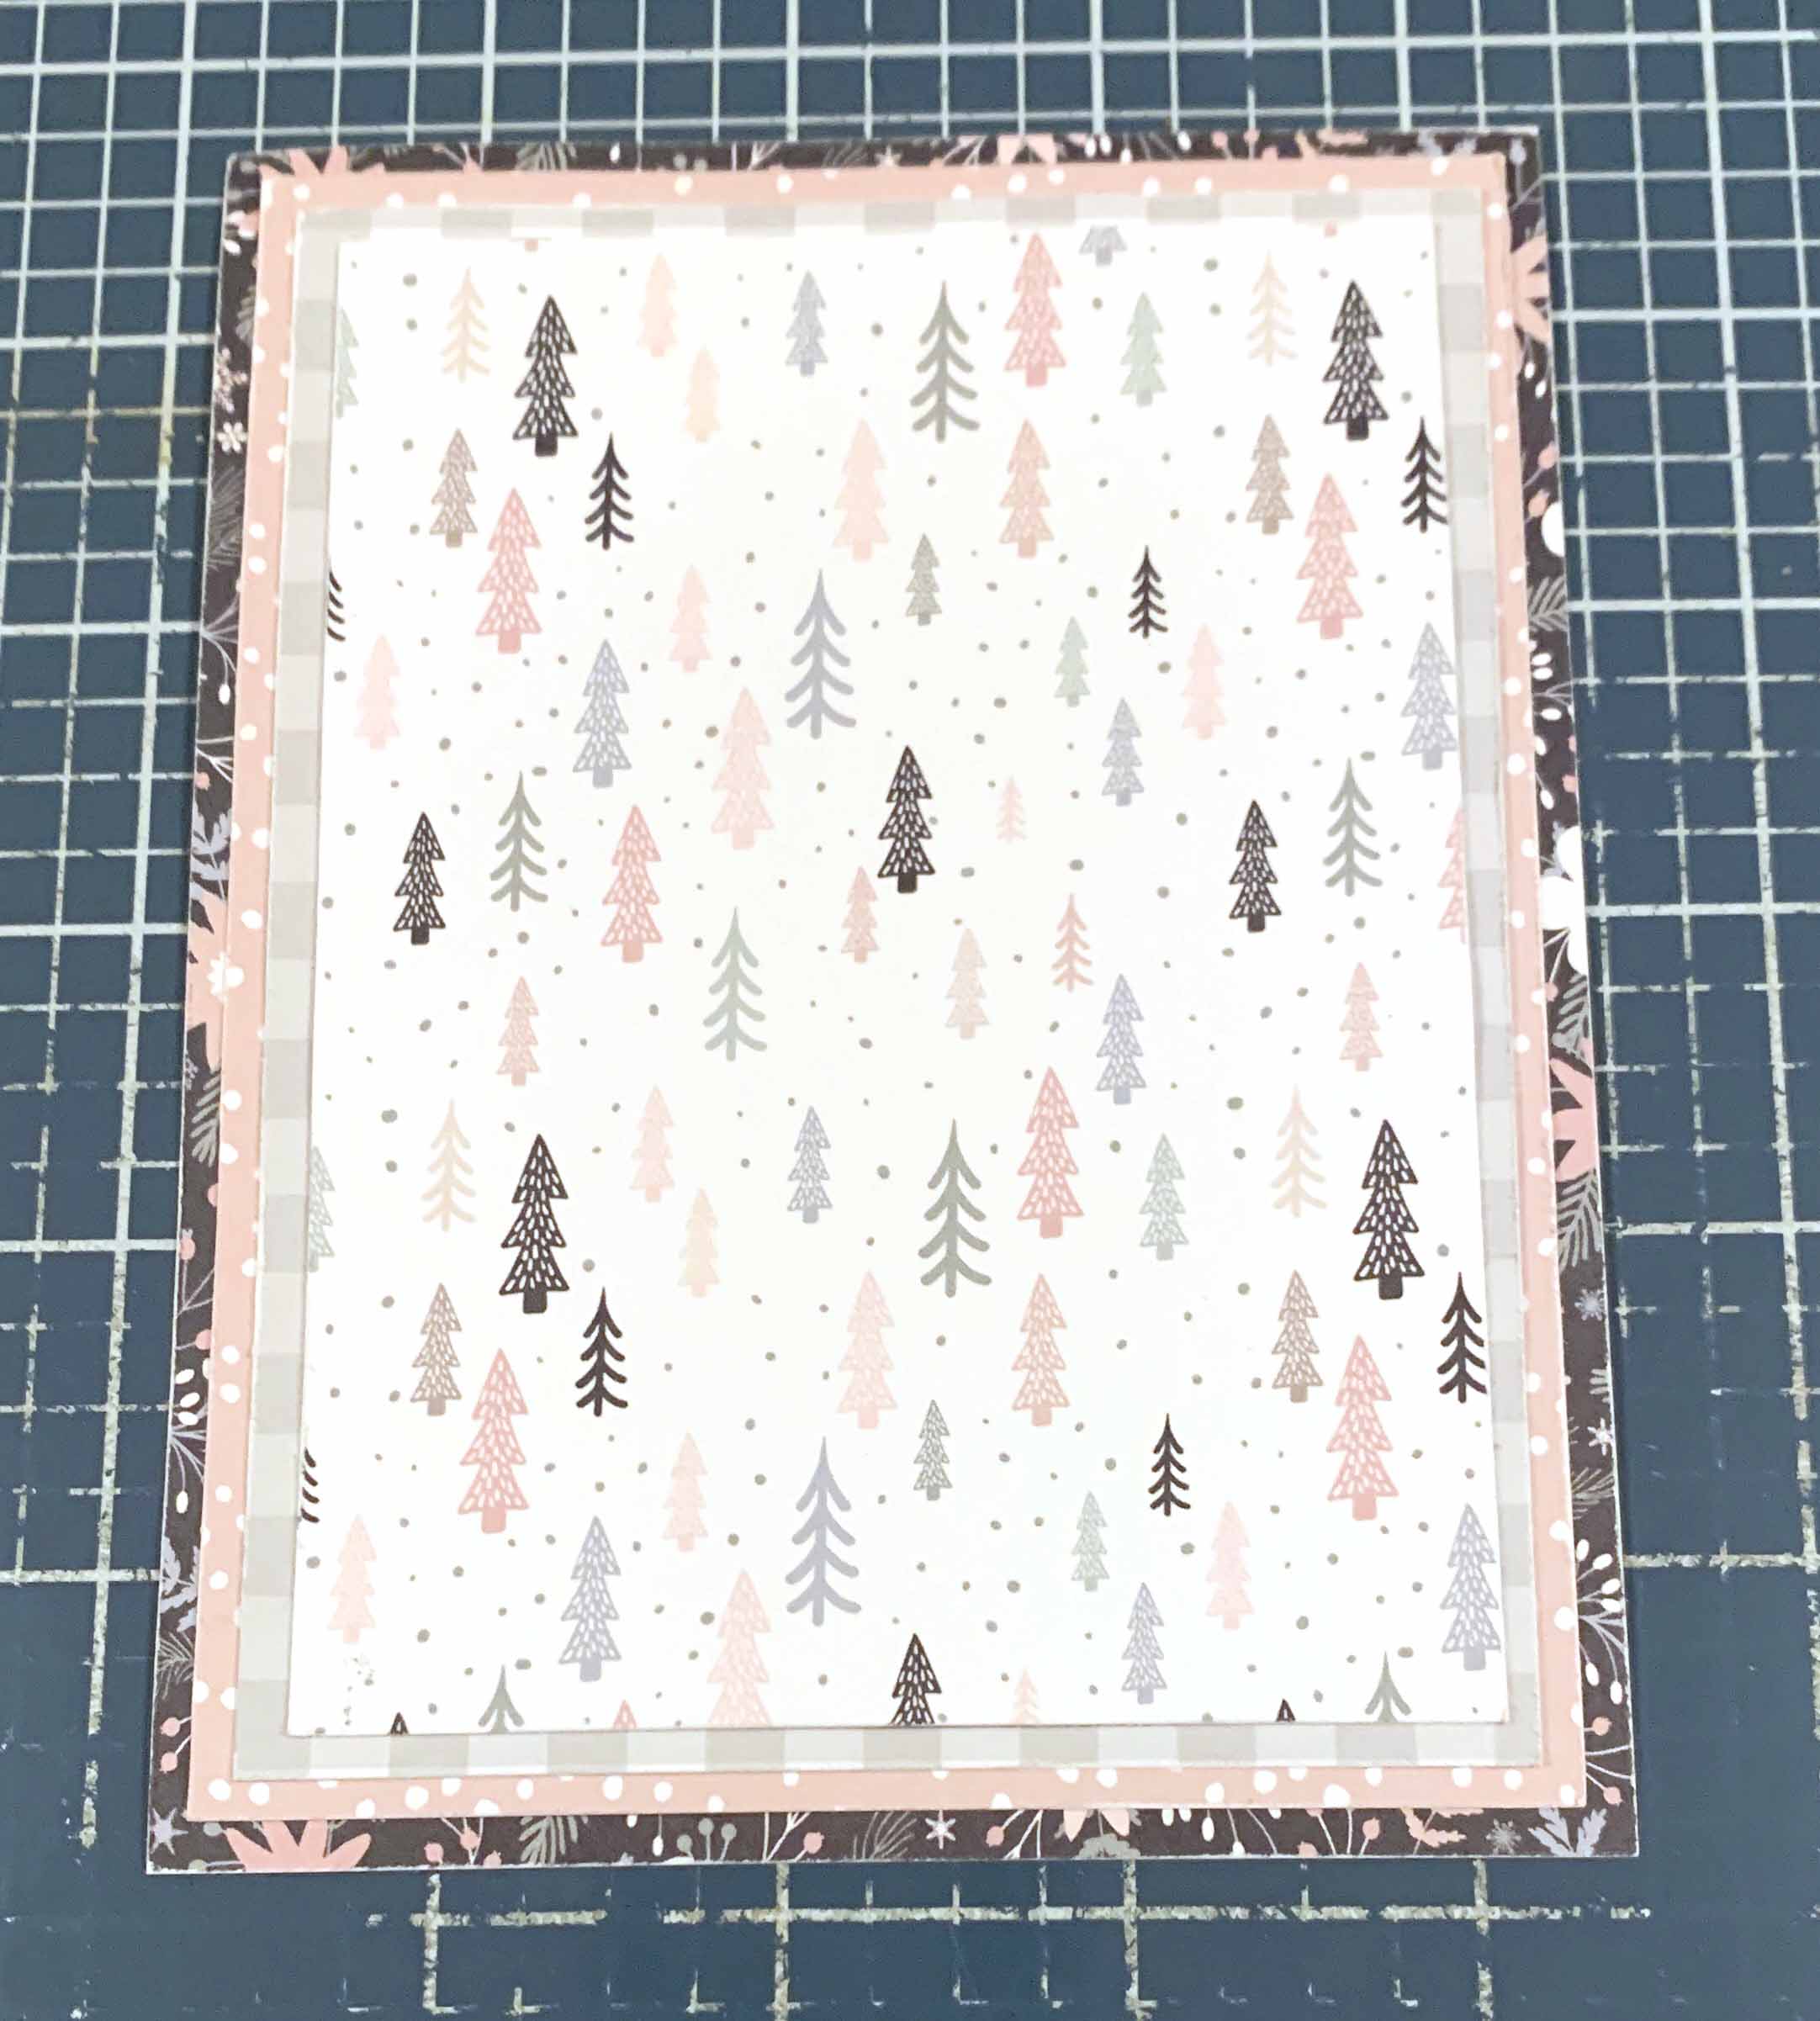 Use E-Z Runner to adhere the grey plaid paper ¼” from the left of the grey plaid paper and all the way to the top of the pink dot paper. Adhere the dark floral paper 1 3/8” from the right and 1/8” from the top of the tree paper. Adhere the pink dot paper 1 7/8” from the right and 1/16” over the edge of the tree paper. Adhere the green branch paper ½” from the left and 1/8” from the top of the tree paper.
 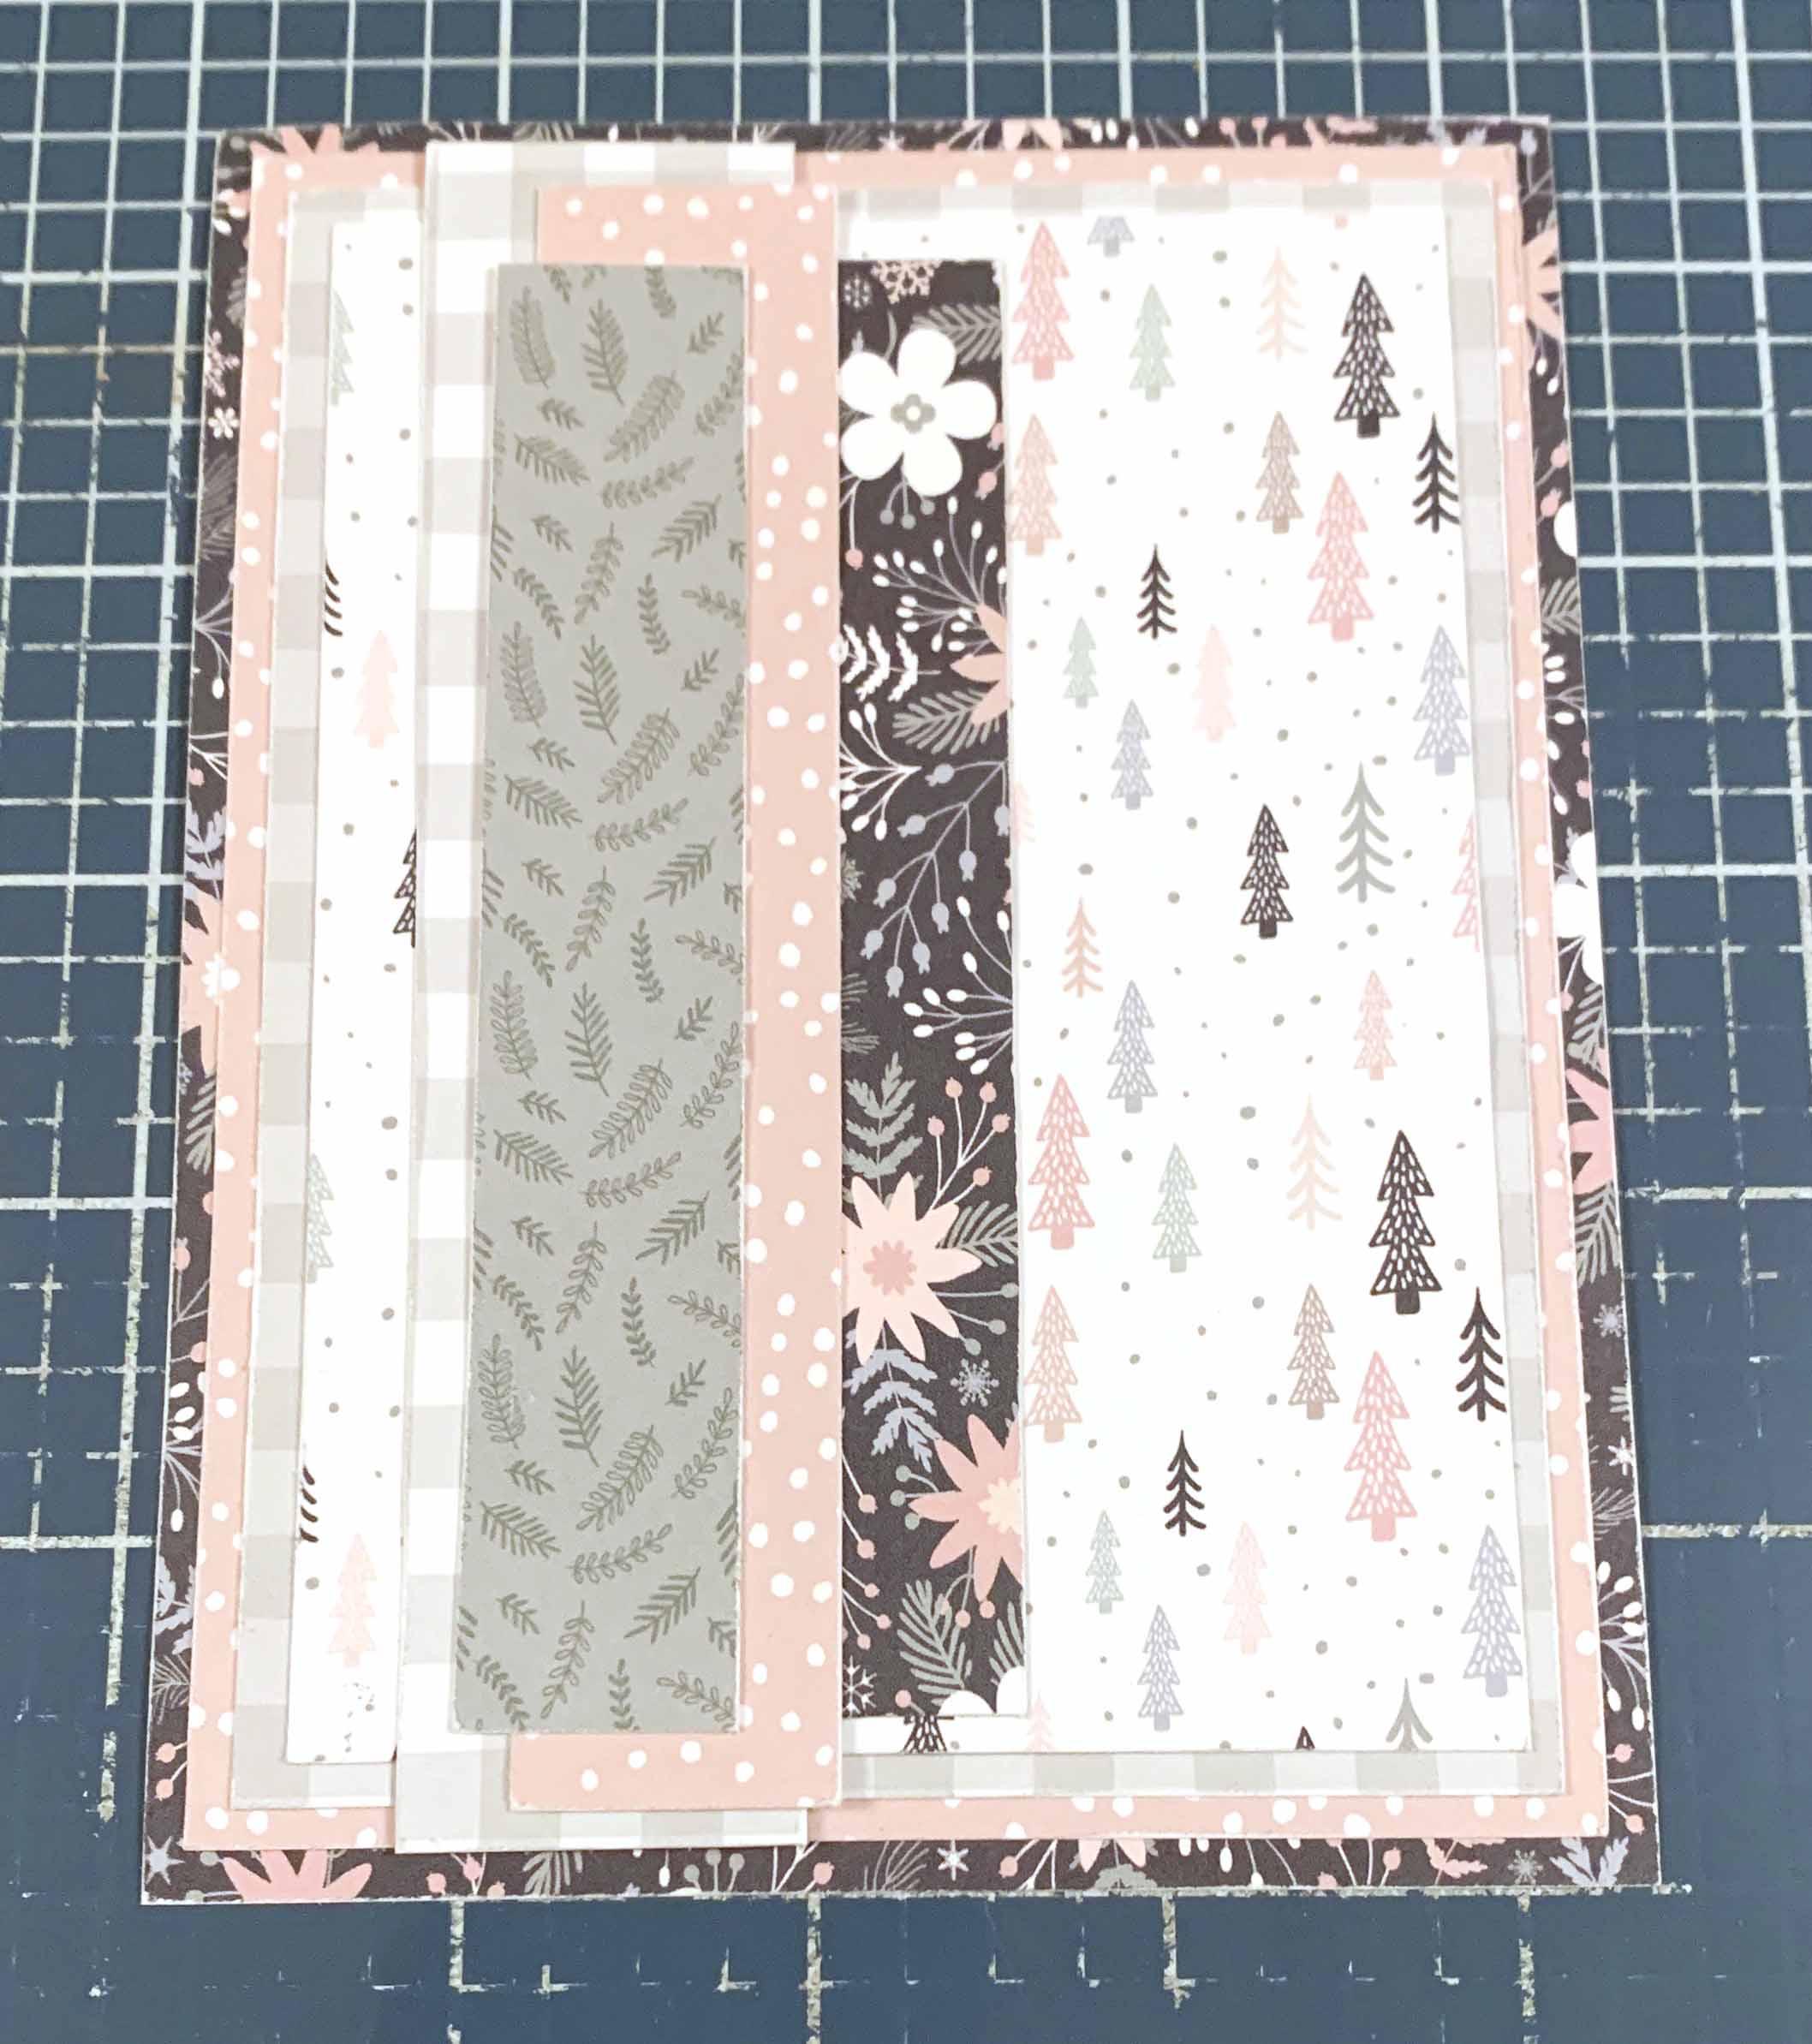 Use E-Z runner to adhere the snowman border strip 1” from the left and 3 1/8” from the top of the tree paper. Adhere the snowflake border strip ¾” from the left and ½” from the bottom of the tree paper. Use 3D Foam Squares to adhere the pink floral image to the bottom left of the cardfront. Use adhesive and 3D Foam squares to adhere the Winter Wishes to the right of the pink floral image as desired.
 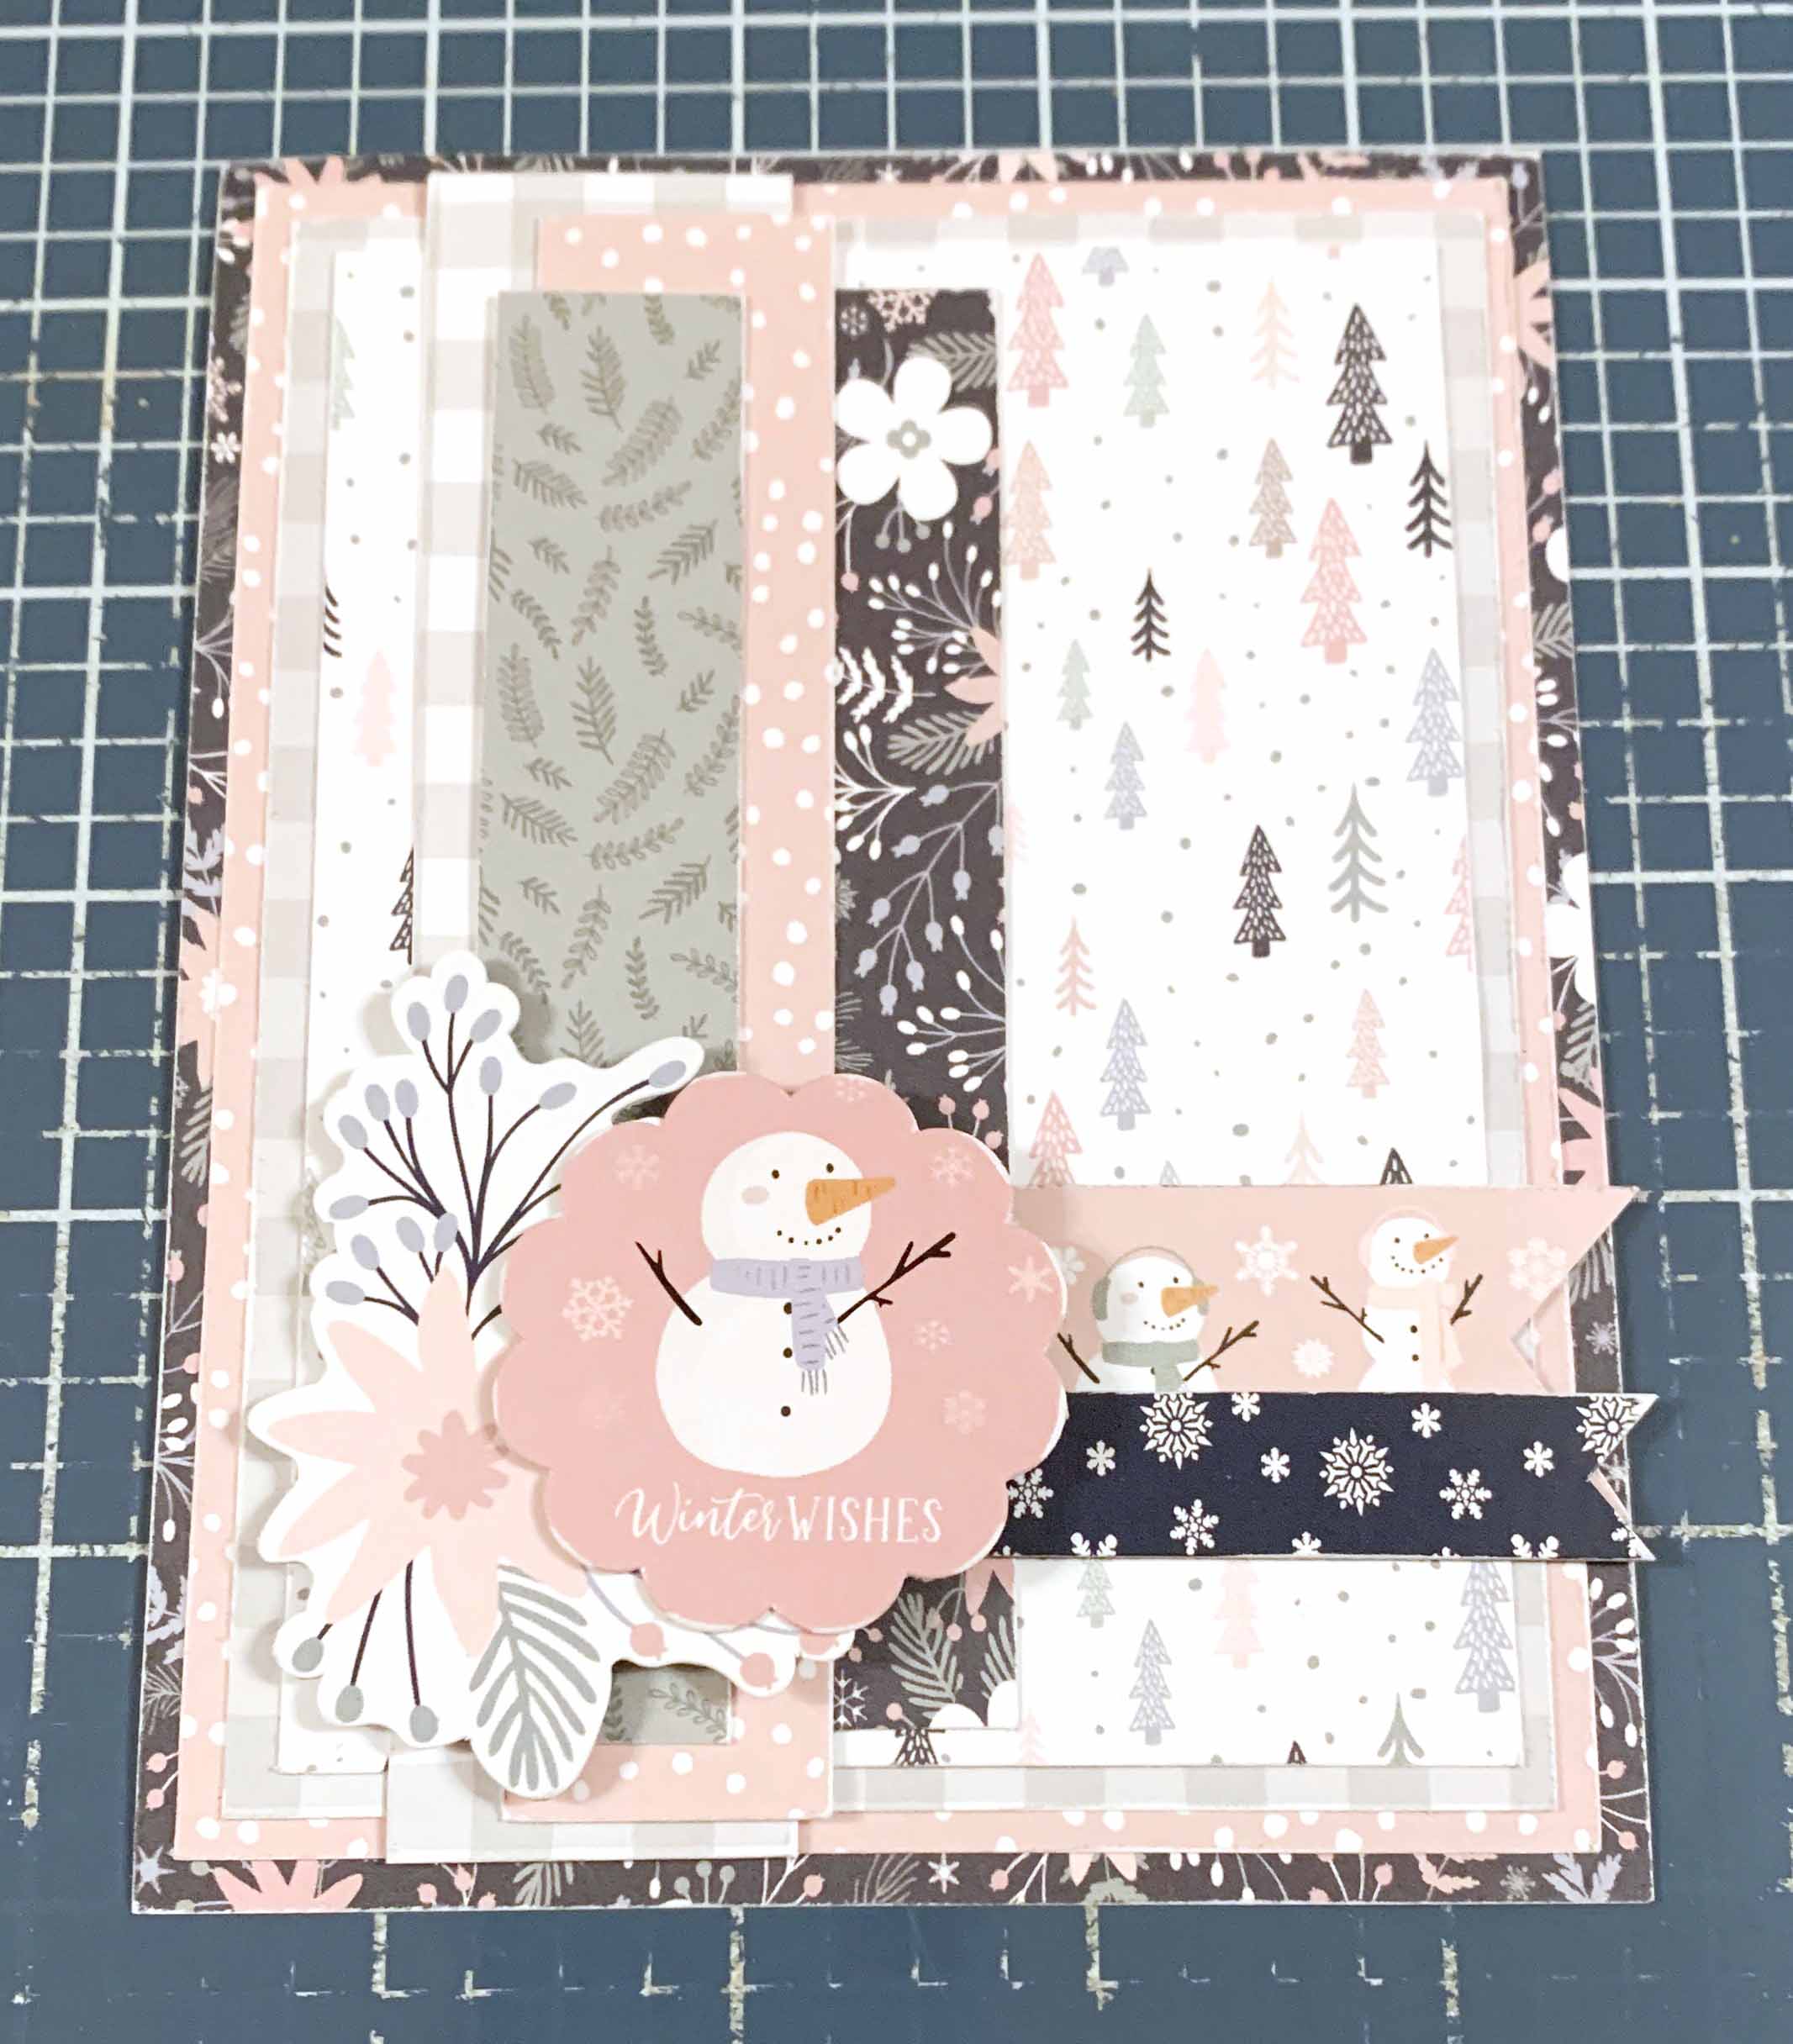 Stick five Enamel Dots off the Winterland Enamel Dots from Echo Park Paper around the pink floral image and winter wishes sentiment as desired. Cut a piece of Superstock from Creative Scrapbooker that measures 5 ½” x 8 ½”, score at 4 ¼”. Adhere the cardfront to the cardbase.
  Now, we’ll create the Warm Winter Wishes Card.
  The first two steps use the Winterland 6×6 Paper Pack from Echo Park Paper.
Cut a piece from the blue plaid paper that measures 4 ¼” x 5 ½”. Flip the paper over and cut a piece that measures 4” x 5 ¼”. Sand the edges of both papers.  Cut a piece from the snowflake paper that measures 1” x 4 ¾”. Cut a piece from the snowman paper that measures 1” x 4 ¾”. Cut a piece from the tree paper that measures 1” x 4 ¾”. From the paper that has the frame card, fussy cut the frame out. Sand the edges of all the papers and frame.
  Off the Winterland Element Stickers from Echo Park Paper, stick the warm winter wishes to a piece of patterned paper. Cut around the sentiment leaving a 1/8” border. Stick the two tree stickers to a piece of white cardstock. Cut the trees out. Sand the edges of all the images and sentiment strip.
  The next two steps use 3D Foam Squares and EZ Runner from Scrapbook Adhesives by 3L. Use E-Z Runner to adhere the green paper to the blue plaid paper.
  Use E-Z Runner to adhere the three patterned paper strips on the green patterned paper, making sure they are spaced evenly. Use 3D Foam Squares to adhere the frame to the middle of the paper strips.
  Stick five Enamel Dots off the Winterland Enamel Dots from Echo Park Paper around the frame as desired. Cut a piece of Superstock from Creative Scrapbooker that measures 5 ½” x 8 ½”, score at 4 ¼”. Adhere the cardfront to the cardbase.
  Here are a few closeups of the finished cards.
  Thank you for joining me today and taking the time to check out my blogpost. I hope that my Warm Winter Wishes Cards have inspired you to recreate your own at home.

You can find more of my work on my blog at: http://www.katelyngrosart.blogspot.ca
Supplies Used:
Echo Park Paper: Winterland – 6×6 Paper Pack, Element Stickers, and Enamel Dots
Creative Scrapbooker Magazine: Super Stock
Scrapbook Adhesives by 3L: 3D Foam Squares and EZ- Runner Permanent Tape
Subscribe Today to Creative Scrapbooker Magazine

