Okay, I am seriously obsessed with the Simple Stories – Simple Cards Card Kits! They are ABSOLUTELY gorgeous and come with EVERYTHING you need to create 8 show-stopping cards! I created this card using the Simple Stories Hello Lovely Card Kit. So here is the story. As a scrapbooker, I can not send bought cards to my friends. I just can’t do it.Β I feel like I am cheating on my supplies LOLOLOLOLOL.Β And there are just times when I don’t have a card ready to go – these kits are soooooooooooooooooooooo the answer!Β Beautiful designs, no scissors necessary, and of course you can add your special touches if you like. All you need is adhesives. And for this card, I used Glue Dots Adhesives Pop-Up! Dots and Permanent Gluetape. Did I mention that with the kit you can make 8 different cards? You sure can!Β In 2-3 minutes, I…
Hello! Hello! Hello! Here on the East Coast of Canada, we are in and out of lockdown. Emotions are up and down and I am trying to make sure that I make time for creativity. Often creativity helps keep me calm and grounded.Β So, here we are.Β Image copyright 2021 Stampinβ Up! Today,Β I am playing with Stampinβ Up!βs Hydrangea Haven bundle. This bundle came out with the new Occasions Catalogue that was released at the beginning of January. I seemed to be drawn to it for the ease in which the images could be coloured. But also because the sentiments are extremely fitting. Lately, everyone is having good and bad days β the sentiments are perfect to send to anyone. Spreading kindness through cards. The image is framed with the Rectangle Stitched Dies. I love that you can use the outside or inside of the die cuts in this…
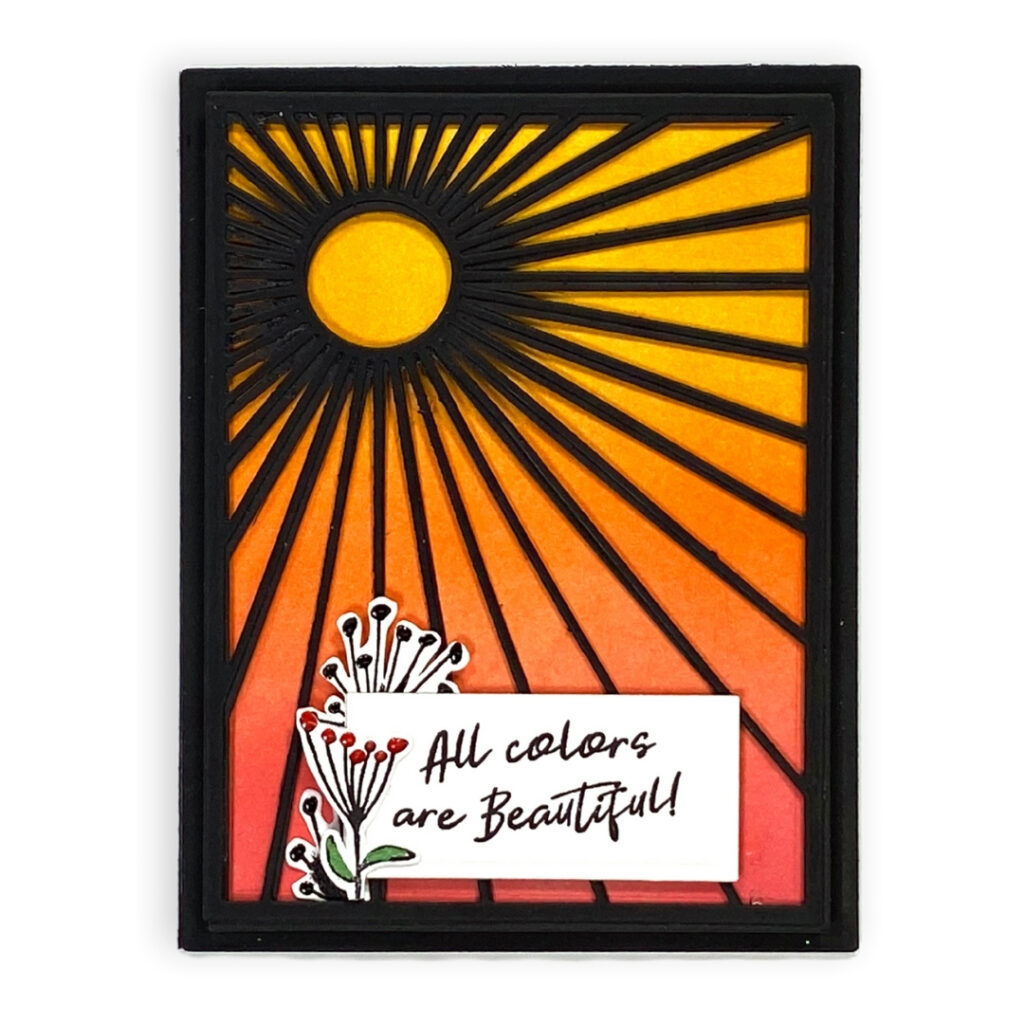
Creating cards with background dies is my latest obsession. Speaking of OBSESSION – Impression Obsession has a variety of MUST HAVE background dies that are absolutely perfect for jazzing up your cards or being the star of the show! Here is the latest card I put together. First I cut out several of the Sunburst Background die from Impression Obsession using black cardstock. I adhered three of them together and let the third one peek slightly from behind so that it is blacker around the sun circle. I pulled out my Picket Fence Studios Life Changing Blender Brushes – these are a serious blending game changer.Β I used them to blend THREE of my favourite colours of Ranger Tim Holtz Distress ink onto a piece of Creative Scrapbooker Super Stock. These three colours look like a beautiful sunset! Using Art Glitter glue with a fine metal tip I adhered the…
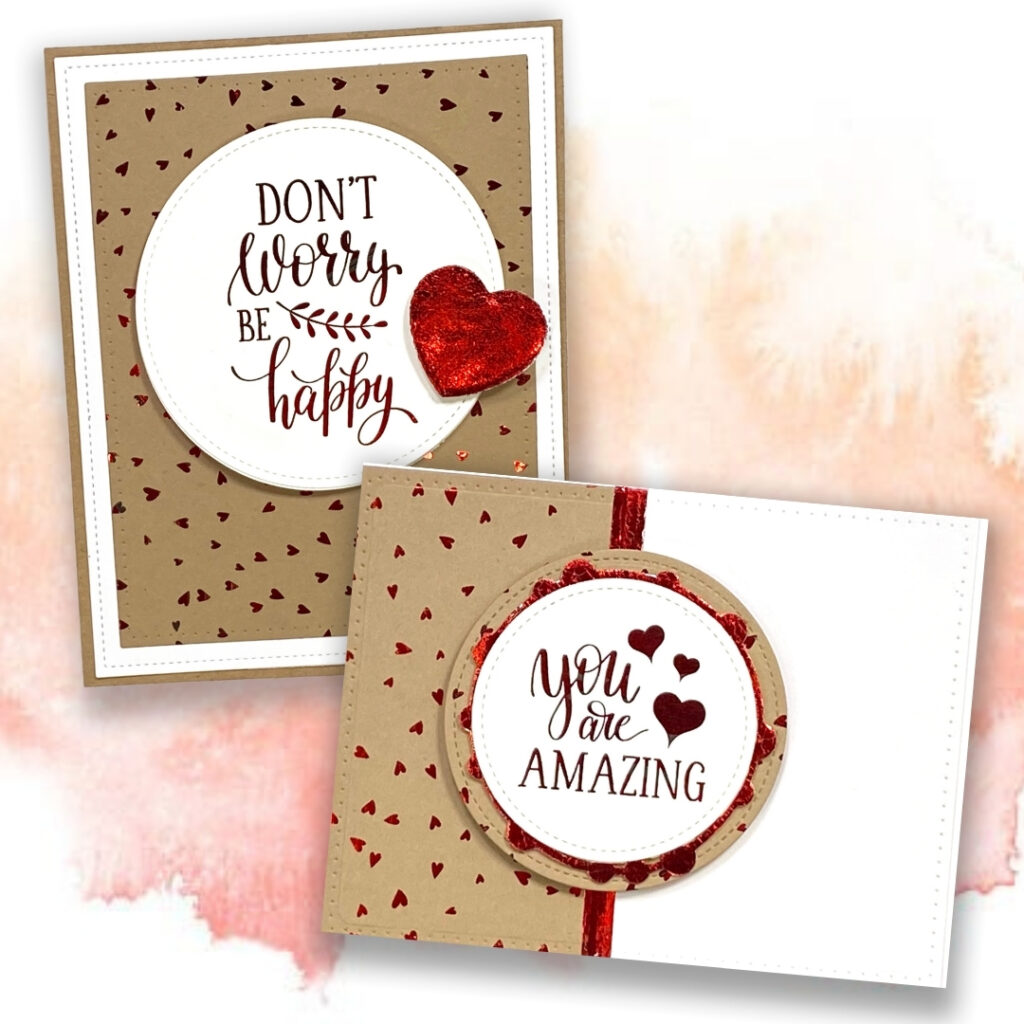
Therm O Web products make adding foil to your project an absolute breeze! Here are a few cards I put together with a shiny finish. I created a card base using an Elizabeth Craft Designs die. Next, I started with a Therm O Web Deco Foil Toner Card Front. I sandwiched the card front into a piece of parchment paper, layered some Therm O Web Gina K. Designs Fancy Foils SHINY SIDE UP on top. Closed the sandwich and ran it through the laminator. WOWZERS! Those hearts sparkle. Next, I used a Therm O Web Gina K. Designs circle die to cut out a sentiment from the Therm O WebΒ Gina K. Designs Foil-Mates. I added the foil, in the same way, I added foil to the Toner Card Front. I wanted a little heart accent. So I took the Therm O Web Gina K. Designs heart die and cut…
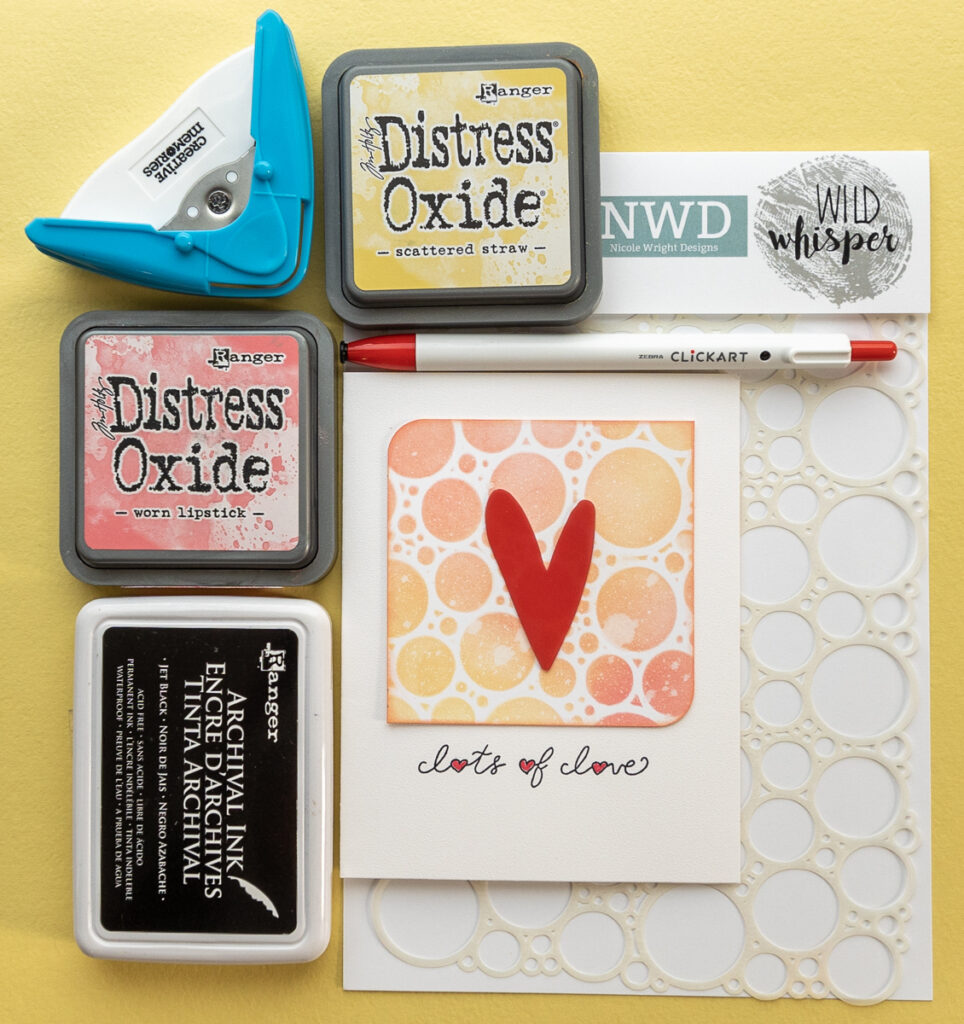
One of the greatest forms of flattery is to imitate or copy. In the world of scrapbooking or cardmaking, we are always flooding our brains with inspiration from several sources. My favourites source is Creative Scrapbooker Magazine. Whether browsing between the covers of the most recent issue or scrolling through their Facebook and Instagram feeds, their shares and styles always seem to match my own. Recently on Instagram, this card by @rlbreaks was shared and I loved it! It did not take me long to try to find a way to imitate it with the supplies I had on hand. It was a simple card to recreate in multiples to meet my Valentine’s needs! So be inspired! Imitate and copy with your own twist, but ALWAYS be sure to credit your source! That way they know they have inspired, itβs a WIN-WIN! Supplies: Ranger Industries: Distress Oxide Ink & Archival…
I pulled out the Echo Park Paper Co. Baby Girl paper collection the other night and started to play. This collection is so soft and pretty to work with.Β I created this card and although I don’t have anyone to give it to, I put it in my greeting card box that’s filled with cards for someone special when the time is right! I created the background using an Elizabeth Craft Designs die. The cardstock is from Ranger Simon Hurley Create – it just might be my favourite right now. I turned the die into a sticker using Sookwang double-sided adhesives. For the final touches, I used the coordinating Echo Park Paper Co. Baby Girl Sticker Book.Β This book is SERIOUSLY PACKED with stickers!!! I added dimension to the card using Scrapbook Adhesives by 3L 3D Foam Squares. Here is a FASTFORWARD look of the card coming together. https://www.youtube.com/watch?v=9MieVt_6oBc Have…
I am obsessed. You scream I scream, everybody wants ice cream! Stampinβ Up!βs new Ice Cream Corner Collection is adorable and I canβt stop playing with it! The collection comes with the Sweet Ice Cream stamp, Ice Cream Cone Builder punch, Ice Cream Corner Designer Series Paper, Blackberry Bliss ribbon, and the super sweet Ice Cream Corner Sprinkles. You can actually create projects with a stamp or simply use the images from the Ice Cream Corner Designer Series Paper as I have in the card below. I love this kind of versatility. Itβs a bonus that the images look like watercoloured delicious-ness. Of course, you can also use the Sweet Ice Cream stamp set for a simple tag as can be shown here. While I didnβt, you can use the Ice Cream Builder punch to pop off the images and create dimension on any of your projects. I love the…
Have you visited the Art Impressions blog lately?!??!?!Β If you don’t visit them on a regular basis you need to start! Seriously! The inspiration you will find is FABULOUS!!!! The Birthday – I popped on over and found this gorgeous birthday card designed by Crystal Schneider. Crystal used one of their latest stamp collection – The practically Perfect Stamp set. The Giveaway – Art Impressions is almost at 20K followers on Pinterest! Help them reach their goal! To celebrate they are having a Giveaway – CLICK HERE for the details. The Challenge – they want to see your creations! CLICK HERE For all the details! SO MUCH going on over at Art Impressions! Don’t miss out! join the fun! Happy Thursday everyone!
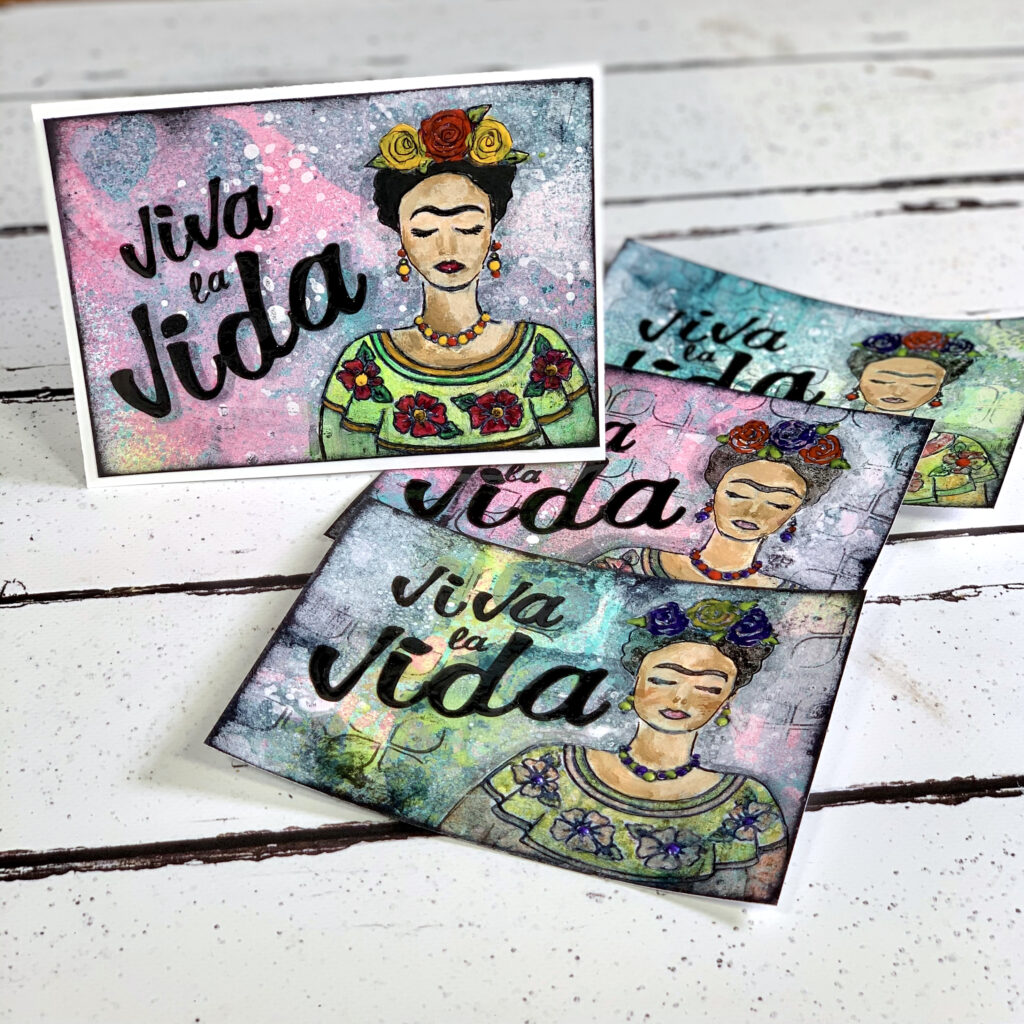
I love these mixed media cards Kerry Engel has designed. Kerry used an SVG file of Frida and added it to her Brother ScanNCut.The Brother ScanNCut then drew the image right on the mixed media background that Kerry designed. The results are stunning. Watch Kerry’s process video from start to finish! https://www.youtube.com/watch?v=Q1qWZu4U2uk For a complete supply list visit the Creative Scrapbooker Magazine Video Library – CLICK HERE
Hey there! Itβs Noreen from OrganizedandCreativeMom.com here to share some fun cards that have a cool retro-vibe with you! Everything old is new again, right? Iβm sure digging these groovy cards from the βGee, Gollyβ Card Kit by Creative Memories, man! This retro card kit kicks it back old-school style and includes all the ingredients to create 12 DIY cards with a vintage palette of dusty blue, pink, navy, mustard yellow, minty green, orange, and taupe. If you love that vintage and retro feel then youβll love the design icons featured in this kit, like the cassette tape, typewriter, file folders, and rotary dial phone! And the fun sentiments like βYou have the ticket to my heartβ, βGee, thanks!β, βRemember When?β and βSo happy 4 you,β means that youβll have cards suitable for almost any occasion! The kit comes complete with step-by-step instructions, twelve pre-folded card bases, pre-cut & pre-labeled…