Hello crafty friends! Tracy McLennon here, and today I have a pretty little card to share and a few little step by step tips on simple colouring technique. The stamps and coordinating dies are from Picket Fence Studios. The Que Sera, Sera collection.Β Here are all of the details. Step one is to stamp the images you would like to use onto white cardstock using Ranger Jet Black Archival Ink. Now I gathered the colours that I wanted to use on my images. A little trick of mine, is that I keeping the backing from my favourite Scrapbook Adhesives by 3L Foam Squares. They can be used as blending surfaces. I always have a little pile of them at my desk for just this purpose. Often when I am colouring I like to add colour straight to cardstock in the areas where I want the colour the darkest. Here is…
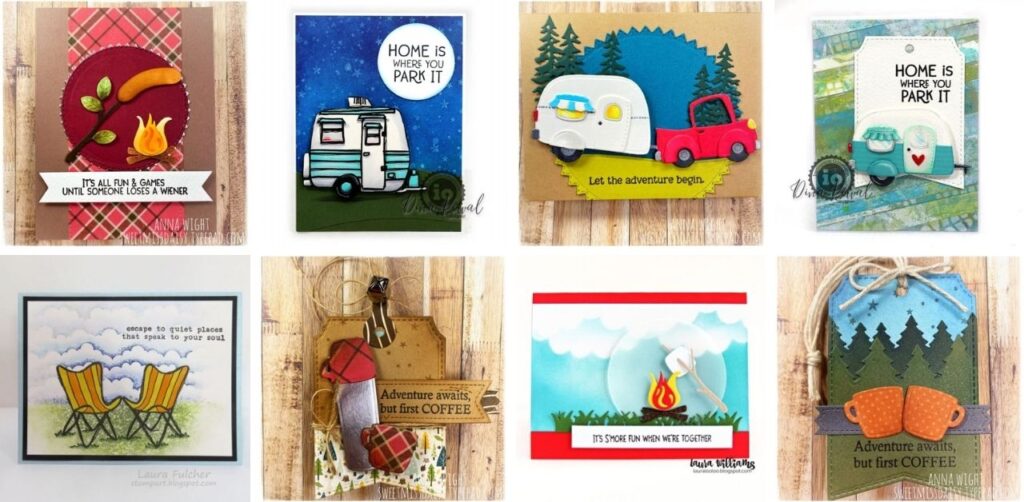
If you love camping, eating smores, roasting marshmallows, enjoying a campfire or just simply really love all those super cute trailers that are so trendy right now πΒ – then the May 2021 Impression Obsession stamp release is for YOU! Here is just a tiny TASTE of some of the creations we found over on the Impression Obsession website featuring a few of our favourite designs. CLICK HERE to check out the entire NEW May 2021 Release. You will love it! Happy Monday Friends! JOIN THE VILLAGE of INSPIRED PEOPLE!
Hello everyone – Kerry Engel here today on the Creative Scrapbooker Magazine blog. The Kraft Slimline Toner Card Fronts from Therm O Web are the perfect substrate for some good old grunge. The kraft paper withstands embossing, folding, and inking like a champ. The Therm O Web Deco Foil Transfer Sheets in Opal is mysteriously different depending on how it was used.Β On the black toner front, it is moody but when used with the Therm O Web iCraft Deco Foil Transfer Gel Blanco, it looks like pearls. Layers of collaging help to create the perfect mixed media card. Here are the steps to create this gorgeous card! FOIL AND EMBOSS The top layer of this card was made by adding Therm O Web Deco Foil Transfer Sheets in Opal to a Slimline Foil Toner Card Front and then running the card through an embossing folder. I used the Bouquet…
I am Party Puffin obsessed!! Okay, okay, you caught me. Being from Newfoundland, Canada and puffins being our official bird and all, the second I saw the word βpuffinβ I said βYes, please!β Itβs just icing on the cake that these puffins are in a party mood. You are looking at one of the new products available in the newly released annual Stampinβ Up! 2021-2022 catalogue (May 4th release date). This stamp set is called Party Puffins and I canβt get enough of it! I mean, look at that little fish wrapped up in a bow! Am I right? Being a Stampinβ Up! demonstrator, I got my hands on some of the new product available including the black and white paper you are seeing here from the Pattern Paper Designer Series Paper pack. This paper actually comes in a pack of 40 pages 12×12β. It has a little bit of…
This new collection of stamps and coordinating dies, called the Hats Off-Line, from Art Impressions is FABULOSA! The new collection has three sets of stamps that include the coordinating dies to make cutting the bits and pieces a breeze. The names of the sets are pretty easy to remember – Miss Set, Mrs. Set, and Mr. Set! PERFECTION! How adorable are all those HATS!!!! Here is a gorgeous little card I found over on the Art Impressions Facebook page created by Tasha Jorgensen. Tasha’s card features the Mrs. Set. LA LA LOVE IT! Pop on over the Art Impressions website for all the details! (PS- do you see those little face mask stamps?!?!?!?) Happy Monday Friends!
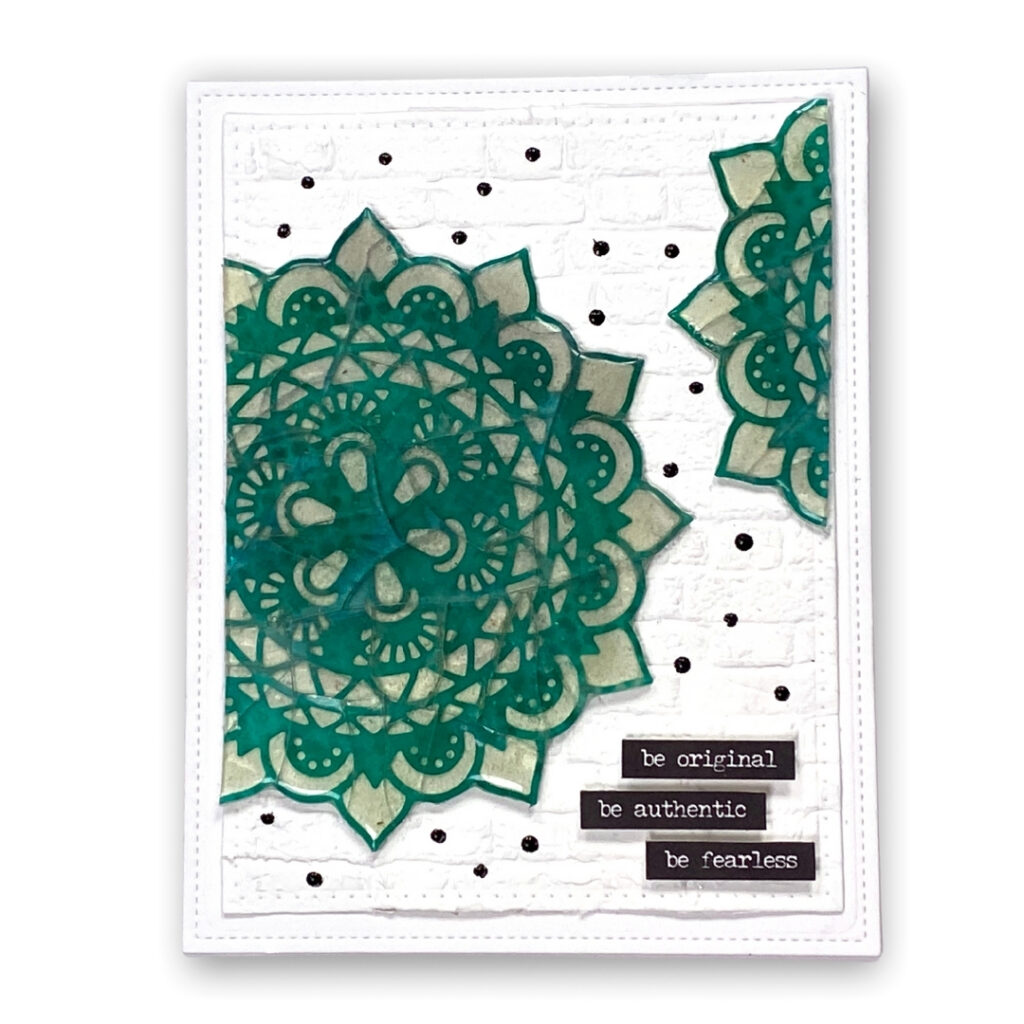
If you are like me and find watching embossing powder change to liquid as it heats up oddly satisfying, this is the technique for you! To create this card first cut out a base from Ranger Simon Hurley Create Stark White Cardstock. I used an Elizabeth Craft Designs Stitched Rectangle die.Β On a second piece of white cardstock, emboss the brick wall using a Tim Holtz Embossing Folder. Once embossed cut out the brickwall using a slightly small stitched rectangle die from the sameΒ Elizabeth Craft Designs die set.Β Adhere the brick wall in the center of the larger stitched rectangle using Scrapbook Adhesives by 3L E-Z Squares. Set aside. Next, on a piece of white cardstock, lay a Stampers Anonymous Tim Holtz stencil down. Apply Ranger Simon Hurley Create ink with a Mini Blending Tool. Lift up the stencil and gently spread the ink filling in the white spots.…
What do you get when you mix Art Impressions Rubber Stamps with Simple Stories?!?!? A charming little card that makes you feel like spring! To create the card I cut a card front from a piece of pink striped patterned paper from the Simple Stories Bunnies & Bloom collection. I cut the same size card front from Ranger Simon Hurley Create Stark White cardstock. Using a Sizzix Framelits circle die, I cut out a circle window in the upper portion of both the card fronts – in the exact same spot. Using Glue Dots Adhesives Gluetape I adhered the two-card fronts together. This process made the pink stripe paper stronger so I could pop it up later. Next, cut out a piece of Prima Marketing white watercolor paper. Pop it into your Tonic StudiosΒ Tim Holtz Stamping Platform. Securing it into place. Stamp the Art Impressions floral stamp onto the…
Hello crafty friends! Tracy here and today I have a pretty little card to share today featuring Gateway Dies and the Cascading Wisteria collection from Heartfelt Creations. Here are all of the details. First I used my Heartfelt Creations Gateway dies to cut my layers from white and Luxe Gold Cardstock. To create my card base I folded a piece of white cardstock in half and die cut it using the largest die from the set, making sure to keep the card’s fold intact. I stamped and die cut all of the Wisteria images using Ranger Archival Ink- Coffee onto white cardstock, and added colour to the branches and flowers using Zig Clean Color Markers and a waterbrush. I added colour to the leaves using Ranger Distress Oxide Ink andΒ Heartfelt Creations Stack and Store Daubers. I shaped all of the flowers and leaves slightly using my shaping tool and…
Hello! Kim here with a quick card share using the Heartfelt Creations Summerβs Garden collection. For my card, I have used some patterned paper and the 2 craft die sets, shown in the photo below. These dies cut images found within the collection or can be used with coordinating stamps! The background of my card is cut from one sheet of patterned paper, to which I added some Therm-O-Web Transfer Gel Duo through a βwell lovedβ Stampers Anonymous stencil! I let the gel dry, then ran it through my laminator to apply some shimmery deco foil details. While the Transfer Gel Duo was drying I readied my elements for the card. I made my 3D flower, securing the layers with little snippets of my Elizabeth Craft Designsβ double-sided adhesive. I coloured my wooden sentiment [unknown supplier] with Rangerβs Distress Oxide Ink, Crackling Campfire was the perfect colour for my paper!…
Oh my – oh my – oh my! Hold the phone!Β I am IN LOVE with SEVERAL (if not all – giggle giggle) of the new releases from Impression Obsession – CLICK HERE to see them all – I will give you a minute or two π So many different designs to play with.Β The question is where does one start?!?!? LOLOLΒ Well they have the answer. A 2-DAY blog hop with their design team members creating and designing with their latest releases. The inspiration you will find here will KNOCK YOUR SOCKS OFF! It was super hard for me to pick a product and project to feature here in my blog post….. this post could be a mile long! Here is one of many cards, that stopped me in my tracks designed by Dina Kowal. STUNNING! Dina designed this card using the Impression Obsession Lotus Flower 3 stamp.Β Aswell…