Hey there everyone! Jackie Ludlage here today on the Creative Scrapbooker Magazine blog and in our latest web show – Basic Watercolor Backgrounds featuring Brea Reese.Β This little card was so easy to create. Not to mention, working with the Brea Reese watercolor inkΒ to create soft, subtle backgrounds is incredibly fool proof! Check it out. https://www.youtube.com/watch?v=_7-iMtFzRsQ SUPPLIES USED Art-C Stamps Brea Reese Watercolor Ink Brea Reese Fine Liner Pens Ranger Gesso Ranger Archival Ink Scrapbook Adhesives by 3L 3D Foam Squares Creative Scrapbooker Super Stock Tonic Studios Tim HoltzΒ Stamp Platform Be sure to follow Creative Scrapbooker Magazine on YouTube! Do not miss a single video! CLICK HERE Happy Scrapbooking EveryoneSubscribe today to Creative Scrapbooker Magazine – HOLD IT! READ IT! LOVE IT!
Nicole Wright is on our web show today with an easy way to create glitter backgrounds for your next homemade card.Β Adding glitter has never been easier! https://www.youtube.com/watch?v=nG1dHu66EME Nicole used the following supplies: Creative Scrapbooker Super Stock Ranger Distress Oxide Inks Scrapbook Adhesives by 3L Adhesive Sheets and E-Z Runner Grand Ranger Distress Glitter Stampers Anonymous Flower Jar Stamp Set Sizzix coordinating Framelits Like what you see? Be sure to follow Creative Scrapbooker Magazine on YouTube – CLICK HERE Happy Scrappin’ Everyone!Subscribe today to Creative Scrapbooker Magazine – HOLD IT! READ IT! LOVE IT!
Hello everyone! Nicole Wright here today on the Creative Scrapbooker Magazine creating a fun Christmas tag. Holiday crafting is in full swing and you may have a Christmas tag or two left to create. Today I am sharing this easy resist background for your next Christmas tag or any paper crafting project.Β Plaid is one of my favourite patterns and itβs even more fun to make your own background.Β This way you can coordinate any colour you want. Β Β It only takes a few easy steps and a lot of inky fingers. Lets get started. Putting Creative Scrapbooker Super Stock card stock through itβs paces with stenciling, embossing, spraying and inking for this tag.Β Start with the clear embossing powder and stencil to create the resist. Heat dry the spray stain and wipe the extra stain off the embossed pattern.Β The clear embossing powder creates the resist allowing the white background…
Hello everyone!Β Karen Ellis here on the Creative Scrapbooker Magazine blog today.Β For my turn on Tuesdayβs with the Team, I am happy to share with you a project close to my heart – cards of thanks and remembrance. Some of you may know that I am a reservist member of the Canadian Forces- CIC Branch.Β I work with our youth Cadet Program.Β This time of year is very special to me.Β I am honoured to wear the uniform and support our countryβs youth. Last month I attended ScrapFest at the CreativFestival in Toronto with the Creative Scrapbooker Magazine.Β It was a fabulous event that had not only some wonderful paper crafting vendors, but sewing and needlework vendors as well.Β Β One of the booths there represented Quilts of Valour – Canada Society.Β This is a great organization that provides quilts to Canadaβs injured forces members.Β I have provided this organization…
EEK… Halloween is coming and all things spooky!Β Hello my pretties Nicole Wright here today on the Creative Scrapbooker Magazine blog sharing this rich Halloween inspired card with this bold punch of colour. I have fallen in love with the Clearsnap carrot dye mini ink pad!There’s a fun team up this week withΒ XyronΒ andΒ Clearsnap.Β Β I got a little yummy box ofΒ Premium Dye Mini Ink PadsΒ and to my delight there was Carrot and Coal in there. I used the CarrotΒ Premium Dye Mini Ink PadsΒ ink and blended, blended and more blending.Β BAM… Now that’s a rich orange.Β I hauled out my Stamp Platform for precision!Β I wasn’t about to the ruin this inky masterpiece! In July I was in LasVegas so of course I had to go toΒ Viva Las Vegas StampsΒ where I found lots and lots… and lots of yummy stamps including theΒ Tree Writing Collage.Β I cut my “Wicked Halloween”, perfect for the Sticker…
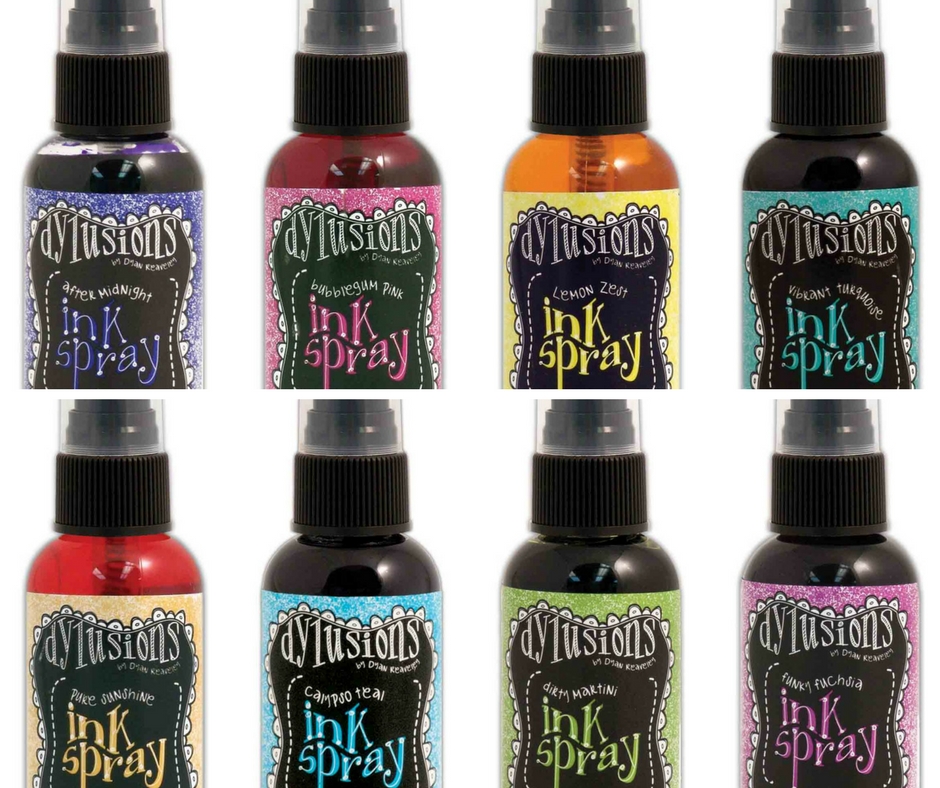
I LOVE this layout Christy Riopel designed for the Fall 2016 issue of Creative Scrapbooker Magazine. That beautiful background was created with Ranger Dylusions spray ink and paper towels! HOW COOL! Frugal Scrapbooker In every issue of Creative Scrapbooker Magazine our Frugal Scrapbooker Connie Nichol shares tips and tricks for keepping your scrapbooking budget from exploding. (this can happen :)) Β In the Fall 2016 issue, Connie shared tips for using scrapbook supplies from your kitchen. Everything from saran wrap, to cheesecloth, to pop can tabs. LOVE IT! This layout was Christy’s contribution to Connie’s article. She used paper towel to create that fun textured background. The Products The base of Christy’s layout is Creative Scrapbooker Super Stock. This is heavy Β 130lb white smooth finish cardstock. It is meant to take a lot of scrapbooking LOVE – giggle giggle. Perfect for stamping, card making and mixed media! Ranger Dylusions ink spray…
3-in-1 May Sketchy Challenge by Kerry Engel This monthβs Creative Scrapbooker Magazine Sketchy Challenge Β is bubbling with fun. There are so many ways to interpret this design. My daughter was home from University one weekend studying economics and finance. Her weekend was basically summed up by the fun emojis in Simple Stories Emoji Love collection. Itβs a great collection for telling stories without a lot of words.Supplies: Creative Scrapbooker Super Stock, Simple Stories Emoji Love collection, Scrapbook Adhesives by 3L. I wanna bring back βSticker Cardsβ. (Not sure βSticker Cardsβ was ever really a trend but they should have been because itβs quick and dirty). After spending a bit too much time figuring out where all those emojiβs should go on this page I decided to try whipping together a quick kid-friendly card from this same collection. I have been adding all the fun paper clips from Simple Stories as…
Hello everyone – Kerry Engel here!Iβve got a soft spot for Creative Memories. I started my scrapbooking journey with them 20 years ago. I have over 25 completed CM albums. All of my layouts have a home in one of their albums. Their latest collection is a hit with my youngest daughter. . . sheΒ loves the Β adorable big-eyed critters. Β Β When I saw the baby animals I thought theyβd rock a tag. Iβve been addicted to tags this year. I find them a fun alternative to cards and great additions to my scrapbook pages. 1. Make a βtagβ base. I made the big tags using a couple of CM punches and a sheet of stickers.To start, I cut rectangles from Creative Scrapbooker Super Stock and then used the CM 4-way Corner Punch to create funky scalloped corners and oblong hole. Give stickers dimension. I stuck some of the Woodland Whimsy…
Check out Kim Gowdy’s super fun party SPA invitations! SUPPLIES: Creative Scrapbooker Super Stock, Art Impressions stamps, Ranger distress crayons, Dylusions paint pen and Β ink, Fancy Pants Designs stickers, Bazzill Basics Paper cardstock, Tombow Mono Multi adhesive, unknown ribbon. TOTALLY love Art Impressions stamps – they are true SMILE MAKERS! Kim coloured her stamped images with Ranger distress crayons and Dylusions paint pen Finally she stuck everything together with Tombow Mono Multi adhesive Kim I hope you send me one of these invitations! Happy Sunday everyone! To see more of Kim’s work – visit her blog – It’s a Beautiful Day! For more spring and Easter inspiration, be sure to get a currentΒ copy of Creative Scrapbooker Magazine; itβs full of ideas!
Way up on the Mountain – Featuring BoBunny – Take a Hike By Kerry Engel Creative blocks? Do you every get them? Sometimes I move the photos around for days. They sit on the counter and everyday I come in and move them around until something jumps out for me. With this set of pictures my first impulse was my go-to βgrid layoutβ. This layout sat on my counter for a few days, it felt sort of boring, it didnβt get my mojo going. That goofy selfie photo made me laugh and I felt like it should be the dominant photo on the page. I also wanted more white space. Something that is hard to do with a set of photos that filled their frames. I also wanted to create some movement, this is when I decided on this layout. After I figured out how I wanted to position my…