


Hello! It’s Noreen from OrganizedandCreativeMom.com here to share some ideas, tips and tricks for using simple tools to create a fun, custom layout! We scrapbookers and papercrafters love, love, love our tools and are always excited to try out the latest and greatest, but it can be very satisfying to get back to basics and create with simple tools like stencils or templates, scissors and pens. 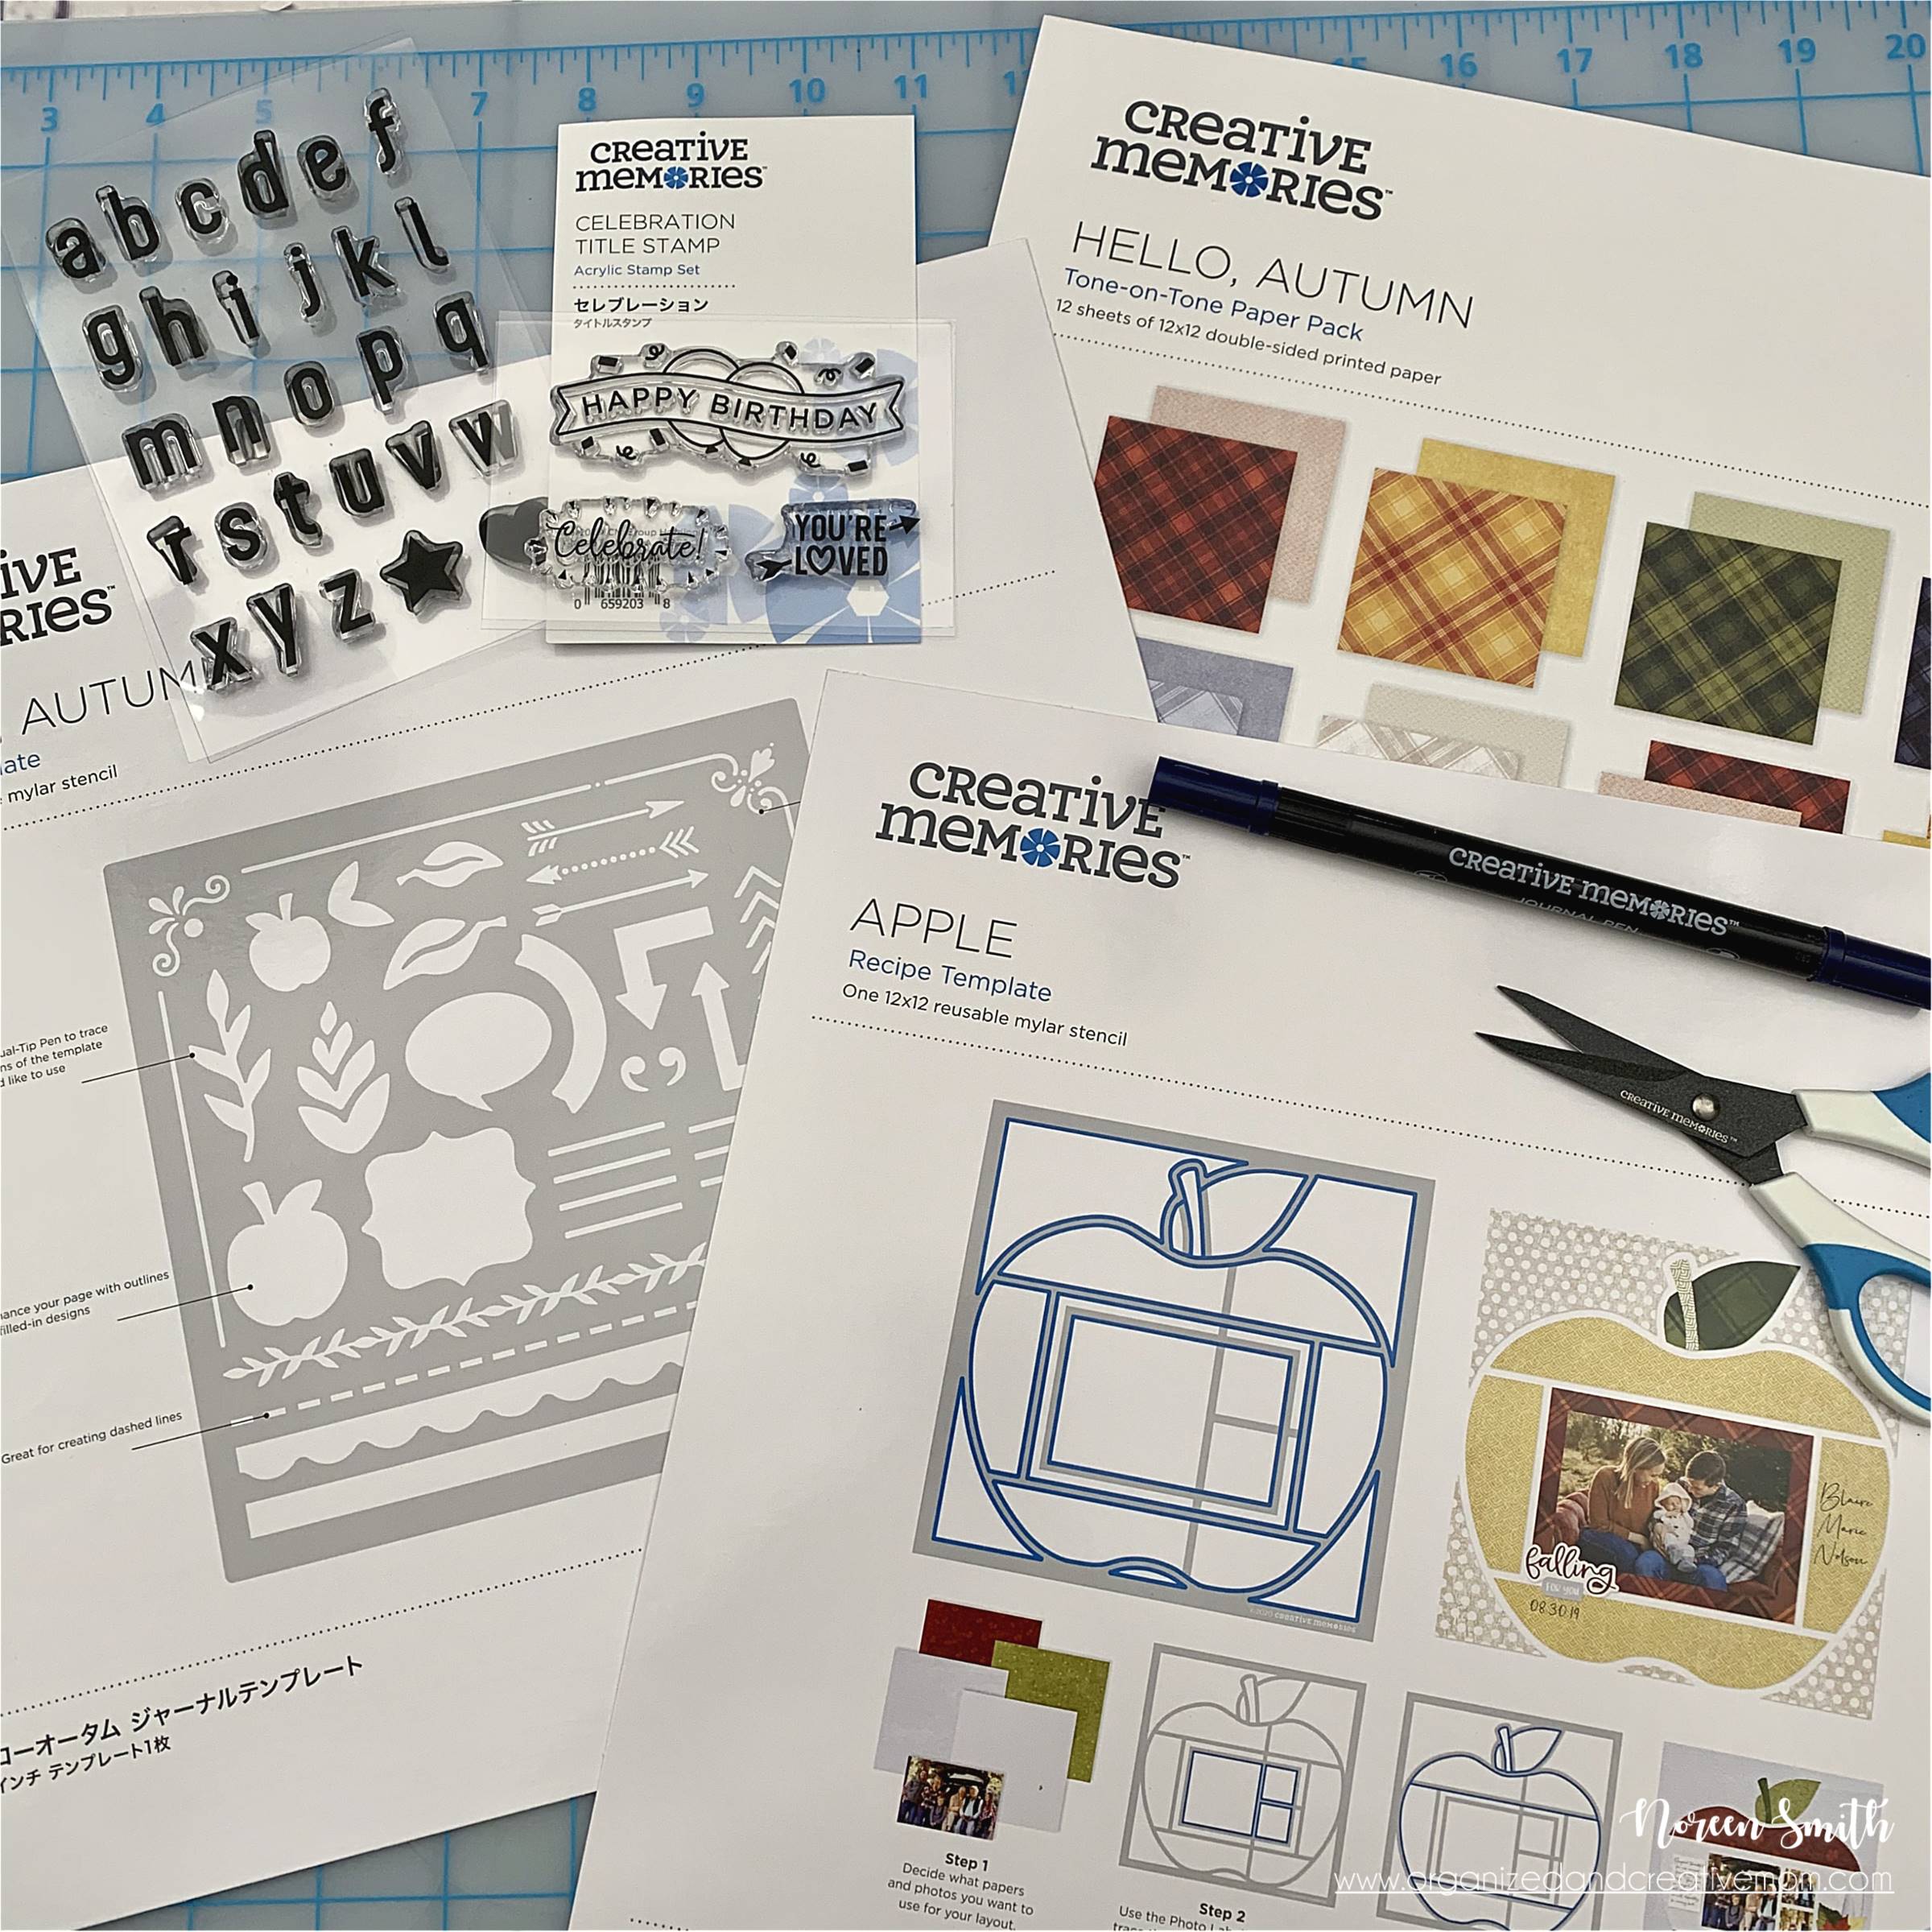 I had lots of fun using the Apple Recipe Template, Hello, Autumn Journal Template, Micro-Tip Scissors, Navy Dual-Tip Pen, Alphabet Stamp Kit System and Celebrations Title Stamp along with the lovely Hello, Autumn Tone-on-Tone Paper Pack to create an apple-themed layout!
 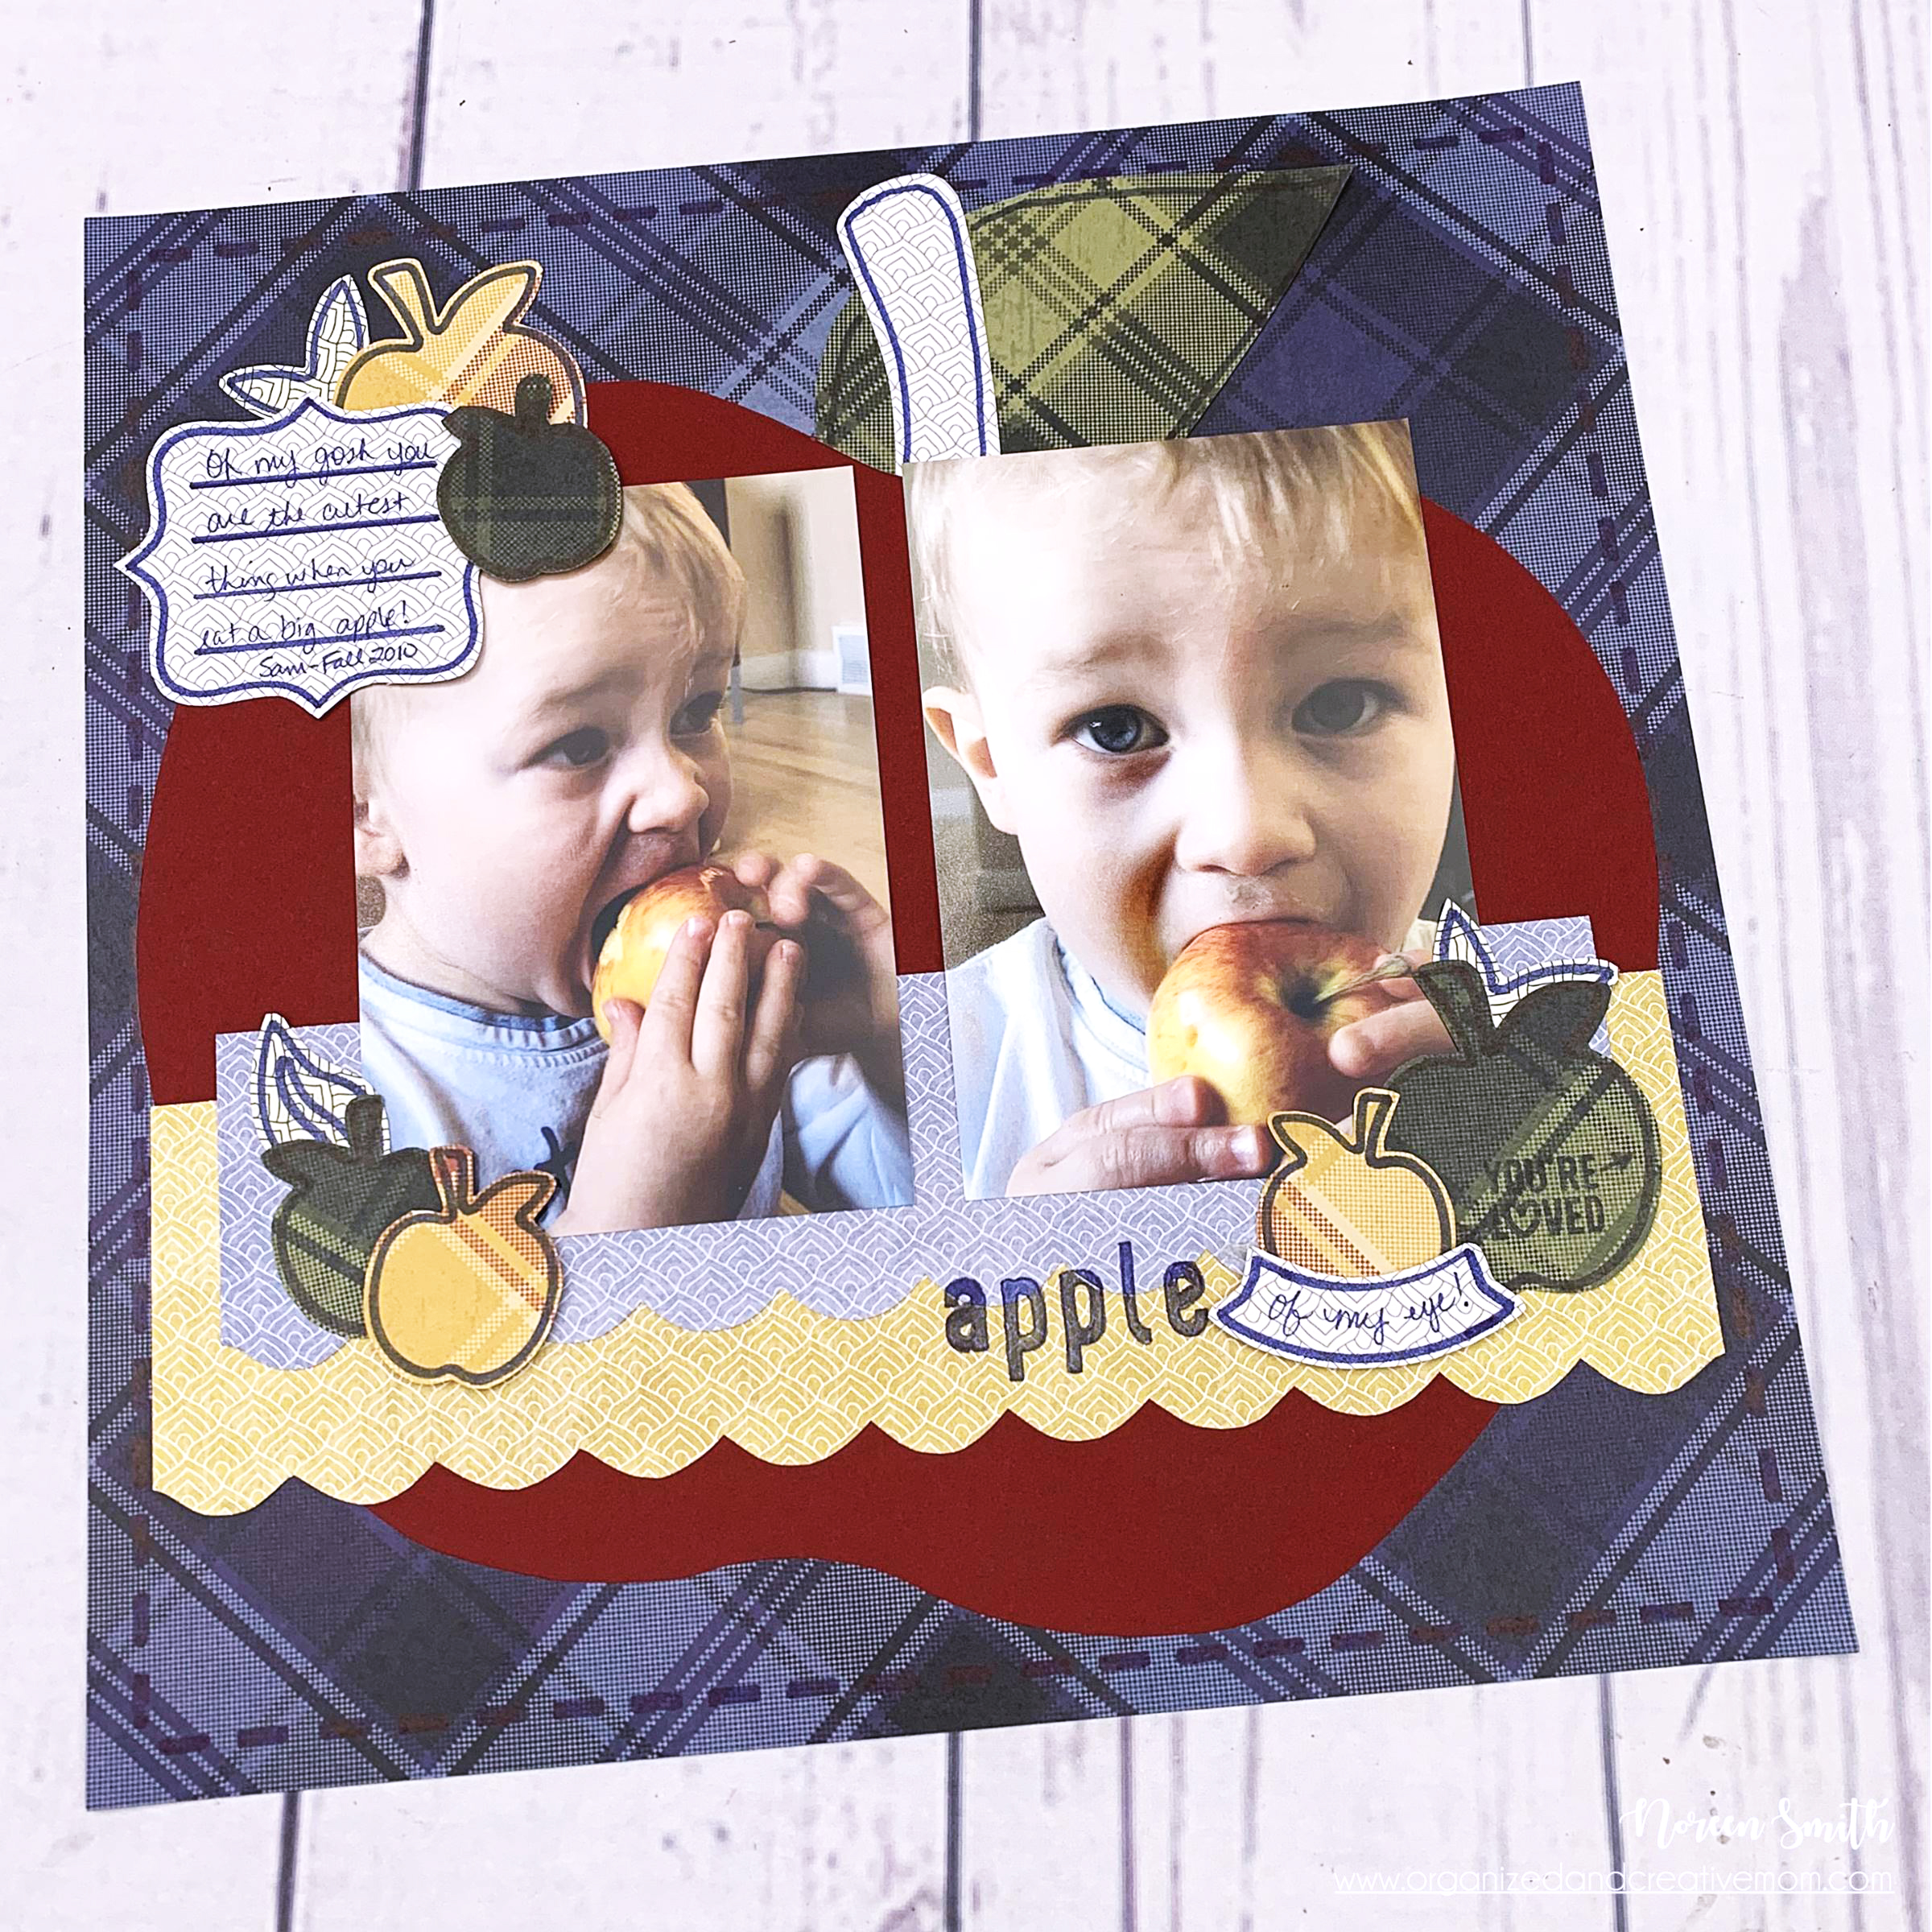 Here’s how to make it:
First, trace the outside edge of the apple on the Apple Recipe Template onto the rich Crimson Cardstock and cut it out with the Micro-Tip Scissors. Trace the leaf and stem shape onto the neutral monochromatic and green plaid paper from the Hello, Autumn Paper Pack and cut them out. Assemble the pieces together like a puzzle and adhere to create the large apple “die-cut” which forms the background of the page.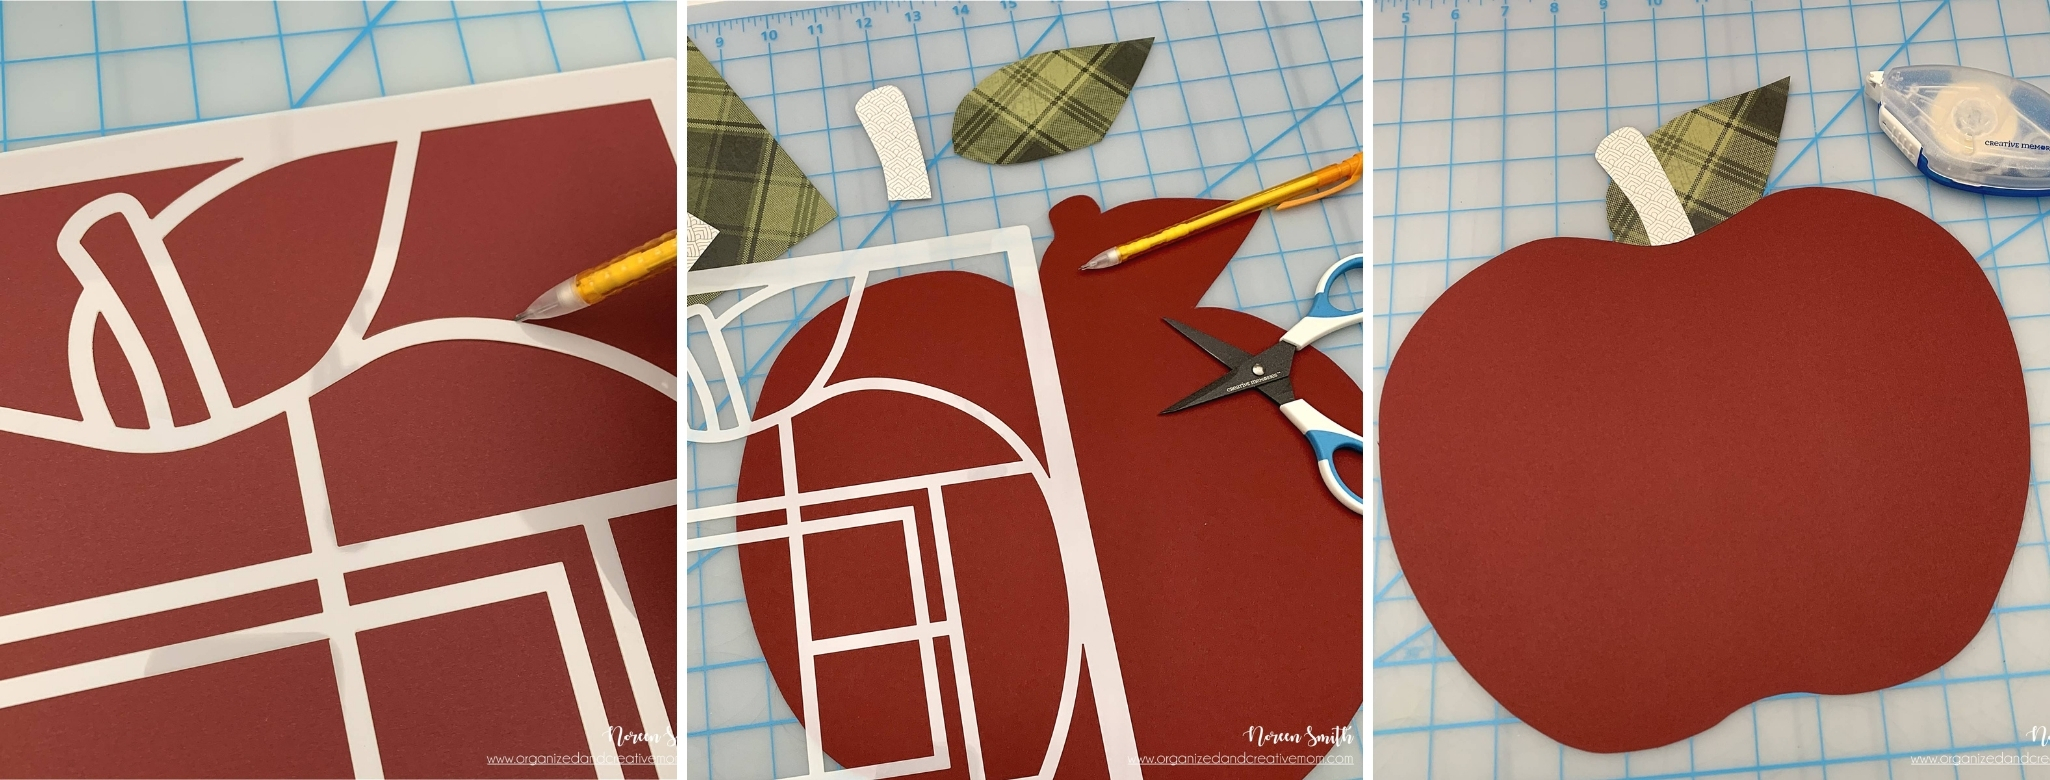
Cut a 3” x 11” strip from the orange monochromatic Hello, Autumn Tone-on-Tone paper. Line up the scallop shape on the Hello, Autumn Journaling Template with the bottom edge of the strip, trace the scallops and cut out. Erase any leftover pencil marks. Repeat with a 2” x 10” strip of the blue monochromatic Hello, Autumn Tone-on-Tone paper. Mount the large apple and layer the strips onto a piece of navy plaid paper from the Hello, Autumn Tone-on-Tone paper. 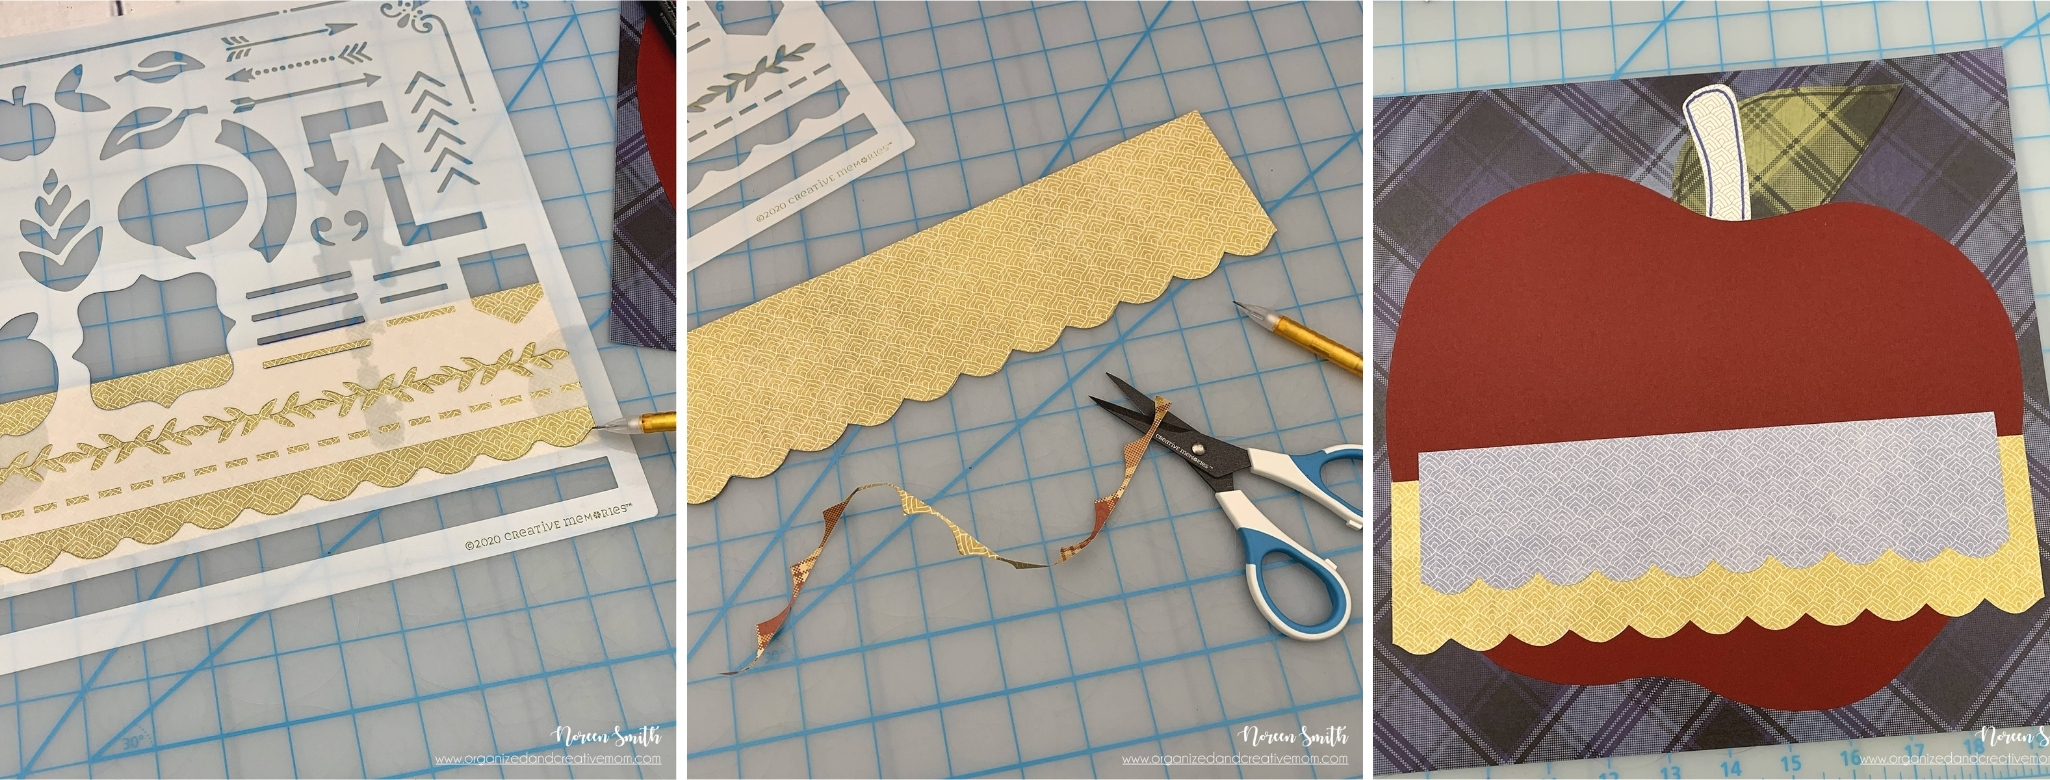 Mount two 4” x 6” photos on top of the blue monochromatic strip. Create apples, leaves, a banner and a journal bracket with the Hello, Autumn Journal Template: place the template onto patterned paper (or cardstock) and trace around the inside of each shape with the Navy Dual-Tip Pen. Cut out each shape, leaving a small border showing. Repeat until you have several embellishments. Write your journaling onto the journal bracket with the fine-tip end of the pen, then cluster, layer and adhere the journal shape and embellishments as shown on the layout. Trace the line of dashes along the edges of the layout to create a perfect faux-stitched look!
 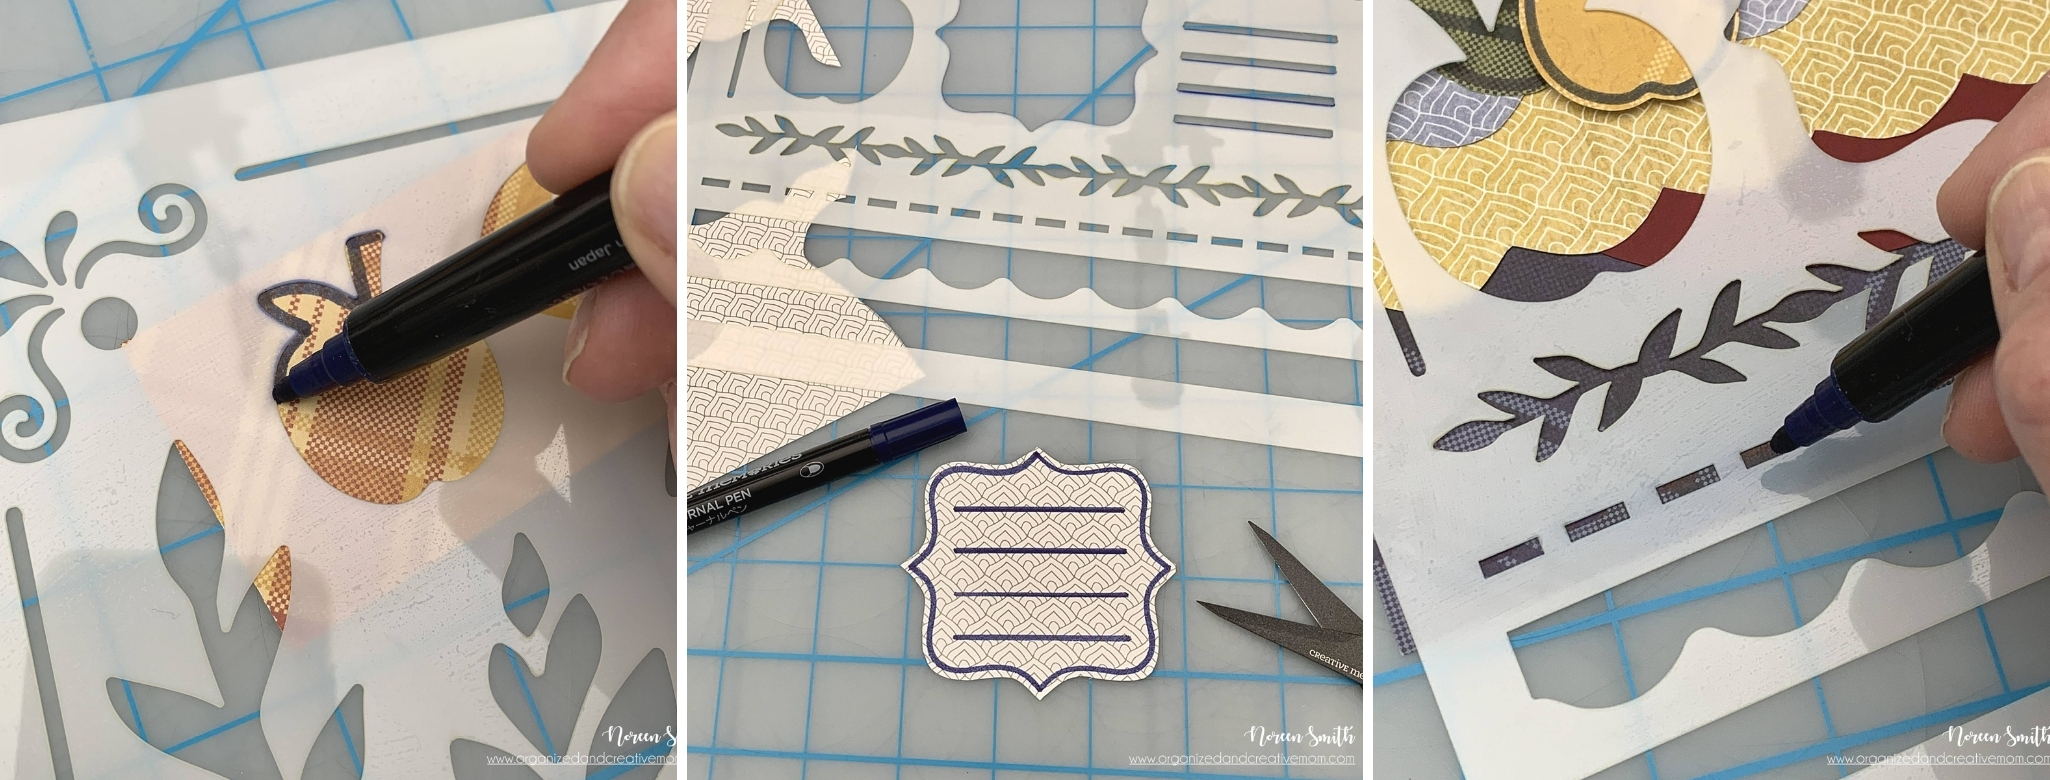 Use the bold tip end of the pen to ink up the “You’re Loved” stamp from the Celebrations Title Stamp set and stamp onto a large apple embellishment. Repeat for the word “apple” using the lower-case alphas from the Stamp Kit System. Write “of my eye” on the banner strip and adhere beside the stamped word for form the title. Add the apple with the “You’re Loved” stamp to finish the title cluster. Tip: If you want to “clean up” any stamped images, use the fine tip end of the pen to draw a fine line around the edges!
  It was so very satisfying to create a layout by simply tracing and cutting and stamping! I hope you give yourself some time to play with these or other similar products to create a custom, handcrafted layout! Here’s another look at it:
  If you like the Hello, Autumn papers featured in this layout, make sure to join me for my FREE Hello, Autumn class during the 2020 Great Canadian Virtual Scrapbook Carnival hosted by Creative Scrapbooker Magazine on Friday, September 25th!
  I’ll be sharing how you can create the base pages for SIX double-page spreads in just an hour!
  See you then!

*All Creative Memories products featured in these projects are available in Canada on my CM website, and you can find CM advisors in the US and other countries by using the Advisor Lookup feature. Please drop by my blog, Facebook Page, YouTube Channel or my Instagram feed for more ideas and inspiration – I create layout sketches, cards and other projects which showcase Creative Memories products & tools on a regular basis.
SUBSCRIBE TODAY to our quarterly publication – delivered right to your door


2 Comments
Wowsers Noreen, fabulous layout ❤🍁🍂
Pingback: Apple Layout – Scrap Booking