Are you ready for some heartwarming coffee crafting inspiration? ☕✨ Pam Bray Designs, in collaboration with Emerald Creek, brings caffeine-fueled creativity straight to your craft room with her beautifully coordinated “Coffee Delight” collection! From cling mount rubber stamps to charming 12×12 designer papers and ephemera, this line is a must-have for cardmakers, scrapbookers, and mixed media enthusiasts alike. Featured here is a gorgeous handmade card designed by Pam herself, using the adorable mug and sentiment stamps, along with coordinating patterned papers that add rich detail and texture. ❤️ Featured Emerald Creek Products: Pam Bray Designs Cling Mount Coffee Sentiment Stamps Pam Bray Designs Coffee Cups Rubber Stamps Pam Bray Deigns coffee Delight 12×12 Paper Collection Whether you’re sipping on your favorite brew or dreaming up your next layout, coffee crafting with Emerald Creek Pam Bray Designs is sure to warm your soul. Perfect for celebrating friendships, daily pick-me-ups, and everything…
Wow! We absolutely adore this stunning whimsical gnome scene card designed by Diane Mason for Art Impressions. Diane has masterfully crafted a charming scene featuring a delightful gnome resting on a bench, surrounded by a lush landscape and whimsical mushrooms. This enchanting design is anchored by the Art Impressions Woodland Castle Stamp Set, bringing a fairytale-like quality to the card. Diane meticulously created this scene using watercolour paper, which she colored with Tombow Dual Brush Pens. The blend of vibrant colors and intricate stamp designs results in a card that truly stands out. The Art Impressions Gnome Stamp Set adds a playful touch with the sweet little gnome, while the Whimsical Mushrooms stamp set perfectly complements the design, making it an absolute must-see for any cardmaking enthusiast. Want to see how Diane brought this scene to life? Head over to the Art Impressions Blog for a detailed step-by-step guide on…
If you’re looking to create a magical card with Lavinia Stamps, this Lavinia Stamps Fairy Card Tutorial designed by Cathie Allan will guide you through every step. From using the White Orbs stencil to stamping the delicate Seren fairy, this tutorial ensures you can craft a beautiful card with ease. Supplies You’ll Need Lavinia Stamps: White Orbs Stencil, Seren Stamp, Balance Stamp VersaColor Pigment Ink: White, Bamboo, Green Tea, Peony Creative Scrapbooker Super Stock VersaFine Pigment Ink – Onyx Black Blending Brushes Foam Tip Blending Brushes Various Size Circle Stencil Slightly Damp Baby Wipe Step-by-Step Instructions Step 1: Prepare Your Cardstock Panel Start by placing the White Orbs stencil onto a piece of Creative Scrapbooker Super Stock. Using a foam tip ink applicator, pounce white pigment ink through the stencil to create the first layer of your background. Allow the ink to dry slightly. Step 2: Apply Bamboo Ink Next,…
Step-by-Step Guide to Stamping Backgrounds with Pink & Main and Cathie Allan Creating unique and eye-catching stamping backgrounds is a fantastic way to add depth and interest to your handmade cards. In this step-by-step guide, designer Cathie Allan demonstrates how to use Pink & Main products to craft a stunning birthday card. The keyphrase for this tutorial is Stamping Backgrounds—a technique that can transform your projects into extraordinary works of art. Follow along to create your own masterpiece, and be sure to watch the accompanying YouTube video for a complete walkthrough. Here is a side view of Cathie’s card. Step 1: Creating the Stenciled Background Start by die-cutting the Pink & Main leaf die from heavy cardstock to create a stencil. Place the stencil on a white piece of cardstock. Using a blending foam, pounce umber ink through the stencil. After removing the stencil, gently blend the color around the…
Happy Summer, crafty friends! Heather Fischer here today on the Creative Scrapbooker Magazine blog. Thank you for stopping by to get a closer look at these cards I created using the Pink & Main Special Day kit. This kit is part of their monthly subscriptions, and you won’t want to miss it! This kit is FULL of bright and cheerful elements—the Colourful Ink Spots 6×6 paper pad is amazing!! Loving all the fun colours and patterns in it, and it really got my creative juices flowing! I based the card designs on these patterned papers and incorporated many of the other items in the kit. Card 1 – Happy Birthday to You Circles…who doesn’t love circles?! I used my Prism Studio Stitched Circle Die Set to cut out five different sized circles of the Colourful Ink Spots papers. I love circles too, and this card was quick to make! Instead…
Creating beautiful cards with Prism Studio, Stampers Anonymous, Ranger and Scrapbook Adhesives by 3L is a delightful way to express your creativity. Here is the “A Little Birdie Told Me” card designed by Karla Yungwirth. Follow this step-by-step guide to re-create Karla’s stunning card Materials Needed: Prism Studio – Acrylic Paint Markers – Canvas Paper – Cardstock – Glitter Cardstock – Blending Brushes – Dies Stampers Anonymous Tim Holtz – Stamps – Stencil Scrapbook Adhesives by 3L – Adhesive Dots – 3D Foam Squares – Tape Runner Ranger Tim Holtz Distress Ink The Robin’s Nest Dew Drops Step-by-Step Instructions: Prepare the Canvas Paper: Scribble Prism Studio paint markers on canvas paper. Add water to the canvas and use a paintbrush to spread and blend the colors. This creates a vibrant and unique background. 2. Enhance the Background: Once the paint has dried, use a Stampers Anonymous Tim Holtz background stamp…
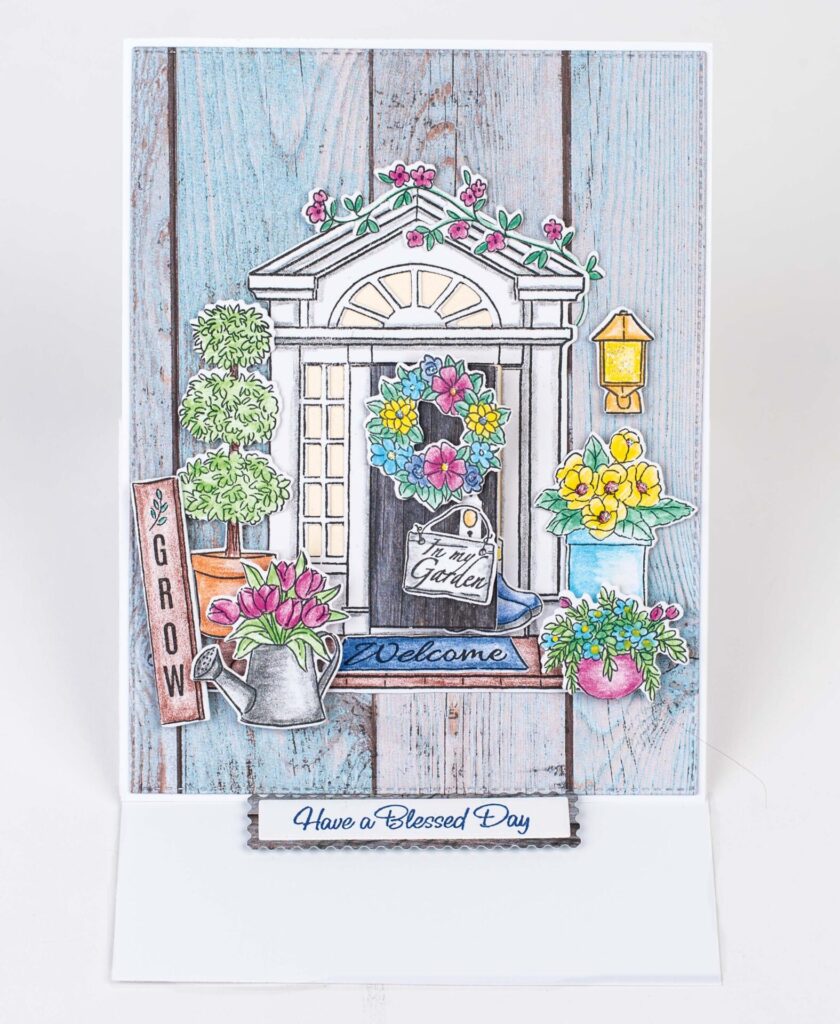
Create this charming Summer Porch Easel Card with Art Impressions Front Porch stamp and die sets created by Karla Yungwrith. Along with a variety of our favourite paper crafting products. Follow this comprehensive guide to achieve a beautiful, dimensional card perfect for any occasion. Below is a detailed step-by-step tutorial to make this stunning card. Materials Needed Art Impressions Front Porch Stamp Set and Die Set Art Impressions Front Porch Garden Stamp Set and Die Set Black Ranger Archival Ink White Prism Studio Cardstock Prism Studio Colored Pencils Elizabeth Craft Designs Wood-Grain Patterned Paper OLFA Scissors OLFA Knife Bone Folder Prism Studio Stitched Nesting Dies Scrapbook Adhesives by 3L Step-by-Step Instructions Step 1: Stamp the Images Stamping: Begin by stamping the images from the main Art Impressions Front Porch stamp set and the Art Impressions Front Porch Garden stamp set onto white Prism Studio cardstock using black Ranger Archival Ink.…
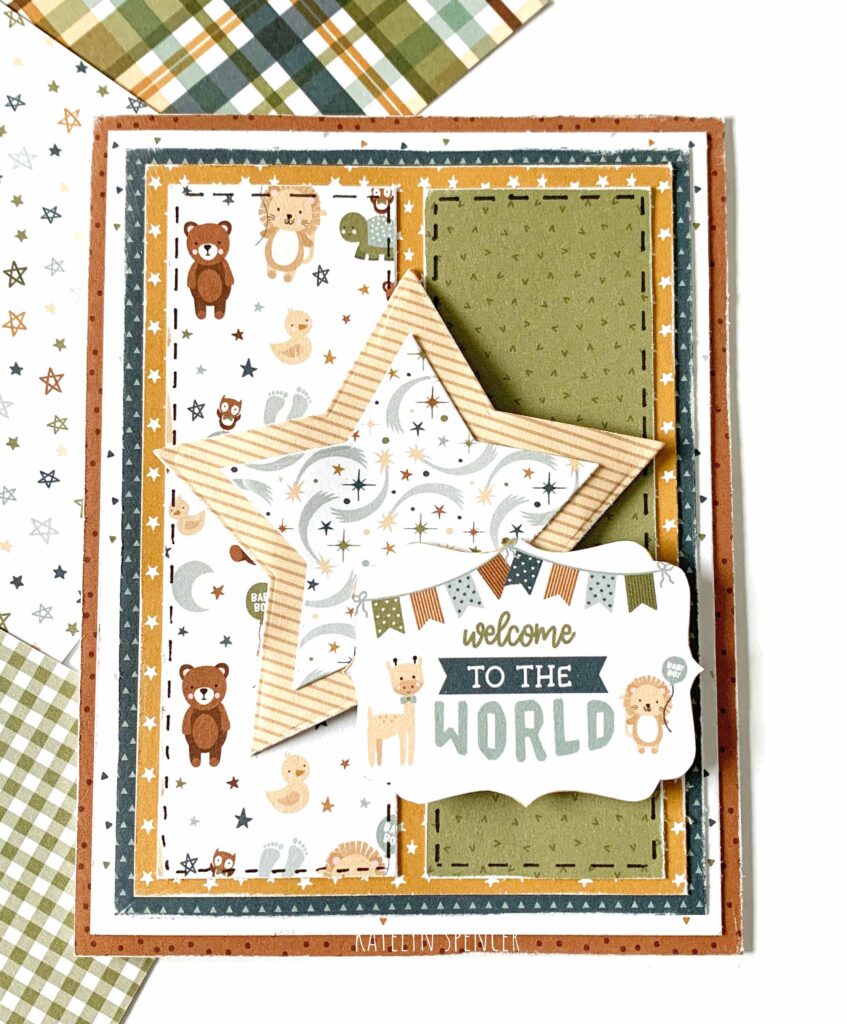
Hey Creative Scrapbooker Fans! For today’s blogpost, I’m sharing with you how to create a Welcome to the World Card which uses the Echo Park Paper Co. Special Delivery Baby Boy Collection.I also used the Fitted Star dies from Elizabeth Craft Designs Along with Super Stock from Creative Scrapbooker Magazine and I adhered everything together using a variety of adhesives by Scrapbook Adhesives by 3L. You’ll want to grab a cup of your favourite beverage and learn how to recreate my card at home. To start, you’ll need the terra cotta dot paper out of the Echo Park Paper Co. Special Delivery Baby Boy collection 6×6 Paper Pad. Cut a piece that measures 4 ¼” x 5 ½”. Flip the paper over and cut a piece that measures 1 ½” x 4 ½”. Sand the edges of both papers. Next, you’ll need the multi coloured triangle paper out of the…
Happy Easter season, friends!! Heather Fischer here today showing you how I created these super cute & simple Easter cards with just a few products!! These can be easily replicated with the Simple Stories Hoppy Easter 12×12 Simple Kit. Aswell as just a few pieces from the Simple Stories Hoppy Easter Page Pieces. I pulled out some coordinating cardstock from Prism Studio. Along with the Prism Studio Stitched Squares die set and the Prism Studio Stitched Scalloped Rectangles die set. I love the weight of the Prism Studio cardstock…it’s perfect for card bases and all my paper crafting needs!! I have a variety of the Prism Studio stacking die sets, and you cannot beat the price for these along with the quality. Easter is one of my favourite seasons to celebrate, I always send out cards and decorate the house because the decorations are just too cute and Easter reminds…
Are the birds out singing in your backyard yet? I can hardly wait for spring in my neck of the woods! While I wait for the snow to melt and spring to start I thought I would share how I created the watercolour bird embellishment featuring Prism Studio. Here are the step-by-step instructions: Die cut the Prism Studio bird die, using Prism Studio watercolour paper. Colour the different elements of the bird die cut, using Prism Studio pencil crayons, a paintbrush, and water. Adhere all the elements of the bird together. Die cut a rectangle panel, using Prism Studio rectangle stitched die and solar white ultra smooth cardstock. Emboss the panel with an Altenew 3D embossing folder. Colour the raised elements of the panel with Prism Studio pencil crayons and water. Die cut a sentiment. Assemble the card, and adhere to a card base. We are SUPER DUPER excited to…


