


Hey Creative Scrapbooker Fans! For today’s blogpost, I’m sharing with you how to create this Hello Sunshine Card which uses the Carta Bella Flower Garden Collection from Echo Park Paper.  Dies from Elizabeth Craft Designs.
  Super Stock from Creative Scrapbooker Magazine, Ink from Ranger Ink and adhesive from Scrapbook Adhesives by 3L.
 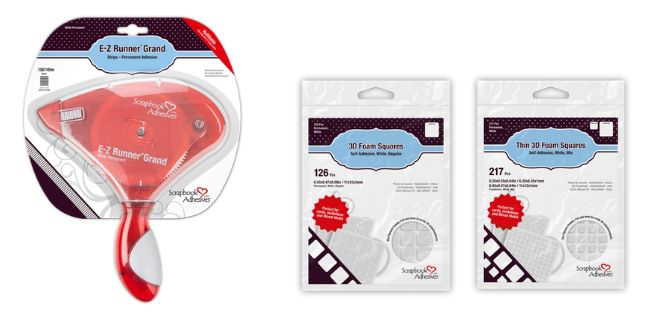 You’ll want to grab a cup of your favourite beverage and learn how to recreate my card at home.
  To start, you’ll need the Beautiful Day Floral Paper out of the Flower Garden Paper Pack from Echo Park Paper. Die cut a 4” Stitched Indented Rectangle from Elizabeth Craft Designs out of the patterned paper. Ink the edges of the rectangle using Black Soot Distress Ink and a Blending Tool with Foam from Ranger Ink.
  Next, you’ll need the Bloom & Grow Paper out of the Flower Garden Paper Pack from Echo Park Paper. Die cut a 3 ¾” Fitted Indented Rectangle from Elizabeth Craft Designs out of the patterned paper. Ink the edges of the rectangle using Black Soot Distress Ink and a Blending Tool with Foam from Ranger Ink.
  Now, you’ll need the Lovely Floral Paper out of the Flower Garden Paper Pack from Echo Park Paper. Die cut a 3 ½” Stitched Indented Rectangle from Elizabeth Craft Designs out of the patterned paper. Ink the edges of the rectangle using Black Soot Distress Ink and a Blending Tool with Foam from Ranger Ink.
  Next, you’ll need the 4×4 Journaling Cards Paper out of the Flower Garden Paper Pack from Echo Park Paper. Cut out the Bloom and grow card as well as fussy cut the cream window out. Trim the Bloom and Grow card down to 3 ¼” x 4”. Flip the 3 ¼” card over so that the patterned side is showing. Ink the edges of the 3 ¼” card and the window using Black Soot Distress Ink and a Blending Tool with Foam from Ranger Ink.
  Now, you’ll need the 3×4 Journaling Cards Paper out of the Flower Garden Paper Pack from Echo Park Paper. Fussy cut the Seed image, the green window and the flower cart. Ink the edges of the cut out images using Black Soot Distress Ink and a Blending Tool with Foam from Ranger Ink.
  Next, you’ll need the Love You Tags Paper out of the Flower Garden Paper Pack from Echo Park Paper. Fussy cut the pink pitcher and blue boots out. Ink the edges of the fussy cut images using Black Soot Distress Ink and a Blending Tool with Foam from Ranger Ink.
  You’ll need the Seeds Paper out of the Flower Garden Paper Pack from Echo Park Paper. Cut out one of the seed packets out that has leaves on it. Ink the edges of the seed packet using Black Soot Distress Ink and a Blending Tool with Foam from Ranger Ink.
  Next, you’ll need the Element Stickers out of the Flower Garden Paper Pack from Echo Park Paper. Cut the floral border sticker down to 3 5/8”. You’ll also need the hello sunshine word strip and the hanging florals. Ink the edges of the stickers using Black Soot Distress Ink and a Blending Tool with Foam from Ranger Ink. Set the stickers aside.
  Use E-Z Runner from Scrapbook Adhesives by 3L to adhere the 3 ¾” rectangle to the 4” rectangle. Adhere the 3 ½” rectangle to the 3 ¾” rectangle.
  Use 3D Foam Squares from Scrapbook Adhesives by 3L to adhere the 3 ¼” floral piece 3/8” from the bottom and ¼” from the left of the 3 ½” rectangle. Adhere the floral border 1/8” from the bottom of the 3 ¼” floral piece you just adhered. Use E-Z Runner from Scrapbook Adhesives by 3L to adhere the large seed image ¼” from the bottom and ½” from the left of the 3 ½” rectangle.
  Lift upleft side of the seed image. Use E-Z Runner from Scrapbook Adhesives by 3L to the small seed packet ½” from the left and 1 ¾” from the top of the 3 ½” rectangle. Use 3D Foam Squares from Scrapbook Adhesives by 3L to adhere the green window 5/8” from the bottom and ¾” from the left of the 3 ½” rectangle. Use E-Z Runner and 3D Foam Squares from Scrapbook Adhesives by 3L to adhere the cream window 1/8” from the bottom and 1” from the left of the 3 ½” rectangle.
  Use E-Z Runner Grand from Scrapbook Adhesives by 3L to adhere the pink pitcher to the bottom right side of the flower cart as desired. Use 3D Foam Squares from Scrapbook Adhesives by 3L to adhere the flower cart ¼” from the bottom and 7/8” from the left of the 3 ½” rectangle. Use E-Z Runner Grand from Scrapbook Adhesives by 3L to adhere the boot to the bottom right side of the flower cart.
  Adhere the Hello Sunshine word strip to the bottom portion of the flower cart as desired. Adhere the hanging floral to the top right corner of the rectangles as desired.
  To finish the card, cut a cardbase out of Super Stock from Creative Scrapbooker Magazine that measures 4” x 10 ½”, score at 5 ¼”. Use E-Z Runner from Scrapbook Adhesives by 3L to adhere the cardfront to the cardbase.
  Here are a few closeup photos of my card.
  Thank you for joining me today and taking the time to check out my blog post. I hope that my Hello Sunshine Card has inspired you to recreate your own at home.
Happy Creating!

You can find more of my work on my blog at: http://www.katelyngrosart.blogspot.ca
Supplies Used:
Ranger
– Distress Ink – Black Soot
– Blending Tool with Foam
Echo Park Paper
– Carta Bella Paper Co. Flower Garden Collection
Creative Scrapbooker Magazine
– Super Stock
Elizabeth Craft Designs
– Stitched Indented Rectangles Dies
– Fitted Indented Rectangles Dies
Scrapbook Adhesives by 3L
– 3D Foam Squares
– E-Z Runner Grand Permanent Tape


