Step-by-Step Guide to Stamping Backgrounds with Pink & Main and Cathie Allan Creating unique and eye-catching stamping backgrounds is a fantastic way to add depth and interest to your handmade cards. In this step-by-step guide, designer Cathie Allan demonstrates how to use Pink & Main products to craft a stunning birthday card. The keyphrase for this tutorial is Stamping Backgroundsโa technique that can transform your projects into extraordinary works of art. Follow along to create your own masterpiece, and be sure to watch the accompanying YouTube video for a complete walkthrough. Here is a side view of Cathie’s card. Step 1: Creating the Stenciled Background Start by die-cutting the Pink & Main leaf die from heavy cardstock to create a stencil. Place the stencil on a white piece of cardstock. Using a blending foam, pounce umber ink through the stencil. After removing the stencil, gently blend the color around the…
Happy Summer, crafty friends! Heather Fischer here today on the Creative Scrapbooker Magazine blog. Thank you for stopping by to get a closer look at these cards I created using the Pink & Main Special Day kit. This kit is part of their monthly subscriptions, and you won’t want to miss it! This kit is FULL of bright and cheerful elementsโthe Colourful Ink Spots 6×6 paper pad is amazing!! Loving all the fun colours and patterns in it, and it really got my creative juices flowing! I based the card designs on these patterned papers and incorporated many of the other items in the kit. Card 1 – Happy Birthday to You Circlesโฆwho doesnโt love circles?! I used my Prism Studio Stitched Circle Die Set to cut out five different sized circles of the Colourful Ink Spots papers. I love circles too, and this card was quick to make! Instead…
Create a Stunning Butterfly Card with Therm O Web Deco Foil Get ready to add some shimmer and shine to your card-making projects! In this tutorial, we’ll show you how to create a gorgeous butterfly card using Therm O Web foil products. This project, crafted by the talented Karla Yungwirth, showcases the magic of Therm O Web Deco Foil Toner Card Fronts, iCraft Deco Foil Brutus Monroe Magical Monarch die set, stamp set, and coordinating stencil. Follow along and bring a touch of elegance to your card designs. Materials Used: Therm O Web Deco Foil Toner Card Fronts Therm O Web iCraft Deco Foil Brutus Monroe Magical Monarch die set, stamp set, and coordinating stencil Therm O Web iCraft Memory Tape Runner Therm O Web Gina K. Designs Fancy Foils Therm O Web iCraft Pixie Tape Therm O Web Deco Foil Craft & Carrier Sheets Prism Studio Stitched Scalloped Rectangle…
Are you looking for a fun and unique way to craft a birthday card? Look no further! Using the Art Impressions Frog Stamp Set, you can create a delightful and vibrant card that will bring a smile to anyone’s face. In this blog post, we’ll take you through the materials needed to create this playful handmade card, and you can watch the full-length video by Cathie Allan to see the entire process in action. Full Supply List Stamps and Dies Art Impressions Frog Stamp Set Art Impressions Tag Stitched Die Set Inks and Coloring Tools VersaColor Pigment Ink VersaFine Black Ink Faber-Castell Pitt Artist Brush Pens Sharpie Black Marker Cardstock and Papers Creative Scrapbooker Super Stock Adhesives Sookwang Double-Sided Tape Tools and Embellishments Blending Brushes Tonic Studios Nuvo Crystal Glaze The Robinโs Nest Creative Dew Drops Here is a close up shot of Cathie’s card Watch the Full-Length Video For…
Creating beautiful cards with Prism Studio, Stampers Anonymous, Ranger and Scrapbook Adhesives by 3L is a delightful way to express your creativity. Here is the “A Little Birdie Told Me” card designed by Karla Yungwirth. Follow this step-by-step guide to re-create Karla’s stunning card Materials Needed: Prism Studio – Acrylic Paint Markers ย – Canvas Paper – Cardstock – Glitter Cardstock – Blending Brushes – Dies Stampers Anonymous Tim Holtz – Stamps – Stencil Scrapbook Adhesives by 3L – Adhesive Dots – 3D Foam Squares – Tape Runner Ranger Tim Holtz Distress Ink The Robin’s Nest Dew Drops Step-by-Step Instructions: Prepare the Canvas Paper: Scribble Prism Studio paint markers on canvas paper. Add water to the canvas and use a paintbrush to spread and blend the colors. This creates a vibrant and unique background. 2. Enhance the Background: Once the paint has dried, use a Stampers Anonymous Tim Holtz background stamp…
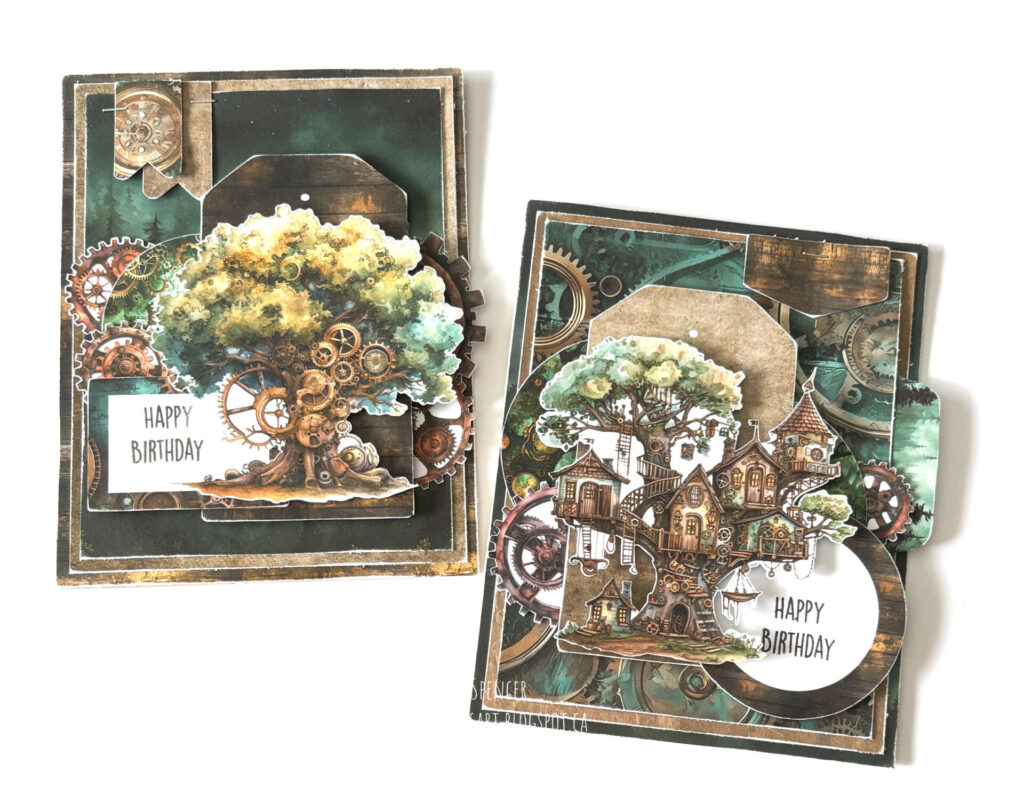
Hey Creative Scrapbooker Fans! For todayโs blog post, Iโm sharing with you how to create these masculine Happy Birthday Cards using the Cogwood Grove Collection from Simply Stated Design. The Build Your Own Sentiments 1 stamp set from Elizabeth Craft DesignsA variety of adhesives from Scrapbook Adhesives by 3L – including the E-Z Runner Grand and 3D Foam Squares. Creative Scrapbooker Super Stock and Ranger Tim Holtz Distress ink.ย Grab a cup of your favorite beverage and follow along to recreate these cards at home. Instructions for the Tree Happy Birthday Card: Cut the woodgrain paper to 4 ยผโ x 5 ยฝโ, the tan paper to 4โ x 5 ยผโ, and the forest paper to 3 ยพโ x 5โ from the Cogwood Grove Paper 9 by Simply Stated Design. Sand the edges of all three papers. From the Cogwood Grove Trees Ephemera by Simply Stated Design, select the tree with…
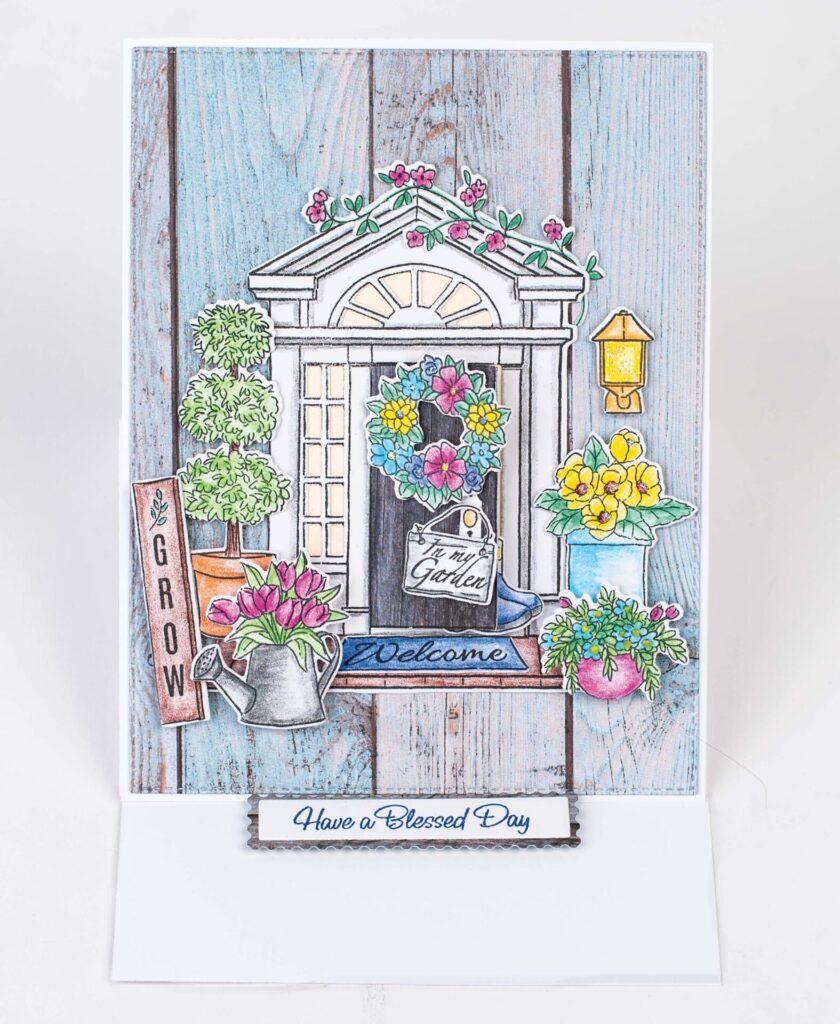
Create this charming Summer Porch Easel Card withย Art Impressions Front Porch stamp and die setsย created by Karla Yungwrith. Along with a variety of our favourite paper crafting products. Follow this comprehensive guide to achieve a beautiful, dimensional card perfect for any occasion. Below is a detailed step-by-step tutorial to make this stunning card. Materials Needed Art Impressions Front Porch Stamp Set and Die Set Art Impressions Front Porch Garden Stamp Set and Die Set Black Ranger Archival Ink White Prism Studio Cardstock Prism Studio Colored Pencils Elizabeth Craft Designs Wood-Grain Patterned Paper OLFA Scissors OLFAย Knife Bone Folder Prism Studio Stitched Nesting Dies Scrapbook Adhesives by 3L Step-by-Step Instructions Step 1: Stamp the Images Stamping: Begin by stamping the images from the main Art Impressions Front Porch stamp set and the Art Impressions Front Porch Garden stamp set onto white Prism Studio cardstock using black Ranger Archival Ink.…
Hey Creative Scrapbooker Fans! For todayโs blogpost, Iโm sharing with you how I created these beautiful vintage Inspirational Tags. To create these tag, I used the Simple Vintage Essentials Color Palette Collection from Simple Stories Aswell as a variety of adhesives from Scrapbook Adhesives by 3L. Youโll want to grab a cup of your favourite beverage and learn how to create my Inspirational Tags. To start, weโll create the wander tag. Choose one of the tags off of the Blue & Purple Tags out of the Simple Vintage Essentials Color Palette Tags Kit from Simple Stories. Sand the edges of the tag. Next, youโll need the Purple Collage paper out of the Simple Vintage Essentials Color Palette Collection from Simple Stories. Fussy cut out the paper the purple flowers, purple circle, key and strip with words. Cut the strip with words to 5/8โ x 3 ยผโ. ย Sand the edges of…
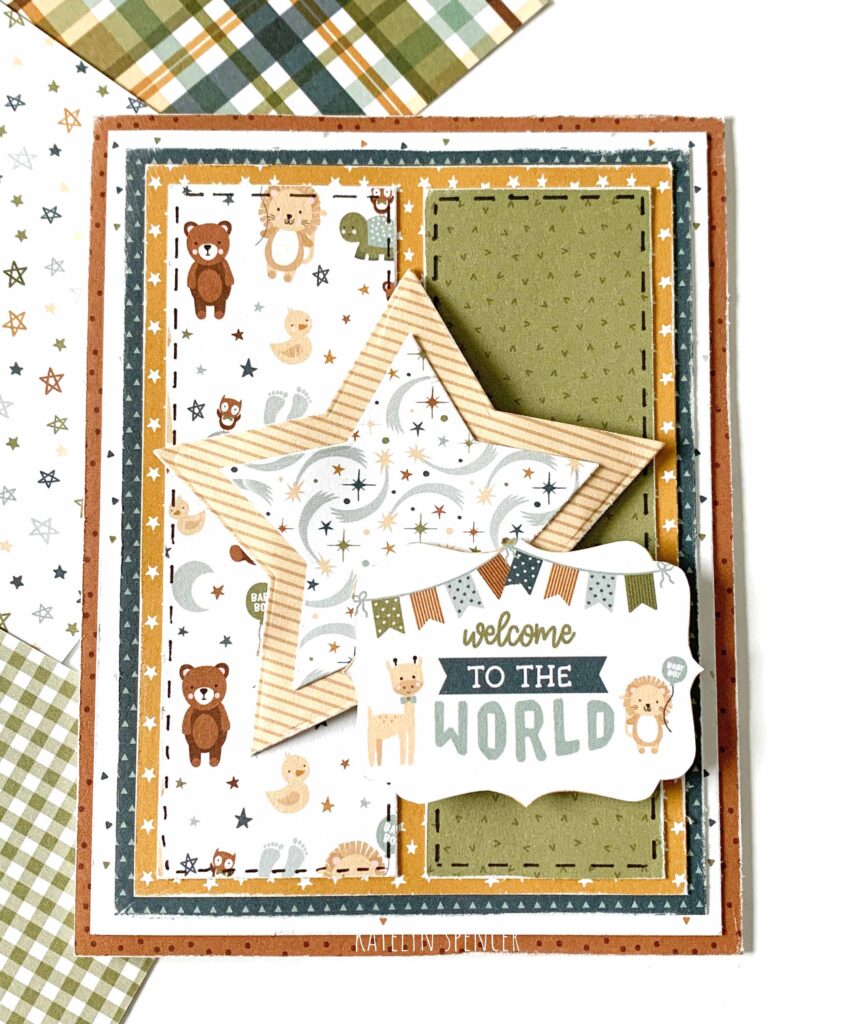
Hey Creative Scrapbooker Fans! For todayโs blogpost, Iโm sharing with you how to create aย Welcome to the World Card which uses the Echo Park Paper Co. Special Delivery Baby Boy Collection.I also used the Fitted Star dies from Elizabeth Craft Designs Along with Super Stock from Creative Scrapbooker Magazine and I adhered everything together using a variety of adhesives by Scrapbook Adhesives by 3L. Youโll want to grab a cup of your favourite beverage and learn how to recreate my card at home. To start, youโll need the terra cotta dot paper out of the Echo Park Paper Co. Special Delivery Baby Boy collectionย 6×6 Paper Pad. Cut a piece that measures 4 ยผโ x 5 ยฝโ. Flip the paper over and cut a piece that measures 1 ยฝโ x 4 ยฝโ. Sand the edges of both papers. Next, youโll need the multi coloured triangle paper out of the…
Hey Creative Scrapbooker Fans! For todayโs blogpost I will be playing with a variety of Stampers Anonymous Tim Holtz stamp sets.ย I will be creating this Hello Friend Card which also uses a variety of products from Ranger Ink, Super Stock Cardstock from Creative Scrapbooker Magazine and adhesive from Scrapbook Adhesives by 3L. Youโll want to grab a cup of your favourite beverage and learn how to recreate my card at home. To start, cut a piece of Tim Holtz Distress Cotton Watercolour Paper from Ranger Ink that measures 3 ยพโ x 5 ยพโ.ย Next, youโll need theย Stampers Anonymous Tim Holtz Tiny Prints Stamp Set. Apply Tattered Rose Ranger Tim Holtz Distress Oxide Ink from Ranger Ink to the stamp and stamp onto the piece of Cotton Watercolour Paper. Spritz the paper with water. Once the paper has dried, ink the edges of the paper using Scorched Timber Distress…