Tag

cardmaking

Browsing

Do you ever find yourself playing with product, not knowing what will come of it and finish with a fun project! This was the case with this coffee card! I started by playing with some Ranger Distress Oxide Inks, masking off the outside border. Once the colours were placed I used this fun Pam Bray stamp from Emerald Creek to stamp over the coloured centre. Next I masked away the centre, so that I could use the same stamp around the border! Fun & simple! This was the perfect background for a fun, chipboard coffee cup from Southern Ridge Trading Company. The chipboard piece was embossed with Emerald Creek’s Just Java Aroma Embossing Powder – smells as good as it looks! I outlined the words of the chipboard cup with a Ranger  Dylusions’ paint pen and added some ‘steam’ with a Distress Marker. Coffee cheers to you!

Hello and good day! Kim here on the blog with another fun card using a fun stamp set from Art Impressions! You can never have enough birthday cards on hand, so that’s what I have to share today! Art Impressions has so many wonderful stamps; and although they have a gorgeous series of watercolor stamps, and animal characters, I am personally drawn to the cheeky humour of people stamps! They always seem to have the perfect quote to go along with the perfect image…and they ALWAYS make me laugh! Without further delay, let’s peek at the birthday card I made to share! It was such a fun card to make and actually quite quick to make. Here is a look at the process! My Color Box pigment inks from ClearSnap, my Chameleon pens and my circle dies from Elizabeth Craft Designs all worked seamlessly together with the Art Impressions stamp…

Whoa! Someone put the reigns on August! Somehow this summer has gotten away from us and September is right around the corner! That means kids are back to school and the Great Canadian Scrapbook Carnival is too! Seems like we just packed up from last year’s carnival! So today I have a quick card share for you that looks a bit more time consuming than it is! Rule #1 as a card maker – make them think you sweat…think Rice Crispy commercial! My card was inspired by our July Sketchy challenge and layered on top of some CSM superstock! In an ideal world I would have more photos for you of the process, but I am using my “free pass” and will step them out in writing. 1] I used and older Heartfelt Creations background stamp, Large Elegant Word and Clearsnap inks to randomly stamp down the left side and…

Get ready! Get set! Mark your calendars and have a babysitter ready! The Great Canadian Scrapbook Carnival is right around the corner! EDMONTON:   September 7th & 8th CALGARY:        September 21st& 22nd Be sure to visit our website often or sign up for our newsletter so you don’t miss the updates! We are blessed with some amazing sponsors for our carnival! They are trend setters in the industry and we want to start sending out some BIG SHOUT OUTS and THANK YOUS, so you know who has partnered with us for your ultimate enjoyment! Today’s Thank You goes out to ELIZABETH CRAFT DESIGNS! In honour of their continued support, I have made a super fun card using the Cacti stamps and dies, along with the Sliders and Spinners die set. We just love the sentiment, and it pretty much sums up this fabulous company! We look forward to seeing you…

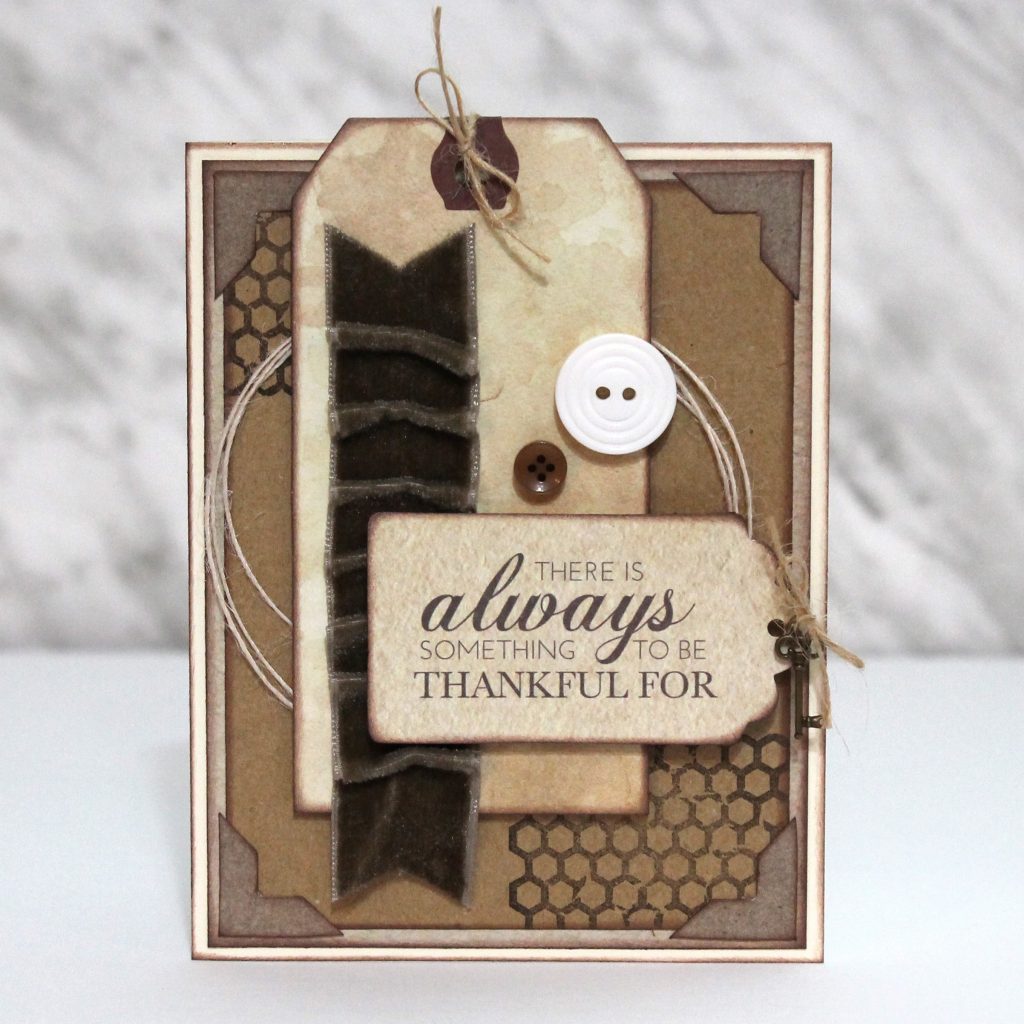
Hello everyone, Tracy McLennon on the Creative Scrapbooker Magazine blog today sharing with you a card I created using a variety of different products from the wonderful company Art-C.The card base is cream cardstock and cut to a 4.25×5.5 card front. Cut the 2 shades of kraft cardstock to 4.5.25 and 3.75×5, both of these were found in the Collage Kit. Using the honeycomb cling stamps from the Stamp and Adhesive Stencils and using brown ink, add some stamped detail to the darker kraft cardstock layer. Adhere these layers together using the E-Z Runner Ultra. Add the kraft photo corners from the collage kit. Using Ivory Burlap String, create a large layered circle and adhere to the middle of the card using Adhesive Dots. Add the large tag with a Natural Burlap String bow to the card over the twine circle using Crafty Foam Tape. Using the super strong E-Z…

Nicole Wright is on our latest web show with a watercolor technique that will KNOCK your socks off because it is so darn easy! This technique is absolutely perfect for soft, subtle backgrounds on your scrapbooking projects and cardmaking. Check it out. https://www.youtube.com/watch?v=nvDv4F_qFf0 SUPPLIES Stampers Anonymous Stamps Ranger Distress Watercolor Paper Ranger Distress Oxide Inks and Archival Inks Eileen Hull for Sizzix Dies Scrapbook Adhesives by 3L Pentel Aqua Waterbrush Be sure to follow Creative Scrapbooker Magazine on YouTube! Do not miss a single video! CLICK HERE Happy Scrapbooking EveryoneSubscribe today to Creative Scrapbooker Magazine

Hello CSM friends! Thanks for dropping by to see how this sweet “HELLO” card came together. I used several fun products from MultiCraft’s Forever in Time products. Neutrals Cardstock, 6×6 paper stack; “Vintage 2”, Laser-Cut Wood Stickers and Epoxy Alpha Buttons. The papers have some gorgeous patterns and their size is perfect for card making! One of the key principles of design is repetition. For my card, I chose to repeat elements from the patterned paper – the rose image, the colours and the circle shape of the roses. My Chameleon pens were the key ingredient to matching the colours. I used them to colour the laser-cut wooden rose & leaf,  as well as the epoxy alpha, even on the wood I was able to get nice blending of colours! …and I can’t even tell you how yummy it was to colour on the epoxy buttons! The colour was perfect…

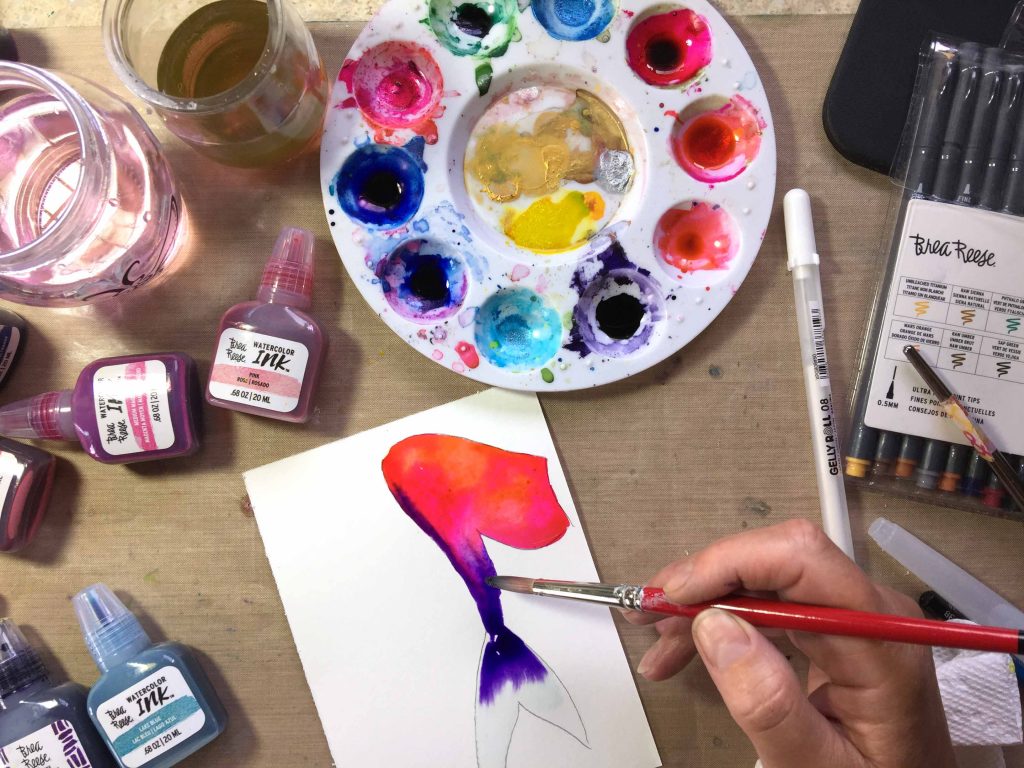
Hello everyone, Kerry Engel here today on the Creative Scrapbooker Magazine blog. I’ve been playing a lot with Brea Reese watercolor inks. They are very bright and beautifully transparent. The glitter inks are just yummy. They are perfect for making the galaxy paintings that you see all over Instagram and Pinterest. Brea Reese watercolor inks are dye-based ink and they dry quickly. They are very concentrated…a little goes a long way. If you put them in a paint pallet they will dry in the pallet and when you come back later with a wet brush you can re-activate them. To make this card download a mermaid tail and turned it into a stencil. You could use any large silhouette type shape with this technique. Large flowers work well too. To begin, trace the tail onto watercolor paper. Use the rough side of 140 Lb, cold pressed watercolor paper. Paint the inside of…

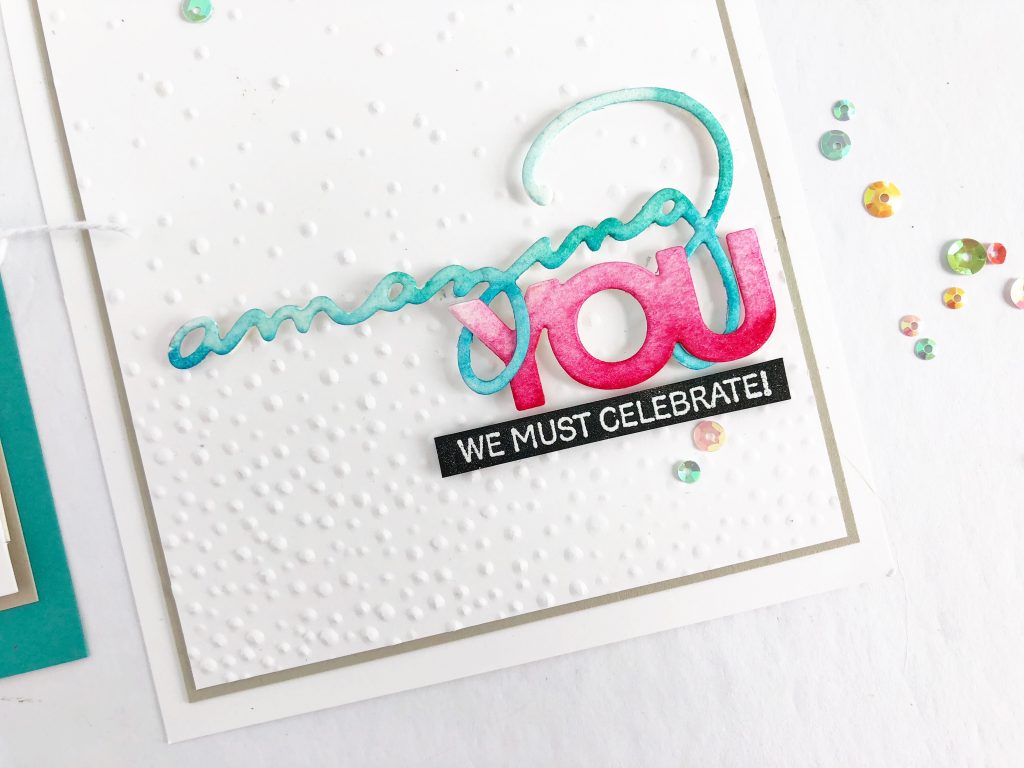
Hello everyone, Cathy Caines here today on the Creative Scrapbooker Magazine blog. We must celebrate! Indeed we do! We have many things to celebrate including the carry over of the Celebrate You Thinlet Dies into the 2018-2019 Stampin’ Up! Annual Catalog. Since it’s introduction in the Sale-a-Bration catalog, I have made too many projects to count with these thinlet dies. When I heard they would carry over I was over the moon!Today’s projects were created combining the Celebrate You Thinlet Dies as well as the sans serif sentiments of the We Must Celebrate Stamp Set from the Stampin’ Up! Occasions Catalog. I love mixing and matching different stamps and dies.To create the above card, you must first make the multi-colored background.  With your Aqua Painter, dip each colour into the refill ink one by one resulting in a multi-colored wash. I would recommend drying each colour with a Heat Tool…

Nicole Wright is on our web show today with an easy way to create glitter backgrounds for your next homemade card.  Adding glitter has never been easier! https://www.youtube.com/watch?v=nG1dHu66EME Nicole used the following supplies: Creative Scrapbooker Super Stock Ranger Distress Oxide Inks Scrapbook Adhesives by 3L Adhesive Sheets and E-Z Runner Grand Ranger Distress Glitter Stampers Anonymous Flower Jar Stamp Set Sizzix coordinating Framelits Like what you see? Be sure to follow Creative Scrapbooker Magazine on YouTube – CLICK HERE Happy Scrappin’ Everyone!Subscribe today to Creative Scrapbooker Magazine – HOLD IT! READ IT! LOVE IT!

January 28/26 Online Class

View the Info PDF: Click Here

Link to purchase the Craft Along Kit: Click Here

Recap Video Click Here

February 15th/25

WATCH THE REPLAY: CLICK HERE

Zoom Crop Information PDF: CLICK HERE

FREE Layout Template Guide: CLICK HERE

VIP Zoom Crop

Friday January 17th Zoom Meeting:
Link to replay: CLICK HERE

Saturday January 18th Zoom Meeting:
Link to replay: CLICK HERE

December 30/24 Online Class

CLICK HERE for the Link for Your Crafty Homework

This includes the eBook and printable materials for the class.
Please note: You’ll need to provide your email address, as Nadine Milton will send the information directly to you.

CLICK HERE for the Link for the Information PDF

This includes the supply list for this class.

VIP Zoom Crop
Friday November 8th: 7:00pm - 10:00pm MST
Saturday November 9th: 10:00am - 10:00pm MST

You will need the ZOOM App on your computer or phone.

Nov 8th - Friday Night
Topic: Zoom Crop #43 - ArtFest hosted by Dooreen Rousseau - FRIDAY NIGHT!
Time: Nov 8, 2024 07:00 PM Mountain Time (US and Canada)
Link: https://us06web.zoom.us/j/87256071707?pwd=F7077MJSL1JLNEK7CMXygrHC0hVAlw.1
Meeting ID: 872 5607 1707
Password: 309205

Nov 9th – Saturday
Topic: Zoom Crop #43 - ArtFest Hosted by Dooreen Rousseau - SATURDAY
Time: Nov 9, 2024 10:00 AM Mountain Time (US and Canada)
Link: https://us06web.zoom.us/j/87925186090?pwd=EEPjhi54pyB6YQ3olyaJaYggcGRGxP.1
Meeting ID: 879 2518 6090
Password: 222409

Zoom Crop Information PDF: CLICK HERE

July 12, 2024 - Zoom Crop

WATCH THE REPLAY: CLICK HERE

Here are the times of the demos
1:12:07 - Demo - Page Builders Club House with Tracy Pounds
Here is the PDF link for Tracy's demo with the instructions and products she used: CLICK HERE

3:03:27 - Demo – Infinity Crafts with April Floriant

Thanks so much to everyone who joined and hope to see you all again on Friday, August 9th – from 10:00am to 2:00pm MDT.

July 24/24 Online Class

View the Class Video: Click Here

View the Info PDF: Click Here

Link to purchase the Craft Along Kit: Click Here

April 30/24 Online Class


View the Info PDF: Click Here

Link to purchase the Craft Along Kit: Click Here

December 9/23 Zoom Crop

8 Hour Zoom Crop: Click Here

After Hours Zoom Crop: Click Here

September 27th/23 Online Class


View the Info PDF: Click Here

Link to purchase the Craft Along Kit: Click Here

This website uses cookies to ensure you get the best experience on our website. Learn more

VIP Zoom Crop
Friday January 16th: 6:00pm - Midnight MST
Saturday January 17th: 10:00am - Midnight MST
Hosted by: Simply Stated Design

You will need the ZOOM App on your computer or phone.

Friday Zoom Meeting:
Link: https://us06web.zoom.us/j/81311221698?pwd=gXkeFjnWDekB0nRHohTqwYpTqZPyps.1
Meeting ID: 813 1122 1698
Password: 751404

Saturday Zoom Meeting:
Link: https://us06web.zoom.us/j/87948630680?pwd=ulxwatsEwIEakz6c5fvQ341BIouJ2t.1
Meeting ID: 879 4863 0680
Password: 862986

Zoom Crop Information PDF: CLICK HERE

To purchase the Craft Along Kit: CLICK HERE