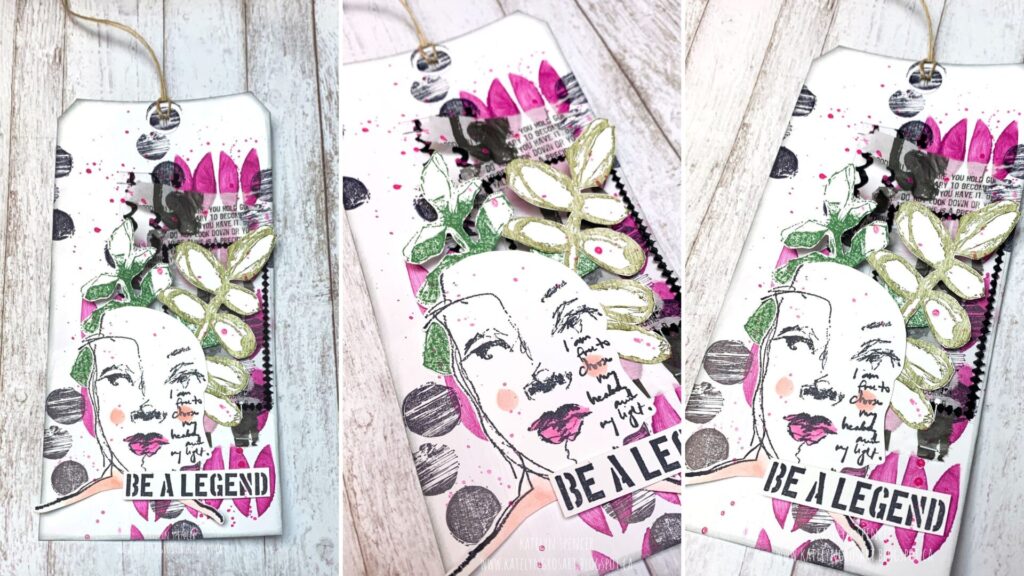
Hey Creative Scrapbooker Fans! For today’s blog post, I’m sharing how I created this Be a Legend Tag featuring fabulous products by Ranger Dina Wakley Media. I also used Super Stock from Creative Scrapbooker Magazine, and adhesive from Scrapbook Adhesives by 3L. You’ll want to grab a cup of your favourite beverage and learn how to create my Be a Legend Tag. To start, you need a tag that measures 4 1/8” x 8 ½”. Apply a coat of White Gesso from Ranger Ink to the tag. Once the gesso has dried, place the Dina Wakley Media Sideways Stencil from Ranger Ink on the stencil. Using a blending tool with foam and Orchid Acrylic Paint from Ranger Ink blend paint through the stencil as desired. Move the stencil as needed and continue to put paint through the stencil. Remove the stencil and allow the stencilled area to dry. Once the…
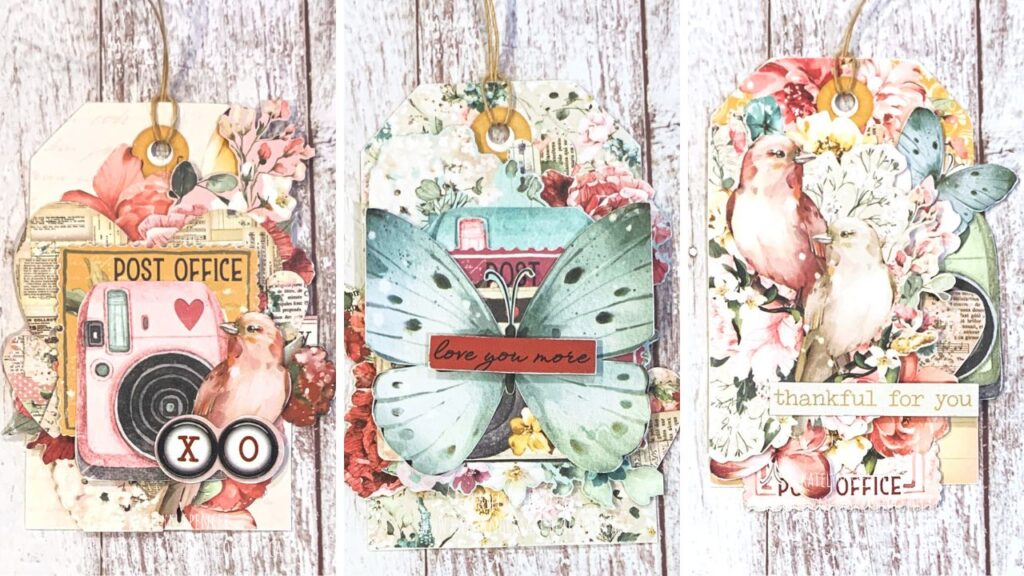
Hey Creative Scrapbooker Fans! For today’s blogpost, I’m sharing with you how these adorable Love Tags were created featuring the Simple Stories Simple Vintage Love Story Collection. With Valentine’s Day next month these tags can be added to gifts or just given with love notes on the back of them. Along with the Simple Stories Simple Vintage Love Story Collection, I also used a variety of adhesive from Scrapbook Adhesives by 3L. You’ll want to grab a cup of your favourite beverage and learn all about my tags.These tags were easy to make as I chose three tags off the Tag Elements Simple Vintage Love Story Paper from Simple Stories which created the bases for my set. Once the tags were chosen, I used a variety of the patterned papers out of the Simple Vintage Love Story Collection Pack from Simple Stories to embellish the tags. When I pick embellishments…
Hey Creative Scrapbooker Fans! For today’s blogpost, I’m sharing with you how I created these adorable Halloween Cards using the Simple Stories Faboolous Collection. Along with Super Stock from Creative Scrapbooker Magazine and adhesive from Scrapbook Adhesives by 3L. You’ll want to grab a cup of your favourite beverage and learn all about my cards at home. To start, we’ll create the Enter If You Dare Card. Out of the Faboolous Paper Pack from Simple Stories, you’ll need the Batty for Candy Paper, Sweet & Spooky Paper, and Shrieks & Screams Paper. Cut a piece from the bat side of the Batty for Candy Paper that measures 4” x 5 ¼”. Cut a piece from the green leaf side of the Sweet & Spooky Paper that measures 3 ¾” x 5”. Cut a piece from the cat side of the Shrieks & Screams Paper that measures 3 ½” x 4…
Hey Creative Scrapbooker Fans! For today’s blog post, I’m sharing with you how I created this Oh Darling, Let’s Be Adventurers Mini Album featuring the Here & There Simple Stories collection. As well as adhesive from Scrapbook Adhesives by 3L. You’ll want to grab a cup of your favourite beverage and learn all about my mini album at home. To start, you’ll need to choose and cut out seven tags from the Tags Elements out of the Here & There Paper Pack from Simple Stories. Sew around the edges of the tags. For the first tag, you’ll need one of the tags from the previous step. Cut a piece that measures 1 5/8” x 3” out of the Floral side of the Travel the World Paper from the Here & There Paper Pack from Simple Stories. Choose one of the labels that measure 1 5/8” x 2 ¾” On Our…
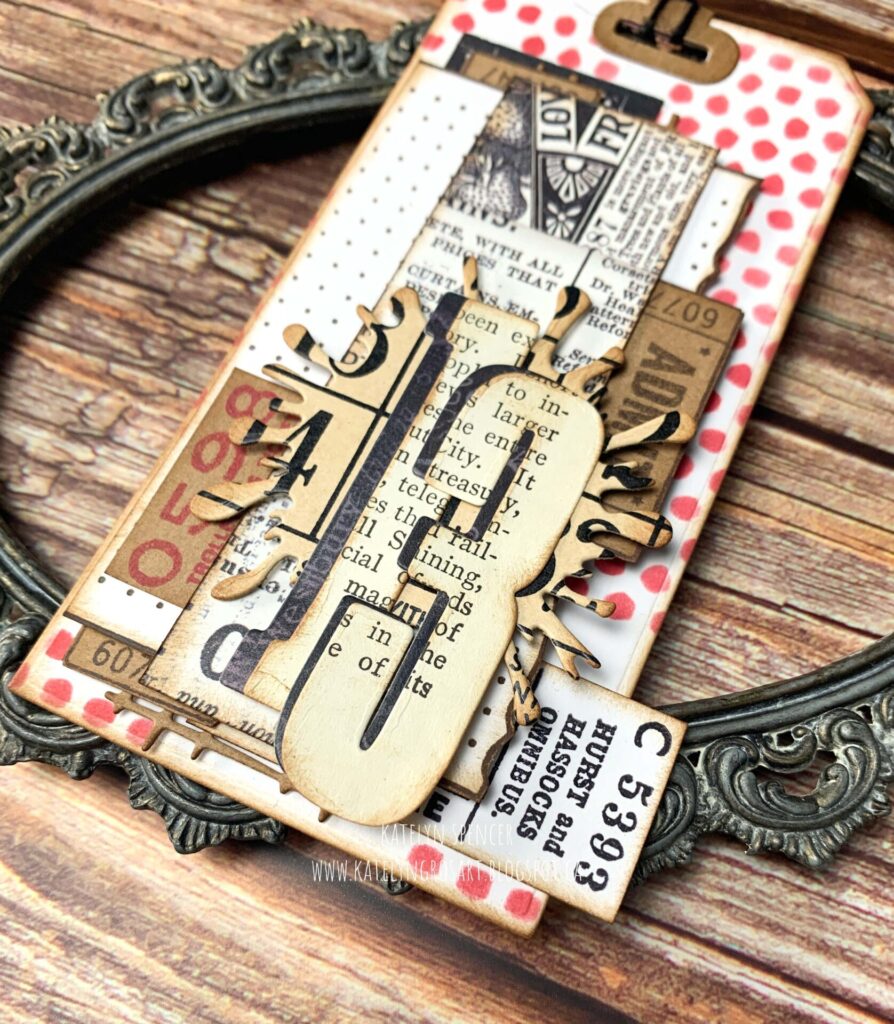
Hey Creative Scrapbooker Fans! For today’s blogpost, I’m sharing with you how I created this 13 Tag using patterned paper from Simple Stories, Dies from Elizabeth Craft Designs, ink from Ranger Ink, Super Stock from Creative Scrapbooker Magazine and adhesive from Scrapbook Adhesives by 3L. You’ll want to grab a cup of your favourite beverage and learn all about my tag at home. To start, die cut the 2 5/8” tag out of the Planner Essentials – Tab 4 with Tags die from Elizabeth Craft Designs out of a piece of Super Stock from Creative Scrapbooker Magazine. Choose one of the reinforcements out of the Planner Essentials – Tab 4 with Tags from Elizabeth Craft Designs out of a piece of kraft cardstock. Using a blending tool with foam and Lumberjack Plaid Distress Oxide Ink from Ranger Ink, blend the ink through the dotted stencil out of the Planner Stencils…
Hey Creative Scrapbooker Fans! For today’s blog post, I’m sharing with you how I created my Happy Little Moment Mini Album using a variety of products from Simple Stories, including the Simple Stories Simple Vintage Essentials collection. Stitched Indented Dies from Elizabeth Craft DesignsAlong with adhesive from Scrapbook Adhesives by 3L. You’ll want to grab a cup of your favourite beverage and learn all about my mini album at home. The base of my mini album, I used the 4” Stitched Indented Rectangle from Elizabeth Craft Designs to cut the pages out. I chose 4 different patterned papers out of the Simple Vintage Essentials Paper Pack from Simple Stories. For Pages 1 & 2 I chose a couple of the patterned papers out the Simple Vintage Paper Pack from Simple Stories for photo mats. I used a variety of embellishments out of the Simple Vintage Collection from Simple Stories. For…
Hey Creative Scrapbooker Fans! For today’s blogpost, I’m sharing with you how to create this For You Gift Envelope using a variety of products from Carta Bella Paper Co Here There and Everywhere collection. Products by Elizabeth Craft Designs, and adhesive from Scrapbook Adhesives by 3L. You’ll want to grab a cup of your favourite beverage and learn how to recreate my gift envelope at home. To start, you’ll need a policy envelope that measures 4” x 9 ½”. Next, you’ll need the Bright Floral Paper out of the Here There and Everywhere Paper Carta Bella Paper Co. Cut a piece that measures 3 ¾” x 9 ¼” out of the dot side. Fussy cut a variety of flowers from the other side of the paper. Sand the edges of the polka dot paper. Out of the Here There and Everywhere Paper Pack from Carta Bella Paper Co., you’ll need…
Hey Creative Scrapbooker Fans! For today’s blogpost, I’m sharing with you how to create this Joyful Moments Tag using a variety of products from the Elizabeth Craft Designs Everyday Elements collection. You’ll want to grab a cup of your favourite beverage and learn how to recreate my tag at home. To start, you’ll need a white tag that measures 3 1/8” x 6 ¼”. Take the circle stencil out of the Planner Essentials – Planner Stencils 1 from Elizabeth Craft Designs. Place the stencil on the left-hand side of the tag. Using a blending tool with foam and Dina Wakley Media Acrylic Paint in Sand from Ranger Ink, blend paint through the left side of the stencil. Remove the stencil. Allow the paint to dry. Out of the Elizabeth Craft Designs Everyday Elements – Happy Stamp set, you’ll need the text stamp. Apply Shaded Lilac Distress Oxide Ink from Ranger…
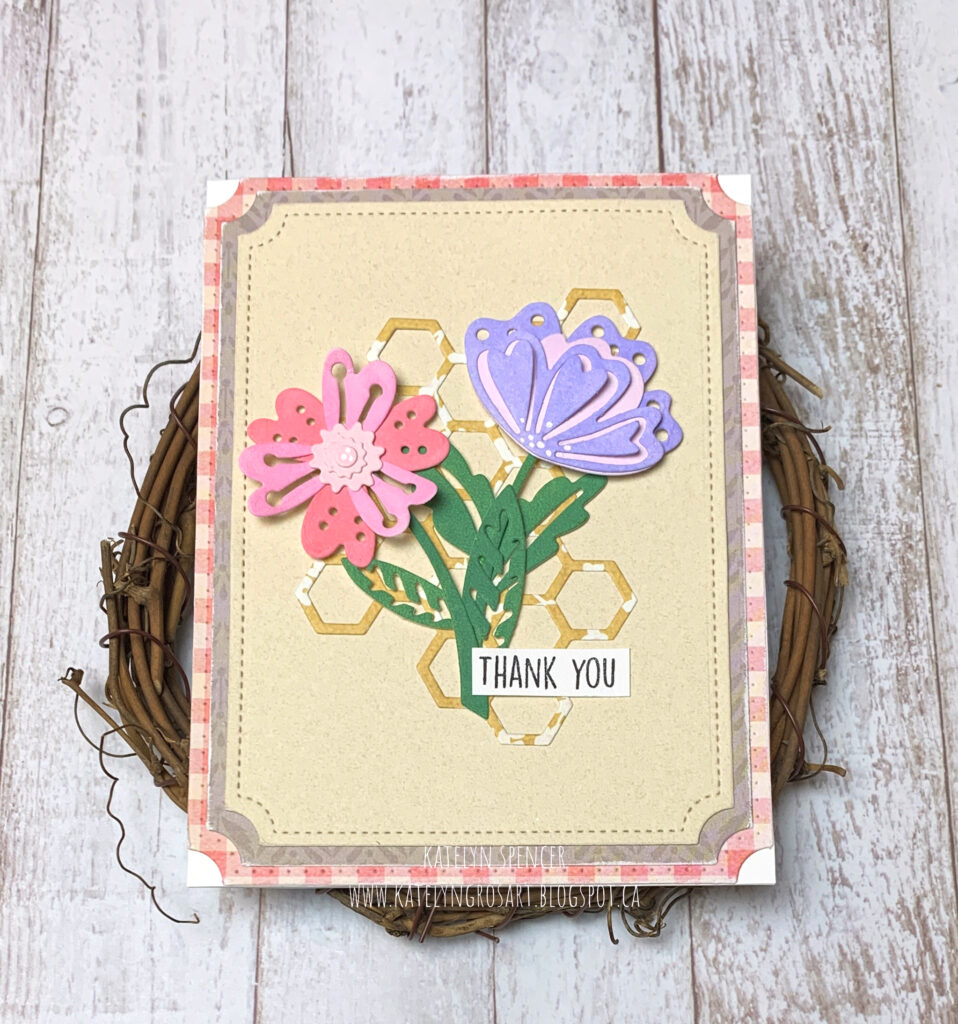
Hey Creative Scrapbooker Fans! For today’s blog post, I’m sharing with you how to create this Thank You Card using Wildflower Paper Pack from Simple StoriesA varity of dies from Elizabeth Craft DesignsSuper Stock from Creative Scrapbooker Magazine, a variety of inks from Ranger Ink and adhesive from Scrapbook Adhesives by 3L. You’ll want to grab a cup of your favourite beverage and learn how to recreate my card at home. To start, you’ll need the pink gingham and grey patterned paper out of the Wildflower Paper Pack from Simple Stories. Die cut a 4” Stitched Indented Rectangle from Elizabeth Craft Designs out of the pink gingham paper. Die cut a 3 ¾” Fitted Indented Rectangle from Elizabeth Craft Designs out of the grey patterned paper. Die cut a 3 ½” Stitched Indented Rectangle from Elizabeth Craft Designs out of a piece of cream cardstock. Sand the edges of both…
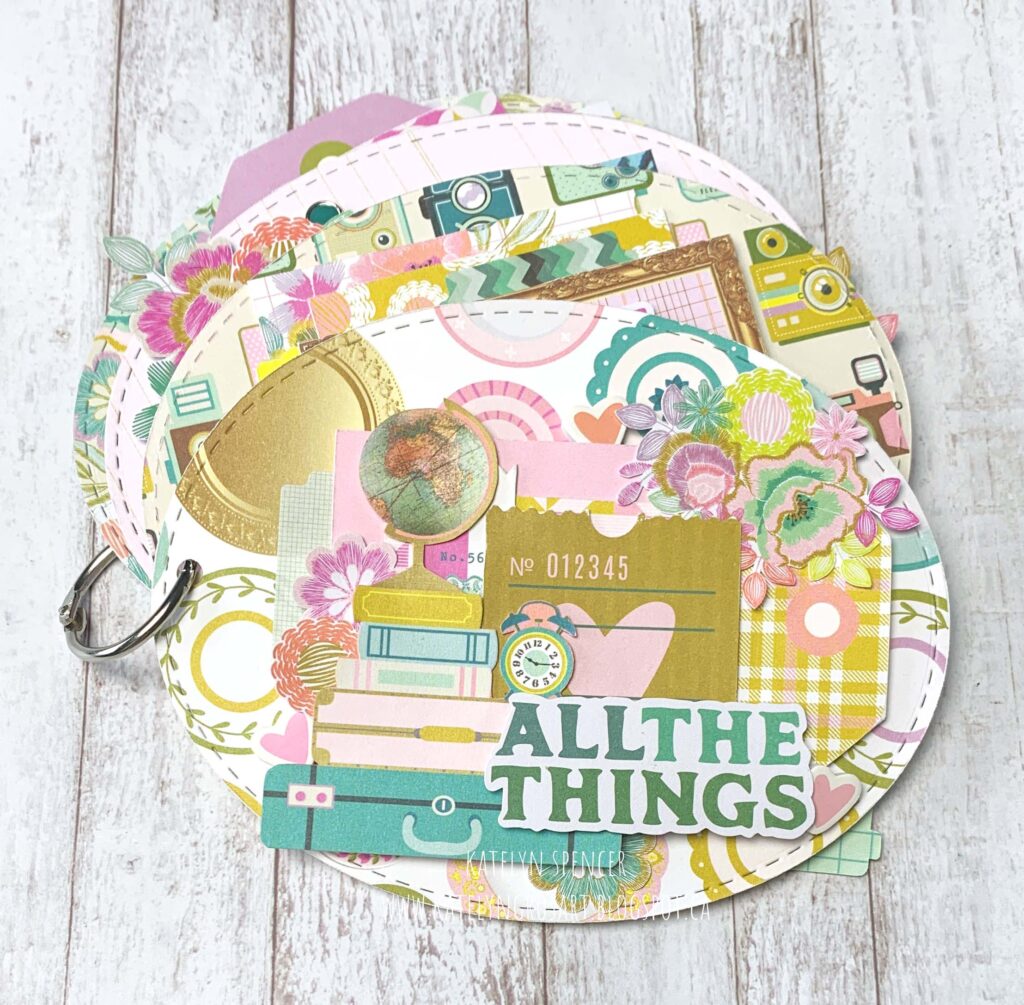
Hey Creative Scrapbooker Fans! For today’s blogpost, I’m sharing with you how I created this All The Things Mini Album using Flea Market Collection from Simple Stories Stitched Oval dies from Elizabeth Craft DesignsAND adhesive from Scrapbook Adhesives by 3L. You’ll want to grab a cup of your favourite beverage and learn all the details about my mini album. All the pages of the mini album were die cut using a variety of patterned papers out of the Flea Market 12×12 Paper Pack from Simple Stories. Once the patterned papers where selected, I die cut a 4 ½” Stitched Oval from Elizabeth Craft Designs out of each patterned paper. All the pages have had the edges sanded. For the embellishments on the front cover of the mini album, I used the tags and the ticket as well as the stacked suitcases from the 3×4 Paper out of the Flea Market…


