


Hey Creative Scrapbooker Fans! For today’s blog post, I’m sharing with you how to create this Thank You Card using Wildflower Paper Pack from Simple Stories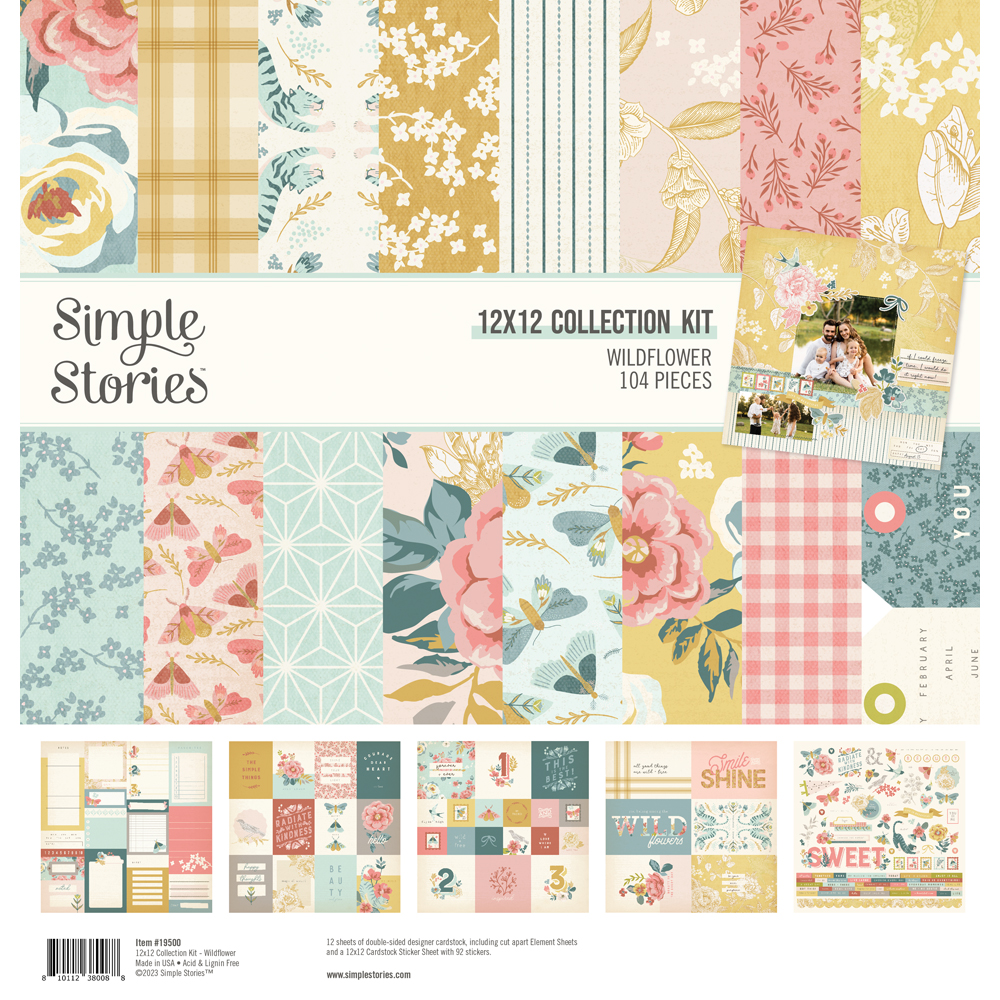 A varity of dies from Elizabeth Craft Designs
 Super Stock from Creative Scrapbooker Magazine, a variety of inks from Ranger Ink and adhesive from Scrapbook Adhesives by 3L.
 You’ll want to grab a cup of your favourite beverage and learn how to recreate my card at home.
  To start, you’ll need the pink gingham and grey patterned paper out of the Wildflower Paper Pack from Simple Stories. Die cut a 4” Stitched Indented Rectangle from Elizabeth Craft Designs out of the pink gingham paper. Die cut a 3 ¾” Fitted Indented Rectangle from Elizabeth Craft Designs out of the grey patterned paper. Die cut a 3 ½” Stitched Indented Rectangle from Elizabeth Craft Designs out of a piece of cream cardstock. Sand the edges of both patterned papers.
  Next, you’ll need the Mustard with Floral paper out of the Wildflower Paper Pack from Simple Stories. Die cut the honeycomb die from Elizabeth Craft Designs out of the patterned paper.
  Next, you’ll need the Playful Flowers Die from Elizabeth Craft Designs. Die cut the three-petal flower, centers, half flower petal and all pieces, stems and two leaves from a piece of White Soft Finish Cardstock from Elizabeth Craft Designs. Using a blending tool with foam, blend Rustic Wilderness Distress Oxide Ink from Ranger Ink on the stems and leaves. Using a blending tool with foam, blend Spun Sugar Distress Oxide Ink from Ranger Ink to the centers. Using a blending tool with foam, blend Worn Lipstick from Ranger Ink on the dotted three flower. Using a blending tool with foam, blend Kitsch Flamingo Distress Oxide Ink from Ranger Ink to the other three flower. Using a blending tool with foam, blend Shaded Lilac Distress Oxide Ink from Ranger Ink to the dotted half petal and cut out petal. Using a blending tool with foam, blend Milled Lavender Distress Oxide Ink from Ranger Ink to the remaining petals.
  Out of the Build Your Own Sentiments 1 Stamp from Elizabeth Craft Designs, you’ll need the Thank You sentiment. Apply Jet Black Archival Ink from Ranger Ink to the sentiment and stamp onto a piece of White Soft Finish Cardstock from Elizabeth Craft Designs. Cut the sentiment into a word strip.
  Use EZ Runner Adhesive from Scrapbook Adhesives by 3L to adhere the 3 ¾” rectangle to the 4” rectangle. Adhere the 3 ½” rectangle to the 3 ¾” rectangle.
  Use EZ Runner Adhesive from Scrapbook Adhesives by 3L to adhere the honeycomb pattern to the middle of the 3 ½” rectangle.
  Use EZ Runner Adhesive from Scrapbook Adhesives by 3L to adhere the two flowers together.
  Use 3D Foam Squares from Scrapbook Adhesives by 3L to adhere the two flowers to the middle of the honeycomb as desired. Use EZ Runner from Scrapbook Adhesives by 3L to adhere the Thank You sentiment 1” from the bottom and 5/8” from the right of the 3 ½” rectangle.
  To finish the card, cut a card base out of Superstock cardstock from Creative Scrapbooker Magazine that measures 4” x 5 ¼”, score at 8”. Use EZ Runner from Scrapbook Adhesives by 3L to adhere the card front to the card base. Add dots to the center of the pink flower and at the bottom of the purple flower using a white gel pen.
  Here are some closeups of the finished card.
  Thank you for joining me today and taking the time to check out my blog post. I hope that my Thank You Card has inspired you to recreate your own at home.

You can find more of my work on my blog at: http://www.katelyngrosart.blogspot.ca
Simple Stories:
Wildflower Paper Pack
Elizabeth Craft Designs:
Stitched Indented Rectangle
Fitted Indented Rectangle
Playful Flowers
Layered Honeybee
Build Your Own Sentiments 1
White Soft Finish Cardstock
Ranger Ink:
Distress Oxide Ink – Shaded Lilac, Milled Lavender, Worn Lipstick, Kitsch Flamingo, Spun Sugar & Rustic Wilderness
Jet Black Archival Ink
Blending Tool with Foam
Creative Scrapbooker Magazine: Super Stock
Scrapbook Adhesives by 3L:
3D Foam Squares
E-Z Runner Permanent Tape
Misc.: Cream Cardstock and White Gel Pen
Subscribe Today to Creative Scrapbooker Magazine

