Tag

cards

Browsing

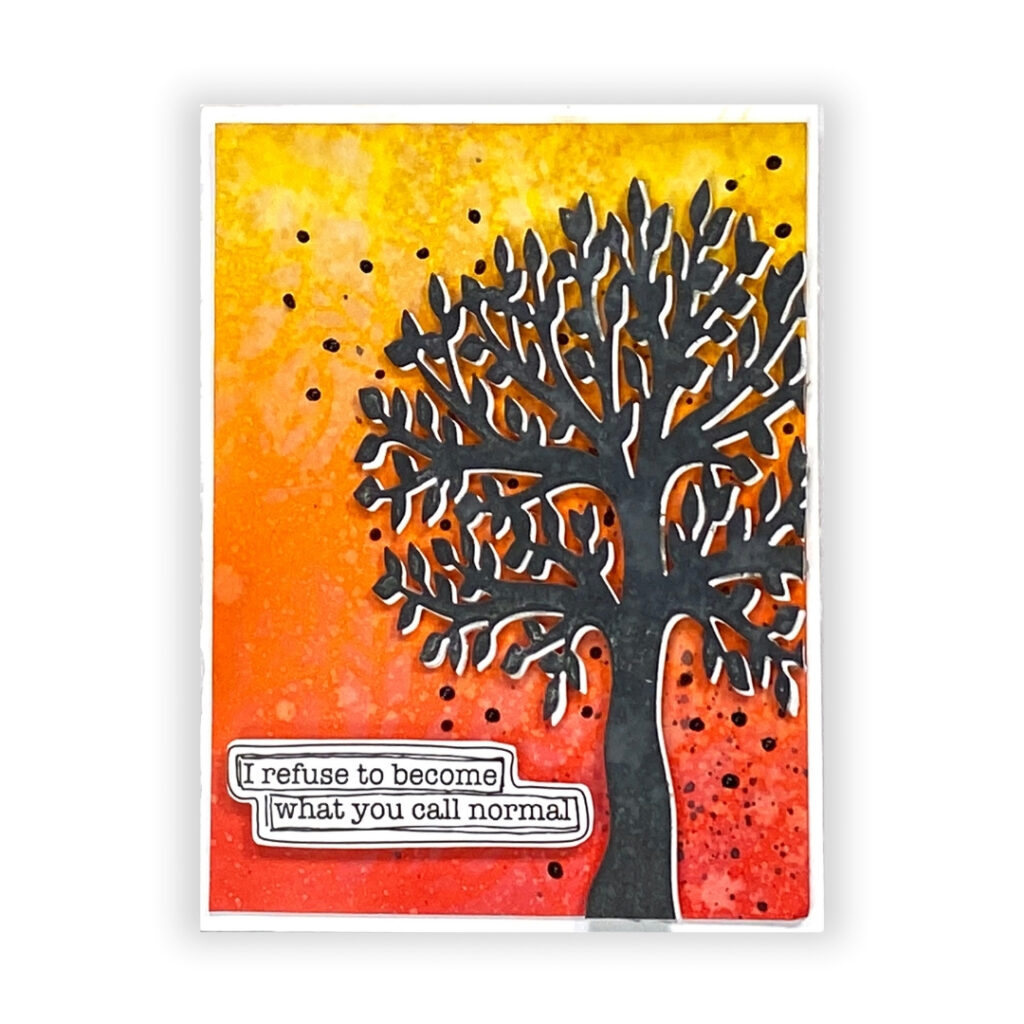
I can’t stop playing with this A Tree Die from Picket Fence Studios. Here is a quick little card I put together using it. I started by die cutting out 3 trees from Ranger Simon Hurley Create cardstock. I adhered two of the trees together and coloured the third with Ranger Tim Holtz Distress ink. I then adhered the coloured tree on top of the two trees with some of the white showing behind. Next, I blended three shades of Ranger Tim Holtz Distress ink onto a piece of cardstock. I used my Picket Fence Studios Life Changing Blender Brushes for a perfect blend. Next, I layed the Funky Leaves stencil from Picket Fence Studios on the background and added some white Distress ink. The look is very soft and subtle. I spritzed with water cause I LOVE those white water dots! With my Ranger Dina Wakley Media acrylic paint…
Look at this absolutely stunning card designed by Kerry Engelย So elegant. Kerryย  put the card together using the Heartfelt Creations Calla Lily collection. And that beautiful gatefold design was created using the Heartfelt Creations Heart of Joy Decorative Die – which really is a MUST HAVE! The entire card was stuck together using a variety of adhesives by Scrapbook Adhesives by 3L! Speaking of Scrapbook Adhesives by 3L – have you entered their AWESOME sweepstakes yet?!?!?!? You can win an ENTIRE YEAR of adhesives by them!!!! HOLLY MOLLY!!!!! YAHOOOO!!! CLICK HERE TO ENTER! Have a wonderful weekend everyone!

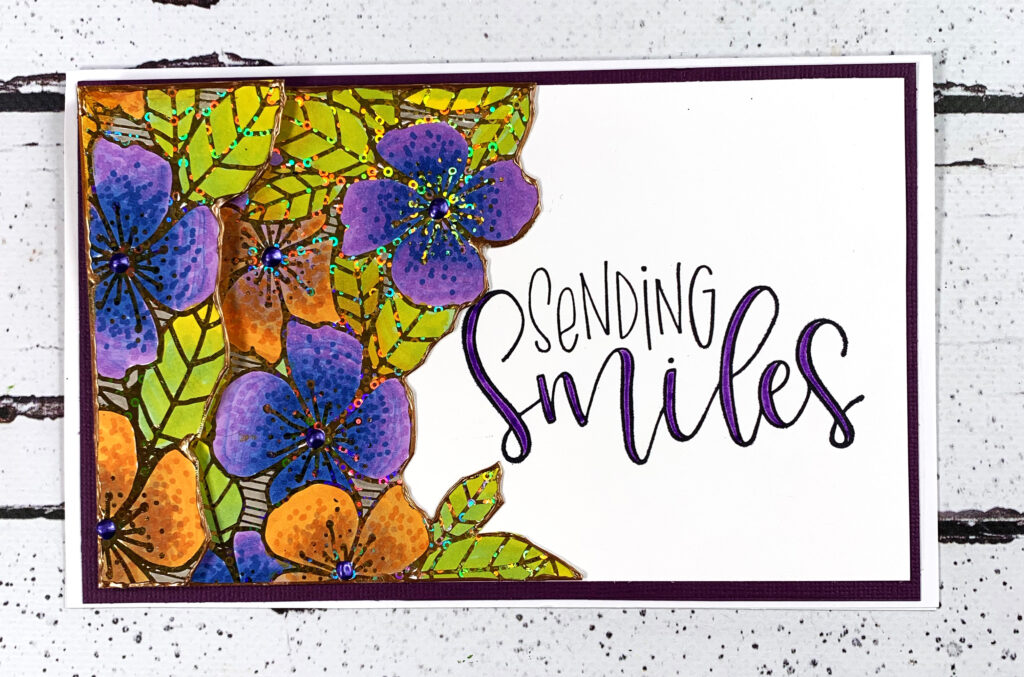
The kids are back to school and Mama (thatโ€™s me!) has been making getting into the craft room a priority. Iโ€™ve been slowly opening all my new stamp sets and products. Sometimes I just get organized or clean up and other times I get messy. Today I got messy with the brand new Blossoms in Bloom Bundle from the Stampinโ€™ Up! Annual Catalogue. I purchased this bundle because I really felt that it could make beautiful cards fast. I wasnโ€™t wrong. I began this project like many others as I die cut several pieces at once. It didnโ€™t take long for me to notice that the die shape of the blossom outline was gorgeous on almost any background. Itโ€™s the star of the show for both my cards! I used the purple posy ink on whisper white cardstock similar to how the products were intended to be paired together. I…

Hey Creative Scrapbooker Fans! For todayโ€™s blogpost, Iโ€™m sharing with you my Hello Dear Friend Card. To create my card, Iโ€™ve used the Hello Autumn Collection from Carta Bella Paper Co. ย Creative Scrapbooker Super Stock Cardstock from Creative Scrapbooker Magazine, Dies from Elizabeth Craft DesignsInk from Ranger Ink and adhesive from Scrapbook Adhesives by 3L. Youโ€™ll want to grab a cup of your favourite beverage and learn how to recreate my card at home. To start, youโ€™ll need the black plaid pattern paper out of the Hello Autumn Paper Pack from Carta Bella. Die cut the 4โ€ Stitched Indented Rectangle from Elizabeth Craft Designs out of the paper. Die cut the 1 ยฝโ€ Diagonal Stitched Fishtail from Elizabeth Craft Designs out of the same patterned paper. Distress the edges of the rectangle and fishtail. Ink the edges of the fishtail and rectangle using Walnut Stain Distress Ink and a blending…

Do you remember paper-tole from the 80โ€™s? It was a very fussy art form that involved layering identical prints to build a 3D pictures. I love to make dimensional cards and there is a quicker and easier way to get a suede-paper-tole look and not waste anything! How to make two 3-dimensional cards at once: leave one Therm O Web Deco Foil Toner Card Front intact. use a second Therm O Web Deco Foil Toner Card Front to cut out a large flower for a 3D flower. layer the remaining pieces of the second card to build a stunning 3D floral cluster. Foiling made easy: Therm O Web Deco Foil has partnered with Unity Stamp Co. to create an exclusive line of Toner Card Fronts. The Toner Card front is made for foiling. You can have a lot of fun changing up the foil colours but for this set, I…

Well, what a weird summer it has been. While most weddings this year have been rescheduled or postponed around the world, here in Newfoundland there are some scattered lovebirds tying the knot. Itโ€™s so nice to try to get back to some normalcy. I think we can all agree, itโ€™s great for the soul to have a reason to celebrate. Throughout the past few months, Iโ€™ve been stamping images and watercolouring while watching TV with my husband. The Bloom and Grow Polymer Stamp by Stampinโ€™ Up! is one of my favourites. I absolutely love the font pairings on this stamp set! This card begins with a sponged blue background. I like having a blue background on most of my cards to help anchor any images.ย  I use a simple technique of sponging onto a white card base with the retired Stampinโ€™ Up! Tempting Turquoise ink. Since I do this so…

Hi everyone! Itโ€™s Kelly Klapstein here today to show you a fun way to make quick, pretty watercolour backgrounds for cards and tags. SUPPLIES:ย  Ranger Distress Ink, Kelly Creates Sentiment Stamps, Black permanent ink pad, Stamping block, Watercolor paper, large paintbrush, water, trimmer, adhesive, card stock Step 1: Rub your ink pad across the top of the watercolor paper. Step 2: Add a lot of water to your large brush and โ€˜paintโ€™ the ink downwards. Dip your brush into more water if needed. Step 3: Let dry completely Step 4: Stamp your sentiment. I chose black ink, but you could use different colors. Step 5: Adhere to a folded cardstock base. This simple technique has limitless watercolour combinations. Use one ink pad or two, or more! Stamp your sentiment for any special occasion or just inspirational words to brighten someoneโ€™s day. Breathe. Write. Relax. . Visit Kelly’s website for all…

Hey everyone! Cathy Caines here today on the Creative Scrapbooker Magazine blog! I had so much fun putting this project together for you this month. I was completely inspired by the new Stampinโ€™ Up! Game On stamp set. My family are โ€˜gamersโ€™ so I knew that this stamp set was going to be a huge hit in my world. While none of us play chest anymore, I couldnโ€™t help but create with the chest pieces first. It was very evident to me that the background of this card should resemble a game board. The Stampinโ€™ Up! Stitched Shapes framelits has a one-inch square that brings this idea to life. We do play Yahtzee and Monopoly, and well, many games with dice. It could work for any age group. I often struggle with using black in my cards are a dominant colour but the Bricks and Mortar 3D embossing folder made…

SPA DAY! At home!!!! I found this super cute project Kim Gowdy designed from 2017 featuring Art Impressions and I just had to re-share. How wonderful would these be to receive in the mail! I think I am going to make one for my Mom and the gift card is going to be for my Dad giving her a massage! GIGGLE GIGGLE! Right now – I appreciate Art Impressions stamps EVEN MORE! They make me giggle. and we could all use some giggles amongst all the worry. Be sure to pop on over to their website and find a stamp or two that makes you giggle. Then make a card and mail a giggle to someone you love! We can’t go to our favourite massage therapist right now….BUT we can still send MAIL! Now more than ever! May today be filled with warm cuddles with your family. Stay Home -Stay…

Hello everyone! Itโ€™s Kerry Engel, here today to share with you an adorable card that is just begging to be touched. Between the embossing, stenciling and flocking this card is full of texture-therapy; for the maker and the receiver. Cards for any occasion are my favorite ones to keep in my stash. This cute little die-cut owl could be used on a multitude of occasions and I find his tummy is just the right size to hold a sentiment. My favourite trick when putting together more detailed die cut items is to use 3D Foam Squaresย under key areas. I used the Scrapbook Adhesives by 3L 3D Foam Squares to raise my owlโ€™s head up and away from his body. Therm O Web Deco Foil Flock Transfer Sheets cut like butter and emboss like a boss. To create this adorable Owl I used the Therm O Web Deco Foil Flock Transfer…

January 28/26 Online Class

View the Info PDF: Click Here

Link to purchase the Craft Along Kit: Click Here

Recap Video Click Here

February 15th/25

WATCH THE REPLAY: CLICK HERE

Zoom Crop Information PDF: CLICK HERE

FREE Layout Template Guide: CLICK HERE

VIP Zoom Crop

Friday January 17th Zoom Meeting:
Link to replay: CLICK HERE

Saturday January 18th Zoom Meeting:
Link to replay: CLICK HERE

December 30/24 Online Class

CLICK HERE for the Link for Your Crafty Homework

This includes the eBook and printable materials for the class.
Please note: Youโ€™ll need to provide your email address, as Nadine Milton will send the information directly to you.

CLICK HERE for the Link for the Information PDF

This includes the supply list for this class.

VIP Zoom Crop
Friday November 8th: 7:00pm - 10:00pm MST
Saturday November 9th: 10:00am - 10:00pm MST

You will need the ZOOM App on your computer or phone.

Nov 8th - Friday Night
Topic: Zoom Crop #43 - ArtFest hosted by Dooreen Rousseau - FRIDAY NIGHT!
Time: Nov 8, 2024 07:00 PM Mountain Time (US and Canada)
Link: https://us06web.zoom.us/j/87256071707?pwd=F7077MJSL1JLNEK7CMXygrHC0hVAlw.1
Meeting ID: 872 5607 1707
Password: 309205

Nov 9th โ€“ Saturday
Topic: Zoom Crop #43 - ArtFest Hosted by Dooreen Rousseau - SATURDAY
Time: Nov 9, 2024 10:00 AM Mountain Time (US and Canada)
Link: https://us06web.zoom.us/j/87925186090?pwd=EEPjhi54pyB6YQ3olyaJaYggcGRGxP.1
Meeting ID: 879 2518 6090
Password: 222409

Zoom Crop Information PDF: CLICK HERE

July 12, 2024 - Zoom Crop

WATCH THE REPLAY: CLICK HERE

Here are the times of the demos
1:12:07 - Demo - Page Builders Club House with Tracy Pounds
Here is the PDF link for Tracy's demo with the instructions and products she used: CLICK HERE

3:03:27 - Demo โ€“ Infinity Crafts with April Floriant

Thanks so much to everyone who joined and hope to see you all again on Friday, August 9th โ€“ from 10:00am to 2:00pm MDT.

July 24/24 Online Class

View the Class Video: Click Here

View the Info PDF: Click Here

Link to purchase the Craft Along Kit: Click Here

April 30/24 Online Class


View the Info PDF: Click Here

Link to purchase the Craft Along Kit: Click Here

December 9/23 Zoom Crop

8 Hour Zoom Crop: Click Here

After Hours Zoom Crop: Click Here

September 27th/23 Online Class


View the Info PDF: Click Here

Link to purchase the Craft Along Kit: Click Here

This website uses cookies to ensure you get the best experience on our website. Learn more

VIP Zoom Crop
Friday January 16th: 6:00pm - Midnight MST
Saturday January 17th: 10:00am - Midnight MST
Hosted by: Simply Stated Design

You will need the ZOOM App on your computer or phone.

Friday Zoom Meeting:
Link: https://us06web.zoom.us/j/81311221698?pwd=gXkeFjnWDekB0nRHohTqwYpTqZPyps.1
Meeting ID: 813 1122 1698
Password: 751404

Saturday Zoom Meeting:
Link: https://us06web.zoom.us/j/87948630680?pwd=ulxwatsEwIEakz6c5fvQ341BIouJ2t.1
Meeting ID: 879 4863 0680
Password: 862986

Zoom Crop Information PDF: CLICK HERE

To purchase the Craft Along Kit: CLICK HERE