Happy Sunday everyone! Kerry EngelΒ here today on the Creative Scrapbooker Magazine blog creating a shiny SHAKER card. Iβm still relatively new to stamping and card making. I tend to go all in and try to use as many products as I can. Thankfully, Therm O Web understands and always has amazing corresponding products that feed my need for βlots of detailsβ.Β Their Gina K. Designs Premium cardstock has been a game-changer for me; itβs smooth, high-quality finish has helped to elevate my stamping and embossingβ¦and then they have foil – how did I ever create without foil before? Here is how I created this very happy, shiny shaker card: Step 1- STAMP Stamp the sentiment, βThanks Snow Muchβ. Stamp and emboss snowflakes with Gina K.Β DesignsΒ Baby, itβs Cold Outside stamps. I used Clearsnap, Top Boss, ink and silver embossing powder. Step 2 – FOIL Using a laminator add Gina K. Designs…
#hellodecember Isnβt is sneaky how December creeps up on you like that? You think itβs so far away and then the first of December is here and you are already feeling like you have dropped the ball on finding matching family pajamas and getting photos in time for the Black Friday sales! Well, my friends β I am here to tell you that you are not alone. However, I am beginning to embrace the frantic. So, here I come December!! Away we go! As always, the holiday season means I am in my craft room creating projects from tags to cards to mini scrapbooks. Todayβs project is a card along with a gift for a special someone. I created this card by starting out with the Wood Texture Paper Stack from Stampinβ Up! I am really enjoying the plaids and wooden elements in the dΓ©cor aisles so I wanted to…
Hi, Connie Nichol here today with a selection of shimmery foiled Christmas cards I made with Therm O Web Foil-Mates and Fancy Foils from Gina K Designs. I am new to the idea of foiling, and I have to tell you that I am in LOVE. Although I was initially intimidated by the idea, it is so simple to create these beautiful cards. You just place the foil of your choice over a pre-printed toner sheet (the Foil-Mates), run it through a laminator and the magic happens. Here are a few cards that I whipped up – once you start laminating foils onto patterns, it’s hard to stop! Just add a bit of ribbon or a couple of flowers and you’re good to go. You can even use the used foil for a card background as I did in the last card. The used foils are too pretty to throw…
Create a fun Bokeh background for scrapbooking, card making and paper crafting! Its so easy! You will be addicted! Watch Cathie Allan in action! https://www.youtube.com/watch?v=QIQv1tyfBec SUPPLIES Art Impression Rubber Stamps Clearsnap ColorBox Pigment Ink Petal Points Clearsnap ColorBox Archival Dye Ink Clearsnap ColorBox Stylus and White Foam Tips Clearsnap ColorBox Art Screen Lyra RembrandtΒ Pencil Crayons Creative Scrapbooker Super Stock Scrapbook Adhesives by 3L Be sure to follow Creative Scrapbooker Magazine on YouTube! Do not miss a single video! CLICK HERE Happy Scrapbooking Everyone!Subscribe today to Creative Scrapbooker Magazine
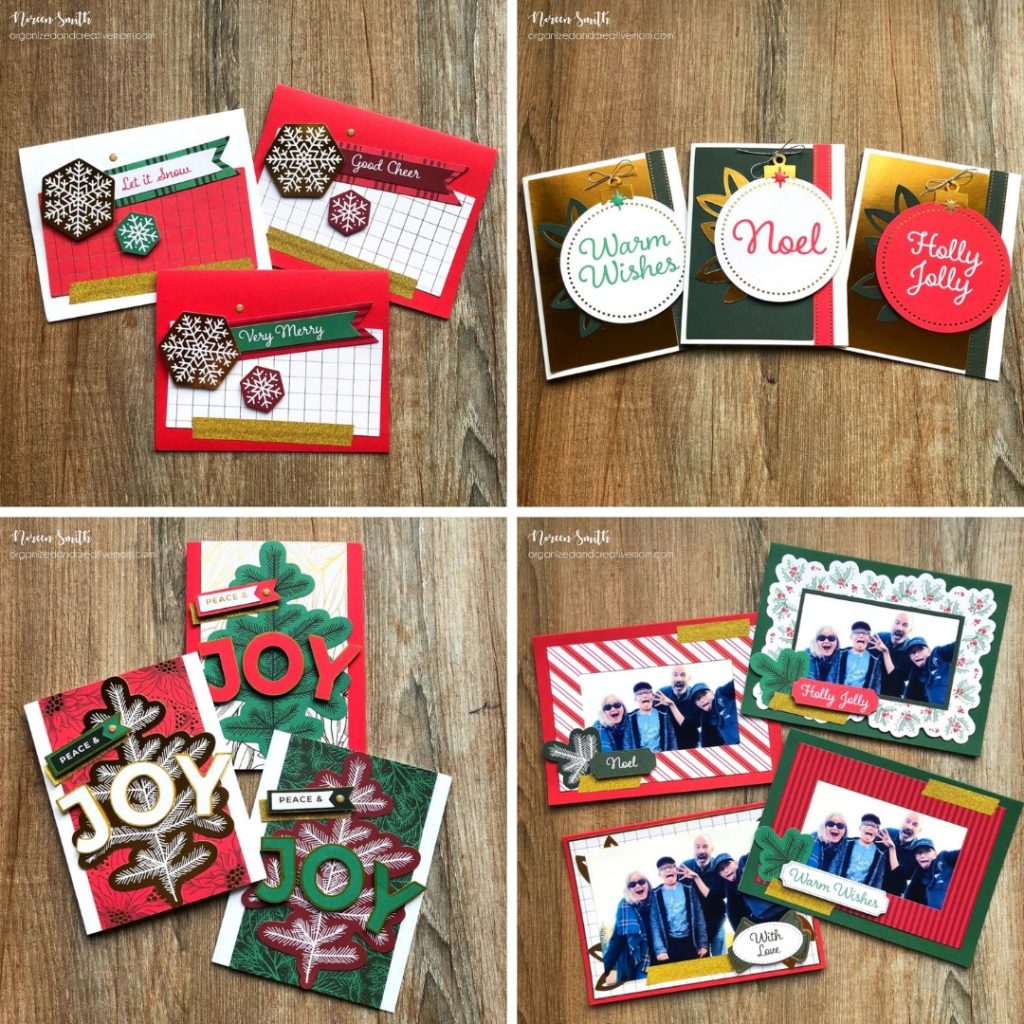
Hi everyone! Noreen Smith here from OrganizedandCreativeMom.com. Weβre halfway into November but Iβm 100% into Christmas crafting right now and working on Christmas Cards! Today I want to show you how I got all my cards done quickly and easily using theβ¦ Creative Memories awesome All That Glitters Card Kit has everything youβll need to create twelve beautiful 5β x 7β cards β the card bases and envelopes, pre-cut embellishment pieces (as well as 170 BONUS pieces!), 26β of gold glitter tape, a sheet of enamel stickers, and an instruction sheet, all packed in a lovely gift box! Although Iβm using the kit to make cards to send to my family and friends, this kit would actually make a wonderful gift β especially for your crafty friends! (Tip: Make sure to check out the Creative Memories Gift Guide to find the perfect gift for everyone on your list!)Β The instructions are…
Happy November Friends! How sweet are these little snowmen? It wonβt be long before I am making snowmen in my backyard with my little ones. The Spirited Snowmen Stamp Set by Stampinβ Up! is the perfect stamp set if you are looking to create a set of cards. It has a great combination of images and sentiments. But best of allβ¦ is that itβs simply super cute.Β Stampinβ Up! has a Snowflake Snowcase during the month of November and these Snowfall Thinlet Dies are part of this suite. It features 19 dies with snowflakes ranging from small to big; however, my favourite has to be the large size snowflake. How gorgeous is that?Β These snowflakes are perfectly paired with the Softly Falling Embossing Folder. This embossing folder gives the illusion of snow falling onto the ground. You can catch me using this snowflake and embossing folder combination throughout the whole…
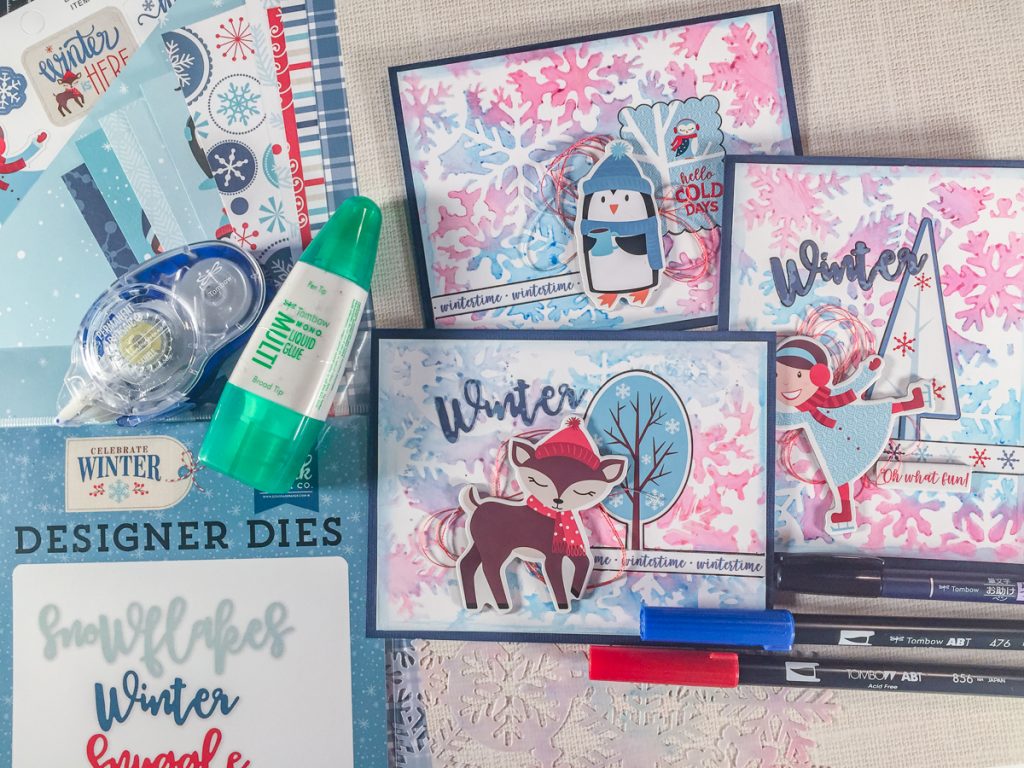
Kim Gowdy is on our latest web show with a super COOL background technique using baby wipes, Tombow Dual Brush pens and a stencil! Check it out! https://www.youtube.com/watch?v=VCAXBaEYzc8&t=11s SUPPLIES Echo Park Paper Co. Stickers, Chipboard and Dies Ranger Dina Wakley White Gesso Tombow Dual Brush Pens Tombow Adhesives Tombow Fudenosuke Pen Magenta MaskBe sure to follow Creative Scrapbooker Magazine on YouTube! Do not miss a single video! CLICK HERE Happy Scrapbooking Everyone!Subscribe today to Creative Scrapbooker Magazine
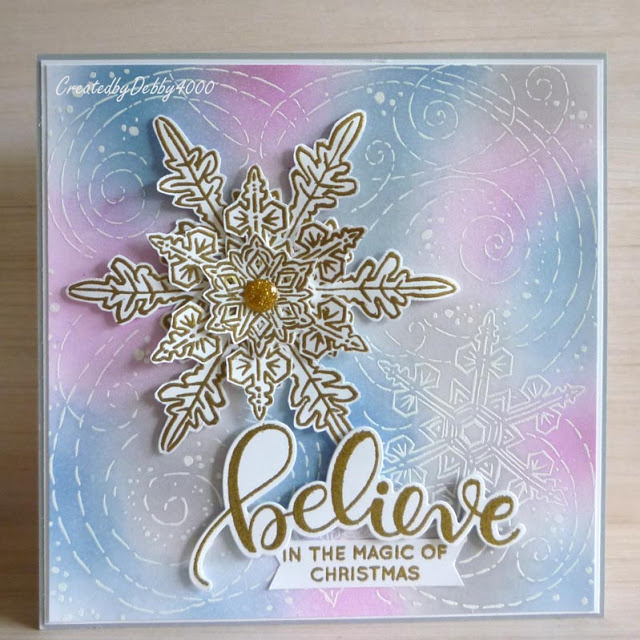
Believe in the Magic of Christmas! Such a gorgeous card designed by Debby Yates as part of the Simon Says Stamp blog challenge featuring Stampendous. This card features one of my favourite stamps this holiday season – Stampendous Winter Blizzard! This stamp is 100% on my wishlist! Did you or have you started thinking about making Christmas cards yet?!?!? I wish I was a wee bit more organized! LOLOLOL! We are super duper happy to announce thatΒ StampendousΒ is one of our fabulous sponsors for The Great Canadian Scrapbook Carnivals. GUESS WHAT – the carnival in Edmonton STARTS TODAY!!!!! We want you to come on down to the show … make and takes, classes, shopping and MORE! You do not have to be a registered cropper to enjoy all the scrapbooking awesomeness! Tickets can be purchased at the door! If you are not in the Edmonton area – we would love to…
Ok. Donβt get too upset with me. I know most of you arenβt ready to be thinking about candy canes or the Sugar Plum Fairy, not to mention the dreaded βsβ word.Β (Shhhβ¦ itβs snow.) But Stampinβ Up! is releasing their Holiday Catalogue tomorrow. Thatβs September 5th. And well. I cannot help but share some of the cute items inside! Letβs start with this simple watercolour card showing off that beautiful deer. I mean. How gorgeous is that? You can create tags with this little guy alone. Stamp βTo: and From:β on the back, add a little string and youβve got yourself a holiday tag! You can find these die cuts and coordinating stamps from the Dashing Deer Bundle. The next two cards are a slightly stepped up version of the clean and simple card above; however, it includes pieces of patterned paper from the βyou gotta see it,Β to believe…
Welcome to the Β Creative Scrapbooker MagazineΒ blog today.Β Its Karan GerberΒ and I thought I would share a Christmas Card with you using some products from Heartfelt Creations My card is designed using theΒ O Holy Night collectionΒ which was released last month. The mini poinsettias and leaves along with that delicate holly branch are from last year, but still one of my favorites go-to’s when doing Christmas Cards. So let’s get started. First, we will need to cut our papers, the card base is a 6×12 folded in half; the dark green is 5.75 x 5.75.Β I like the border the white automatically creates, if you prefer to have the green go to the full 6×6, that would look lovely too. The red is 5.25 x 5.25 and the wood looking paper is cut from the reverse of the center of this one and measures 5×5. Using the Ornament Die set from Heartfelt;…