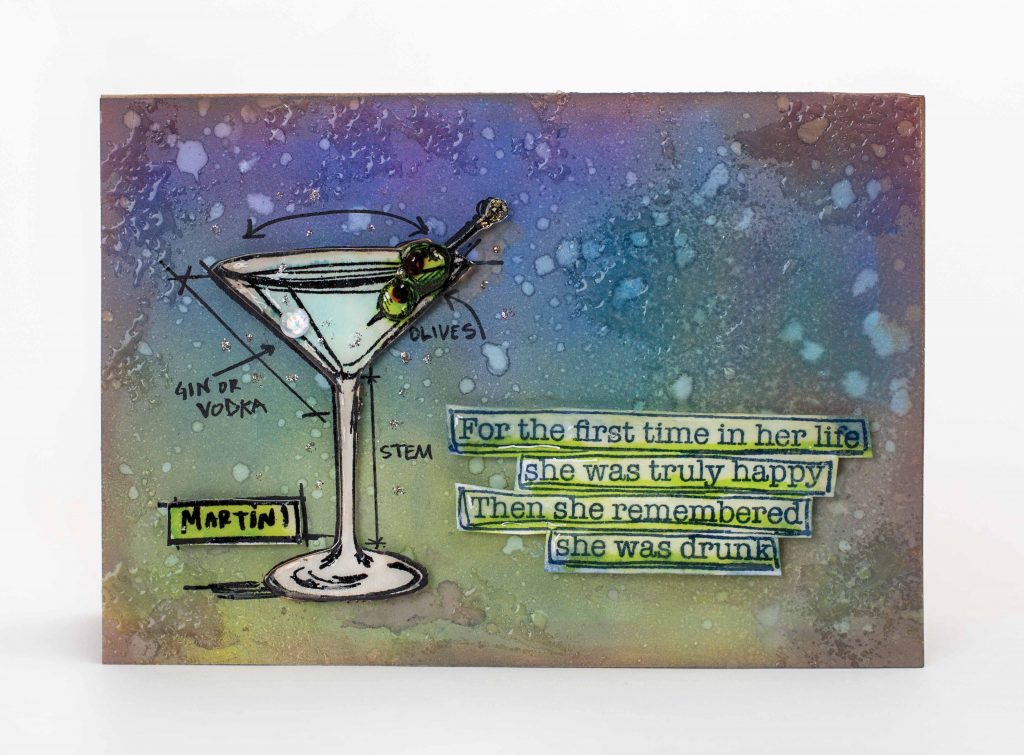
I have completelyย fallen in love with Kerry Engel’sย martini greeting card! How fun is this beautiful little creation. I can think of a few girlfriendsย who would get a real giggle out of receiving thisย card.ย To create the background Kerry followed these basic steps 1. On a piece of Creative Scrapbooker Super Stock, blend Ranger Tim Holtz Distress Oxide inks. 2. Spritz with water and watch the oxide effect. 3. Gently pat a Scrapbook Adhesives by 3L Adhesive sheet onto the base – only part of the adhesive will sit down. 4. Sprinkle with Ranger embossing powder and heat set! Here is a complete list of supplies that Kerry used. Stampers Anonymous Stamps Ranger Dylusions Stamps Ranger Tim Holtz Distress Oxide Inks Ranger Embossing Powder Ranger Archival inkย Ranger Glossy Accents Scrapbook Adhesives by 3L Adhesives Sheets and 3D Foam Squares Happy Martini Card Making Everyone! Subscribe today to Creative Scrapbooker Magazine
Hello crafty friends, Tracy McLennon here today on the Creative Scrapbooker Magazine blog. Today I have a fun little birthday card to share. Here are all of the details for this beautiful birthday card. Project Recipe: Impression Obsession- Baby Bird Set (CL837) Chameleonย Color Toneย Pens- BV4 Blue Violet, RD5 Burgundy, YO3 Warm Sunset, RD3 Vermillion, OL3 Olive Green, BR5 Bark, BR2 Hot Cocoa, NU3 Fawn Chameleon Colour Top- RD5 Burgundy Ranger Archival Ink- Jet Black Ranger Tim Holtz Distress Oxide Ink- Bundled Sage, Frayed Burlap, Walnut Stain, Aged Mahogany, Antique Linen Ranger Embossing Pad Ranger Black Embossing Powder Scrapbook Adhesives by 3L- Crafty Foam Tape, E-Z Runner Ultra, 3D Foam Squares, This 3D Foam Squares Blending Tool Craft Mat Edge Distresser Burlap String Cardstock- WhiteI stamped my Impressionย Obsession stamps using Ranger Archival Ink- Jet Black onto white cardstock and added colour using Chameleon Color Tone Pens and Chameleon Colour Tops.ย Fussy cut…
Hello friends! Tracy McLennon here, and I am loving that Autumn is right around the corner in my neck of the woods. Cooler days, changing leaves and of course pumpkin spice everything. To celebrate in a crafty way, I created this Take Life One Cup At A Time card, with a fall colour scheme. I started my creation by stamping this fabulous Art Impressions image onto white cardstock using black Archival Ink. Then I added colour using Chameleon Pens. I did so using some simple bold shading for more of a cartoon look. Then I simply fussy cut around the images leaving a narrow white border.ย I inked the edges of all of my patterned and cardstock layers using Walnut Stain Distress Oxide Ink. Using patterned papers from the Hello Fall collection from Carta Bella, I hand cut leaves that were about 1.5โ long and 1โ wide. Then I added them…
Ok. Donโt get too upset with me. I know most of you arenโt ready to be thinking about candy canes or the Sugar Plum Fairy, not to mention the dreaded โsโ word.ย (Shhhโฆ itโs snow.) But Stampinโ Up! is releasing their Holiday Catalogue tomorrow. Thatโs September 5th. And well. I cannot help but share some of the cute items inside! Letโs start with this simple watercolour card showing off that beautiful deer. I mean. How gorgeous is that? You can create tags with this little guy alone. Stamp โTo: and From:โ on the back, add a little string and youโve got yourself a holiday tag! You can find these die cuts and coordinating stamps from the Dashing Deer Bundle. The next two cards are a slightly stepped up version of the clean and simple card above; however, it includes pieces of patterned paper from the โyou gotta see it,ย to believe…
What screams Birthday more than that confetti look! ย Nicole here and I am sharing this fun stamping technique with a variety of Stampers Anonymous Stamp Sets and Rangers new Alcohol Lift- Ink.ย This is an easy stamping technique that will work for any stamped image.ย I used Stampers Anonymous Crazy Cats and Crazy Things stamps for this quick Birthday Card.ย Select an assortment of Ranger Alcohol Inks and Yuppo.ย Load the Alcohol Ink Applicator with Alcohol Inks and a couple drops of Blending Solution. Dab the Alcohol Ink randomly around the Yuppo paper.ย Use a twisting motion while applying the alcohol ink to the Yuppo.ย It takes no time to dry so you can pop it right onto the Stamp Platform. Make sure you position your stamp where you want it and load it on the Stamp Platform.ย Use the new Alcohol Lift-Ink to load your stamp.ย With the stamp loaded…
Nicole Wright is on our latest web show putting together a sweet card featuring Wendy Vecchi Make Art Blendable Dye Inks. Nicole partners these inks together with products from Stampers Anonymous and Ranger to create a beautiful botanical card. Check it out! https://www.youtube.com/watch?v=zIzFcsbRZ68 SUPPLIES Wendy Vecchi Make Art Blendable Dye Inkย Rangerย Detailed Blending Tools Ranger Archival inkย Stampers Anonymous Stamps Tim Holtz for Tonic Studios Stamp Platform Scrapbook Adhesives by 3Lย Be sure to follow Creative Scrapbooker Magazine on YouTube! Do not miss a single video! CLICK HERE Happy Scrapbooking Everyone!Subscribe today to Creative Scrapbooker Magazine
Cathy Caines here on the blog today playing with the Stampin’ Up!ย Little Elephant stamp set and coordinating punch. Call me crazy but I love a cute punch. Punches are easy. I donโt have to move much. Its fast. And itโs effective. So when a stamp set and a punch as cute as this gets released from Stampinโ Up!, itโs first on my list. Here I am introducingโฆ. the Little Elephant Bundle. #socuteThis cutie was sitting in my craft room for almost a month before I took the plastic off. It was about time to get this stamp set dirty! When I first approached these projects using the Little Elephant stamp set and punch, I started with the stacking technique. It seems to be the thing to do with little critters and animals these days. And I can understand whyโฆ itโs easy and of course, ridiculously adorable. A quick hint…
Cathy Caines is on our web show today with a quick little trick to create a faux stitched card frame using Framelits by Stampin’ Up! Check it out! https://www.youtube.com/watch?v=wOiRZjpSe9w&t=64s SUPPLIES USED Stampin’ Up! Stitched All Around Bundle Stampin’ Up! Cardstock Stampin’ Up! Big Shot Die-Cutting Machine Stampin’ Up! Magnetic platformBe sure to follow Creative Scrapbooker Magazine on YouTube! Do not miss a single video! CLICK HERE Happy Scrapbooking Everyone!Subscribe today to Creative Scrapbooker Magazine
Hello everyone! Cathie Allan here today on the Creative Scrapbooker Magazine blog. Today, I thought I would share the Make-n-Take, from an event I did with Katharina in Chantilly, Virginia. First I will tell you this was an exceptional event. If you are a paper crafter of any kind you will want to be at their next event.ย So many booths, vendors, door prizes, a huge crop and more. Creative Scrapbooker Magazine was there and we met so very many amazing paper crafters, made new friends and shared ideas. Here is the 10-minute make-n-take that the participants did in our booth. We had so much fun creating these speedy little tags, sharing ideas, laughing and giggling together. Once I got home, I took the same ideas and created more tags and a scrapbook page. Yes, I added embellishments from MultiCraft because โwhy notโ, lol. This was a quick idea that…
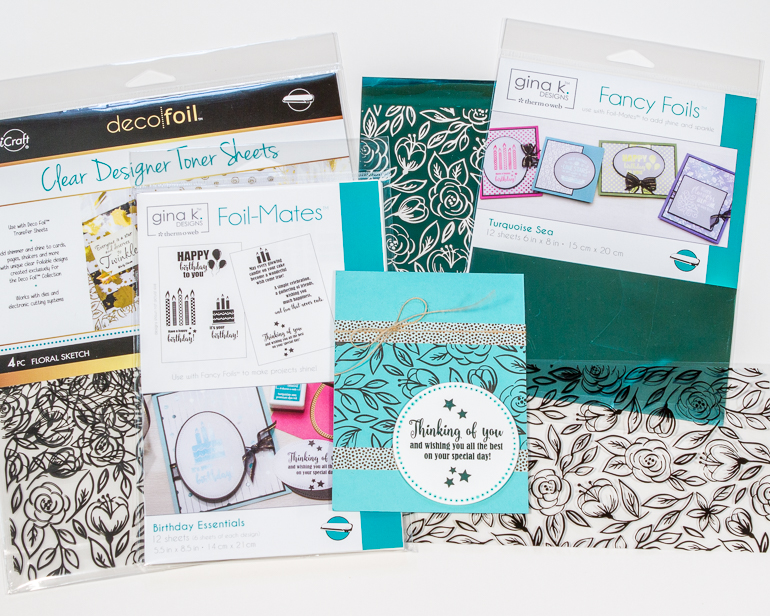
Seriously! Have you tried foiling yet? I did! I LOVE itโฆ Makes me think of changing the words to Kate Perryโs โI Kissed a Girlโ songโฆsing with me! I tried to foilโฆ and I liked it! I think you should try it too, but weโll let Kate stick to song writing! LOL! Check out these SIMPLE foiled cards! Now, Iโll share some eye candy and explain a bit of whatโs going on in each photo. Hope you enjoy! Thanks for joining me on my foil initiation. Itโs super fun and honestly easy! Give it a try and share your projects with us!
