


Hi there! It’s Noreen from OrganizedandCreativeMom.com here today to share some ideas for back to school layouts AND some FREE cut-files with you! Sadly, summer is rapidly ending and it’s time for the kiddos to get ready to head back to school. Since Covid-19 is still a factor, school might look very different this year – some jurisdictions are opening “regular” school, some are only doing remote learning and many are offering a combination of the two. No matter what your child’s first day back looks like, be sure to document it and tell the story of this very unique year!
My own boys will primarily be doing remote learning and will be heading back in early September. For these layouts, I pulled out some photos of my boys and I heading back to school from LAST September to use with the fantastic Book Smarts Theme Pack from Creative Memories. Theme Packs contain just enough product to create a few theme-specific layouts: four sheets of double-sided patterned papers, a sheet of cardstock and coordinating stickers. You can also add in the coordinating Book Smarts Laser Cut Borders to stretch the Theme Pack even further. And to really have fun and get a lot of scrapbook mileage from this pack, I designed some word-art cut files that you can download for free and use with it for titles or as a main feature of your layout! 
I challenged myself to use the same photos, Book Smarts Theme Pack along with a couple of extra sheets of cardstock to create three very different yet easy layouts.  Why three layouts made with the same photos? Well, each of my sons has their own School Years Album that I add layouts to, and of course I want to keep a layout for myself in the regular family album! It always feels more efficient to create all three layouts at the same time with the same products while I have them out. Here are the step-by-step instructions I used to create these three layouts.
First, head over to the Organized and Creative Mom Shop to download your free Back to School and School Days cut-files. You’ll get a zipped file containing the two word-art titles and shadow layers each in three different formats – PNG, JPG and SVG. Use them with your electronic cutting machine such as Cricut, Silhouette, or Brother ScanNCut to cut out the titles in preparation for your layouts. The beauty of cut-files is you can make them whatever size you need for your project! I cut both of the layered titles from White and Crimson Cardstock to measure 5” wide when the two pieces are assembled, and the larger open “School Days” title from White Cardstock to measure 11” wide. Once your titles are cut, you’re ready to scrap!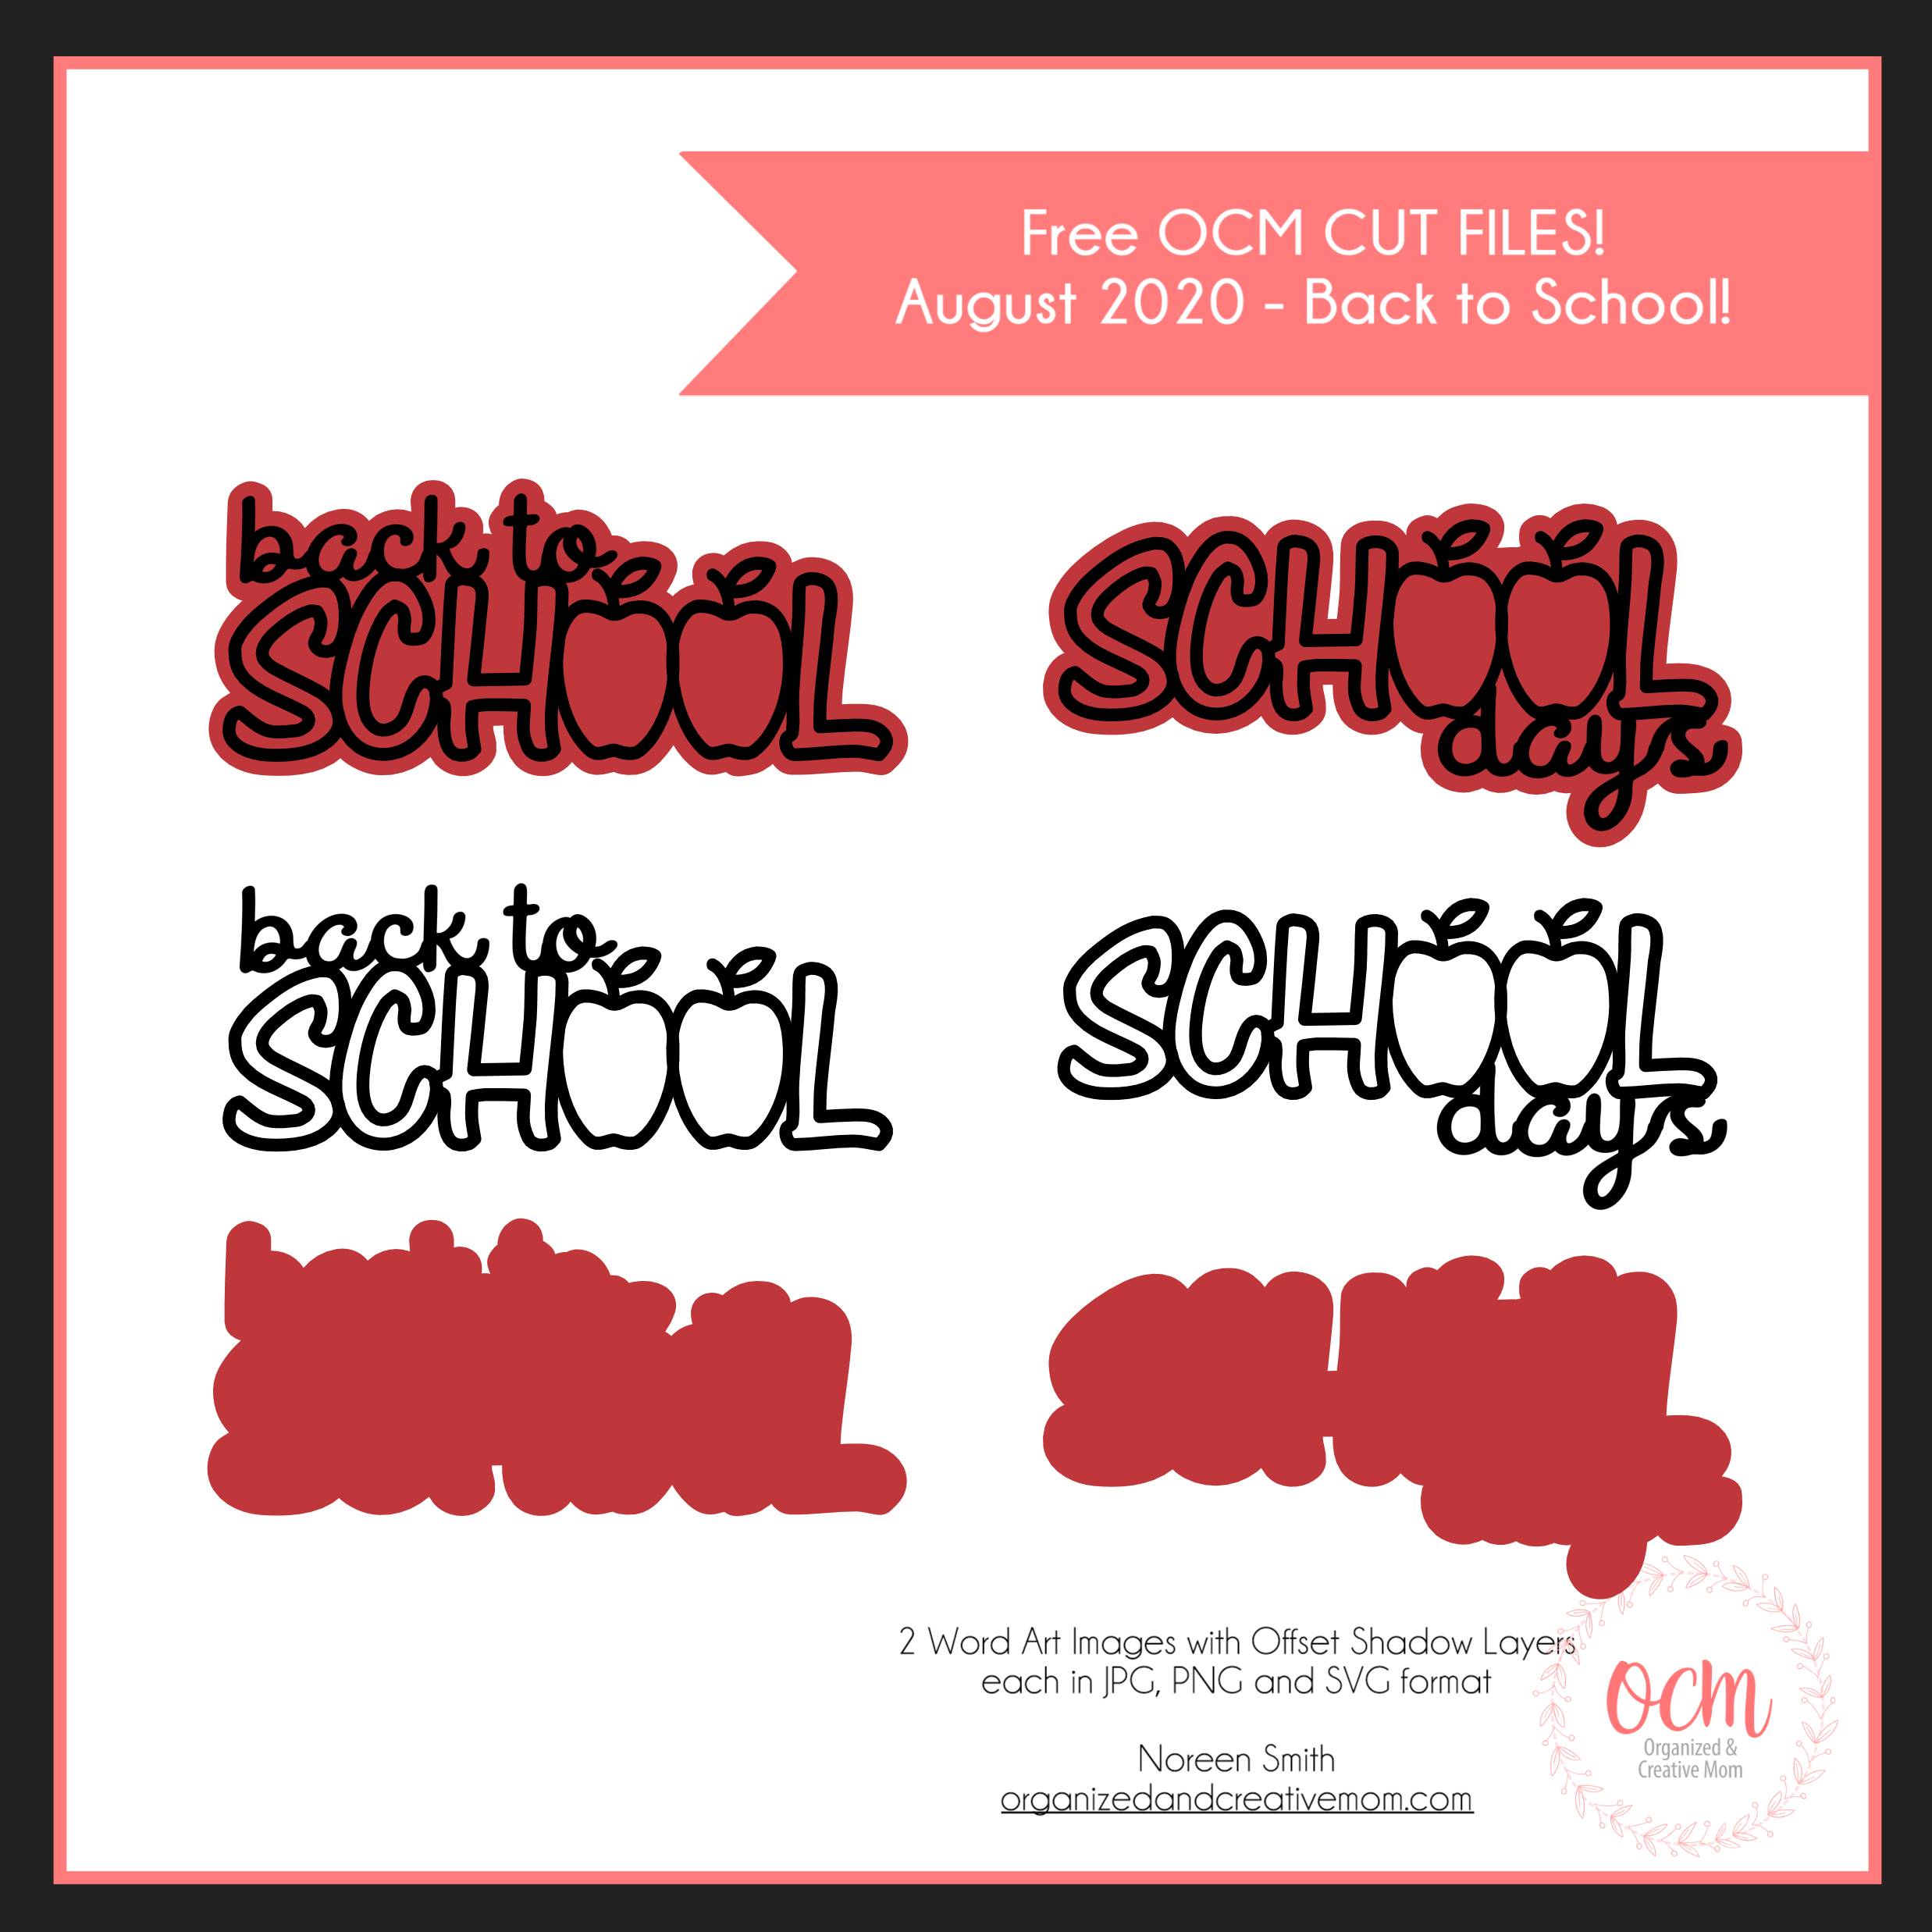
Layout 1:
– Use the Navy Cardstock that comes in the Theme Pack, one sheet of the yellow/notebook double-sided patterned paper, the Apples Laser Cut Border, and the “Back to School” cut-file title and shadow layer.
– Use Repositionable Adhesive to attach the title and shadow layer – it’s perfect for adhering intricate cuts!
– Cut the patterned paper into a 3” x 11” strip, a 4” x 12” strip, and a 4” x 12” strip. *Make sure to save the 1” x 12” strip for use on the next layout. 
– Adhere the patterned paper strips to the Navy Cardstock. Mat one 6” x 4” and three 3” x 3” photos on additional pieces of Crimson Cardstock and adhere them on top of the patterned strips.
– Use Foam Squares to mount the Apple Laser Cut Border across the seam at the bottom of the notebook strip, and the cut-file title near the top of the notebook strip. 
– Finish the layout with journaling, Apple, Pencil, and A+ stickers as shown!  Layout 2:
– Use one sheet of the blue paper clips/blue dots patterned paper, a piece of White Cardstock (not included in Theme Pack), the Book-Shelf Laser Cut Border and the “School Days” cut-file
– Use Repositionable Adhesive to attach the title and shadow layer.
– Use the outside of the Jumbo Circle Custom Cutting System Template and the Blue Blade to cut a large circle from the blue paper clip paper. * Make sure to save the leftover piece of paper from the outside of the circle for the next layout.  – Adhere the large circle to the center of the White Cardstock. Adhere the 1” x 12” yellow strip saved from Layout 1 slightly below the center of the circle.
– Mat one 4” x 6” and three 3” x 3” photos on Crimson Cardstock and adhere on top of strip and circle. Use Foam Squares to adhere the Book-Shelf Laser Cut Border and the cut-file title to the layout.  – Finish the layout with journaling around the outside edge of the large circle, the Book Stack, A+ and Take Note stickers to complete the layout!
  Layout 3:
– Use the second sheet of yellow/notebook patterned paper, the leftover circle outline from the second layout, the Banner Laser Cut Border and the large “School Days” cut-file title.
– Adhere the leftover circle outline on top of the yellow paper. If it works with your photos, place one photo behind each of the open apples in the word “School” and trim off the excess with Micro-Tip Scissors so that the photo fills the apple.  – Use scraps of Navy, Crimson, and Dark Green Cardstock to fill in the remaining open letters and leaves in the same way.
– Cut the Banner Laser Cut paper into three sections as shown.
– Mat one 6” x 4” and one 3.5” x 3.5” photo with Crimson Cardstock and adhere on top of the yellow circle. Angle the filled “School Days” title between them.
– Mount the Banner sections with Foam Squares from the edges of the circle to the photos.  Finish the layout with journaling and various Stars stickers!
  There you go – three different layouts each with the same feel! Which one is your favorite? And which one do you think I’m keeping for my family album? I’d love to hear your thoughts!
If you like having lots of layouts choices, make sure to join me for my FREE class during the 2020 Great Canadian Virtual Scrapbook Carnival hosted by Creative Scrapbooker Magazine on Friday, September 25th!
I’ll be sharing how you can create the base pages for SIX double-page spreads in just an hour!
See you then!

*All Creative Memories products featured in these projects are available in Canada on my CM website, and you can find CM advisors in the US and other countries by using the Advisor Lookup feature. Please drop by my blog, Facebook Page, YouTube Channel or my Instagram feed for more ideas and inspiration – I create layout sketches, cards, and other projects which showcase Creative Memories products & tools on a regular basis.
SUBSCRIBE TODAY to our quarterly publication – delivered right to your door

