Tag

Elizabeth Craft Designs

Browsing

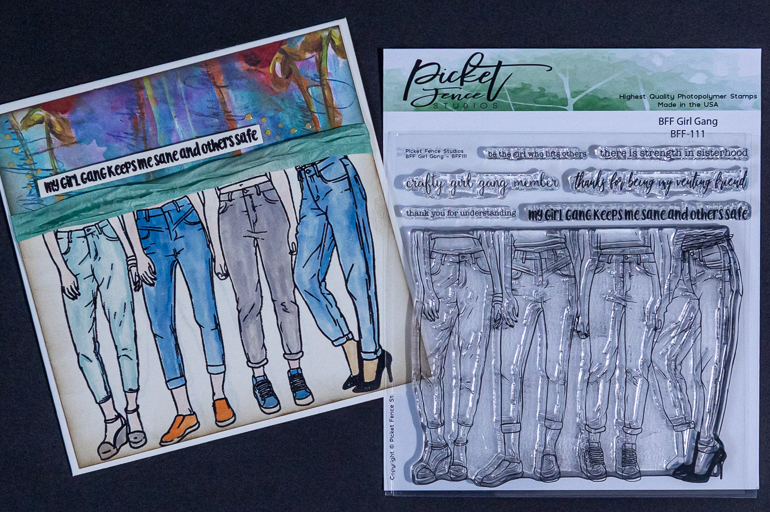
Hello! Kim here again with another FUN card share! Honestly, where would you be without your favourite girl gang? Regardless of age, our BFF’s are a huge part of getting through life! They make us laugh, love us despite our faults and encourage us to be our best self! That being said…how can you not LOVE the Picket Fence BFF Girl Gang stamp set! I love all the sentiments and possibilities! It will be a well-loved stamp set for years to come! On to the details of how I created this 6×6 card that makes me smile! Thanks for checking in! Just like Arnold Schwarzenegger…I’ll be back! Have you been inspired by our SPRING ISSUE of Creative Scrapbooker Magazine yet? Be sure to get your copy soon, we know you’ll LOVE it!
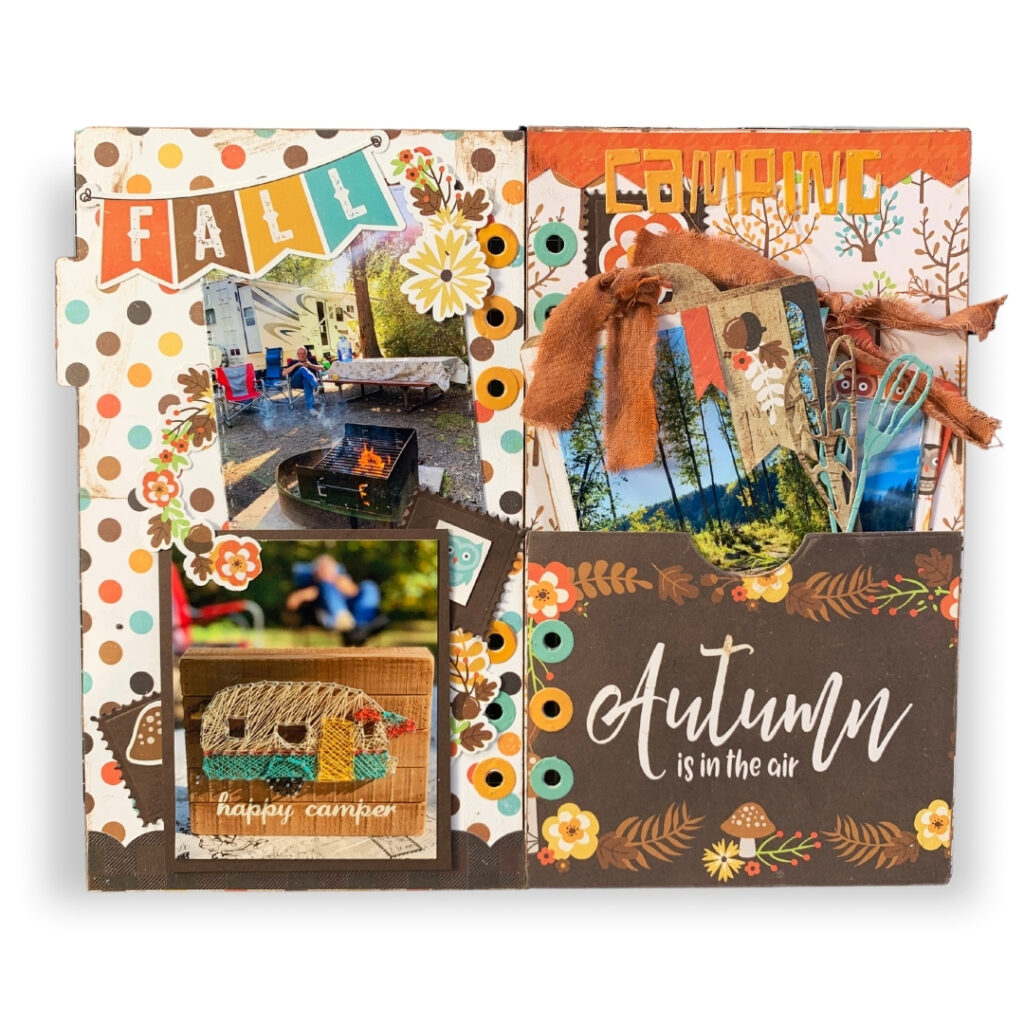
I have been using the Elizabeth Craft Designs Planner Essential system for over a year now. I have a mix of Planner Essential Dies and Art Journal Dies, they give me endless options. Once I get started creating I find it hard to go to bed, they really push me to think creatively and their dies allow me to use up supplies in really unique ways. For this two-page spread, I used the Celebrate Autumn Collection from Echo Park Paper Co. It’s an older collection with a fabulous colour scheme. I can’t resist teal and yellow.  One of the fun items in the Echo Park Paper Co. collections is the Journaling Cards. These cards transition easily into actual pockets and tags with Elizabeth Craft Designs dies. For this spread, I used the journaling cards in two ways. Most obviously, I used an Elizabeth Craft Designs Planner Essentials die to cut…

Hey Creative Scrapbooker Fans! Katelyn Grosart here today sharing with you how to create a little boy birthday card using the Welcome Baby Boy Collection from Echo Park Paper Co. To create my card, I’ve also used a variety of products from Ranger Ink, Dies from Elizabeth Craft Designs, Super Stock from Creative Scrapbooker Magazine and adhesive from Scrapbook Adhesives by 3L. You’ll want to grab a cup of your favourite beverage and learn how to recreate my card at home. To start, you’ll need the Little One Paper out of the Welcome Baby Boy Paper Pack from Echo Park Paper. Die cut a 4” Stitched Rounded Rectangle from Elizabeth Craft Designs out of the patterned paper. Ink the edges of the paper using Chipped Sapphire Distress Ink and a blending tool with foam from Ranger Ink. Next, you’ll need the It’s a Boy Paper out of the Welcome Baby…

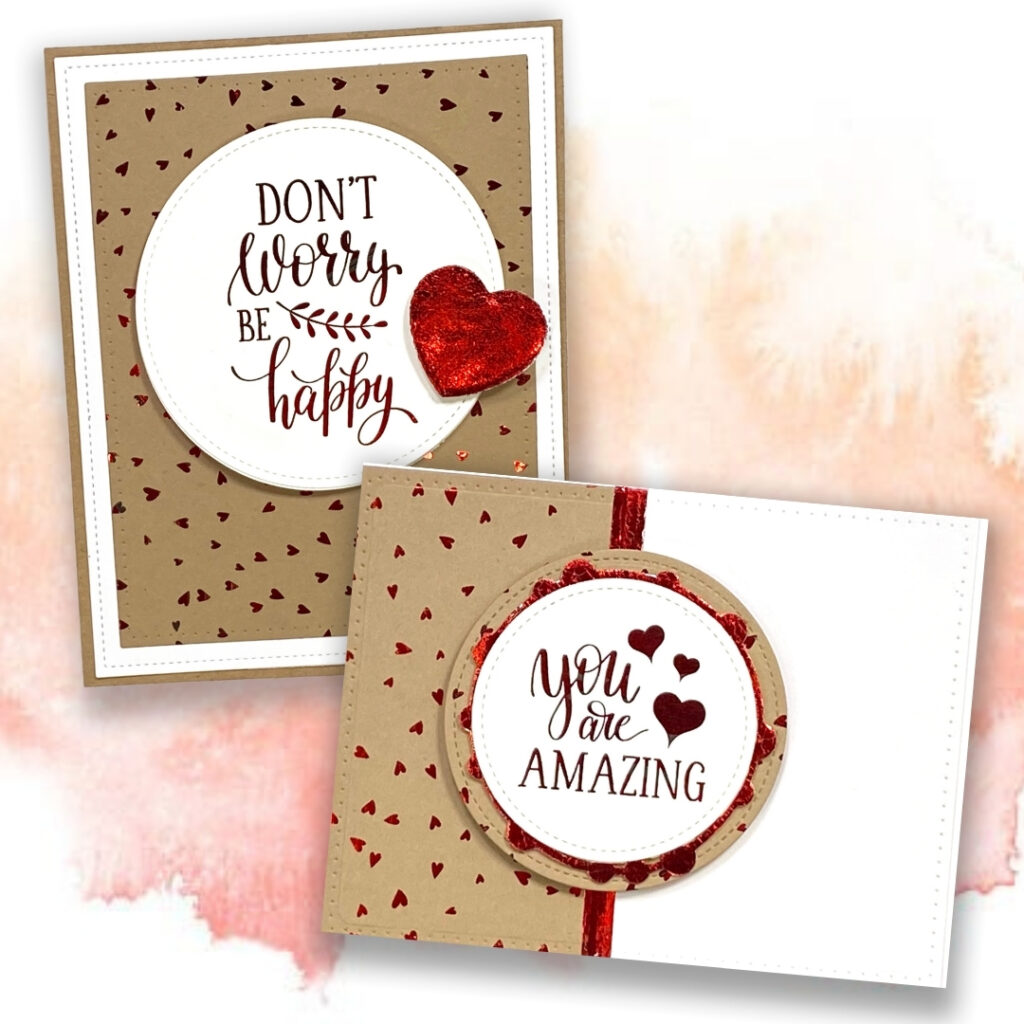
Therm O Web products make adding foil to your project an absolute breeze! Here are a few cards I put together with a shiny finish. I created a card base using an Elizabeth Craft Designs die. Next, I started with a Therm O Web Deco Foil Toner Card Front. I sandwiched the card front into a piece of parchment paper, layered some Therm O Web Gina K. Designs Fancy Foils SHINY SIDE UP on top. Closed the sandwich and ran it through the laminator. WOWZERS! Those hearts sparkle. Next, I used a Therm O Web Gina K. Designs circle die to cut out a sentiment from the Therm O Web  Gina K. Designs Foil-Mates. I added the foil, in the same way, I added foil to the Toner Card Front. I wanted a little heart accent. So I took the Therm O Web Gina K. Designs heart die and cut…

I pulled out the Echo Park Paper Co. Baby Girl paper collection the other night and started to play. This collection is so soft and pretty to work with.  I created this card and although I don’t have anyone to give it to, I put it in my greeting card box that’s filled with cards for someone special when the time is right! I created the background using an Elizabeth Craft Designs die. The cardstock is from Ranger Simon Hurley Create – it just might be my favourite right now. I turned the die into a sticker using Sookwang double-sided adhesives. For the final touches, I used the coordinating Echo Park Paper Co. Baby Girl Sticker Book.  This book is SERIOUSLY PACKED with stickers!!! I added dimension to the card using Scrapbook Adhesives by 3L 3D Foam Squares. Here is a FASTFORWARD look of the card coming together. https://www.youtube.com/watch?v=9MieVt_6oBc Have…

Hey Creative Scrapbooker Fans! For today’s blog post, I’m sharing with you my Be Mine Treat Bag perfect for putting treats in for Valentine’s Day. To create my treat bag, I’ve used a variety of products from Ranger Ink, Dies from Elizabeth Craft Designs, Stamps from Wild Whisper Designs, Super Stock Cardstock from Creative Scrapbooker Magazine, and adhesive from Scrapbook Adhesives by 3L. You’ll want to grab a cup of your favourite beverage and learn how to recreate my treat bag at home. To start, you’ll need a treat bag. Ink the edges of the treat bags using Walnut Stain Distress Ink and a Blending Tool with Foam from Ranger Ink. Choose two papers out of Dina Wakley’s Collage Collective Book from Ranger Ink. Die cut a 3” Stitched Rounded Rectangle from Elizabeth Craft Designs out of one of the papers. Die cut a 2 ½” Stitched Rounded Rectangle from…

WINNER – Congratulations to Kimberley Galloway It is beginning to look a lot like Christmas!!!! Good morning Day #9 of our 12 Days of Giving! Today’s sponsor is Elizabeth Craft Designs. Check out this AWESOME prize package filled with dies, stamps, and a planner. If you were thinking of jumping on the planner trend – this prize is for you! If you want to add to your collection – this prize is for you! If you are a paper crafter – this prize is for you! LOL! Okay, I am thinking this prize is for everyone!!!! The lucky winner is going to LOVE IT! This prize package includes:  Planner Essentials Dies #4 Planner Essentials Dies #28 – Globe Planner Essentials Dies #29 – Directions Planner Essentials Dies #34 – Christmas Figures Planner Essentials Dies #35 – Holiday Tab Pages Reinforcement Pack 2 Destination Phrases stamp set Hello stamp set Olive…

Hey Creative Scrapbooker Fans! Katelyn Grosart here! For today’s blog post, I’m sharing with you my Warmest Wishes Wall Hanging. To create my wall hanging, I’ve used the Simple Vintage North Pole Collection from Simple Stories Dies and Watercolor Palette from Elizabeth Craft Designs Stamps and Embossing Powder from Emerald Creek Craft Supplies, Ink from Ranger Ink Adhesive from Scrapbook Adhesives by 3L. You’ll want to grab a cup of your favourite beverage and learn how to recreate my wall hanging at home. To start, you’ll need to choose two pieces of patterned paper out of the Simple Vintage North Pole Paper Pack from Simple Stories. From one of the patterned papers, die cut a 4” Stitched Rounded Rectangle from Elizabeth Craft Designs out. From the other patterned paper, die cut a 3 ¾” Fitted Rounded Rectangle from Elizabeth Craft Designs. Distress the edges of both rectangles. Ink the edges…

Hey Creative Scrapbooker Fans! For today’s blog post, I’m sharing with you my Have a Cozy Day Wall Hanging. To create my wall hanging, I’ve used the Cozy Days Collection from Simple Stories Dies from Elizabeth Craft Designs Ink from Ranger Ink Adhesive from Scrapbook Adhesives by 3L You’ll want to grab a cup of your favourite beverage and learn how to recreate my wall hanging at home. To start, you’ll need the yellow plaid pattern paper out of the Cozy Days Paper Pack from Simple Stories. Die cut the 4 ½”  Stitched Fishtails from Elizabeth Craft Designs out of the paper. Distress the edges of the fishtail. Ink the edges of the fishtail using Walnut Stain Distress Ink and a blending tool with foam from Ranger Ink. Next, you’ll need the burgundy/pink dash pattern paper out of the Cozy Days Paper Pack from Simple Stories. Die cut the 4” Stitched Fishtails…

Hey Creative Scrapbooker Fans! For today’s blogpost, I’m sharing with you my Hello Dear Friend Card. To create my card, I’ve used the Hello Autumn Collection from Carta Bella Paper Co.  Creative Scrapbooker Super Stock Cardstock from Creative Scrapbooker Magazine, Dies from Elizabeth Craft DesignsInk from Ranger Ink and adhesive from Scrapbook Adhesives by 3L. You’ll want to grab a cup of your favourite beverage and learn how to recreate my card at home. To start, you’ll need the black plaid pattern paper out of the Hello Autumn Paper Pack from Carta Bella. Die cut the 4” Stitched Indented Rectangle from Elizabeth Craft Designs out of the paper. Die cut the 1 ½” Diagonal Stitched Fishtail from Elizabeth Craft Designs out of the same patterned paper. Distress the edges of the rectangle and fishtail. Ink the edges of the fishtail and rectangle using Walnut Stain Distress Ink and a blending…

January 28/26 Online Class

View the Info PDF: Click Here

Link to purchase the Craft Along Kit: Click Here

Recap Video Click Here

February 15th/25

WATCH THE REPLAY: CLICK HERE

Zoom Crop Information PDF: CLICK HERE

FREE Layout Template Guide: CLICK HERE

VIP Zoom Crop

Friday January 17th Zoom Meeting:
Link to replay: CLICK HERE

Saturday January 18th Zoom Meeting:
Link to replay: CLICK HERE

December 30/24 Online Class

CLICK HERE for the Link for Your Crafty Homework

This includes the eBook and printable materials for the class.
Please note: You’ll need to provide your email address, as Nadine Milton will send the information directly to you.

CLICK HERE for the Link for the Information PDF

This includes the supply list for this class.

VIP Zoom Crop
Friday November 8th: 7:00pm - 10:00pm MST
Saturday November 9th: 10:00am - 10:00pm MST

You will need the ZOOM App on your computer or phone.

Nov 8th - Friday Night
Topic: Zoom Crop #43 - ArtFest hosted by Dooreen Rousseau - FRIDAY NIGHT!
Time: Nov 8, 2024 07:00 PM Mountain Time (US and Canada)
Link: https://us06web.zoom.us/j/87256071707?pwd=F7077MJSL1JLNEK7CMXygrHC0hVAlw.1
Meeting ID: 872 5607 1707
Password: 309205

Nov 9th – Saturday
Topic: Zoom Crop #43 - ArtFest Hosted by Dooreen Rousseau - SATURDAY
Time: Nov 9, 2024 10:00 AM Mountain Time (US and Canada)
Link: https://us06web.zoom.us/j/87925186090?pwd=EEPjhi54pyB6YQ3olyaJaYggcGRGxP.1
Meeting ID: 879 2518 6090
Password: 222409

Zoom Crop Information PDF: CLICK HERE

July 12, 2024 - Zoom Crop

WATCH THE REPLAY: CLICK HERE

Here are the times of the demos
1:12:07 - Demo - Page Builders Club House with Tracy Pounds
Here is the PDF link for Tracy's demo with the instructions and products she used: CLICK HERE

3:03:27 - Demo – Infinity Crafts with April Floriant

Thanks so much to everyone who joined and hope to see you all again on Friday, August 9th – from 10:00am to 2:00pm MDT.

July 24/24 Online Class

View the Class Video: Click Here

View the Info PDF: Click Here

Link to purchase the Craft Along Kit: Click Here

April 30/24 Online Class


View the Info PDF: Click Here

Link to purchase the Craft Along Kit: Click Here

December 9/23 Zoom Crop

8 Hour Zoom Crop: Click Here

After Hours Zoom Crop: Click Here

September 27th/23 Online Class


View the Info PDF: Click Here

Link to purchase the Craft Along Kit: Click Here

This website uses cookies to ensure you get the best experience on our website. Learn more

VIP Zoom Crop
Friday January 16th: 6:00pm - Midnight MST
Saturday January 17th: 10:00am - Midnight MST
Hosted by: Simply Stated Design

You will need the ZOOM App on your computer or phone.

Friday Zoom Meeting:
Link: https://us06web.zoom.us/j/81311221698?pwd=gXkeFjnWDekB0nRHohTqwYpTqZPyps.1
Meeting ID: 813 1122 1698
Password: 751404

Saturday Zoom Meeting:
Link: https://us06web.zoom.us/j/87948630680?pwd=ulxwatsEwIEakz6c5fvQ341BIouJ2t.1
Meeting ID: 879 4863 0680
Password: 862986

Zoom Crop Information PDF: CLICK HERE

To purchase the Craft Along Kit: CLICK HERE