Tag

Ranger

Browsing

Hey Creative Scrapbooker Fans! For todayโ€™s blog post, Iโ€™m sharing with you my Do Everything With Love Tag. To create my tag, Iโ€™ve used a variety of dies from Elizabeth Craft Designs, patterned paper from Simple Stories, a variety of products from Ranger Ink, ย and adhesive from Scrapbook Adhesives by 3L. Youโ€™ll want to grab a cup of your favourite beverage and learn how to recreate my tag at home. To start, youโ€™ll need a tag that measures 3 1/8โ€ x 6 ยผโ€. Select a piece of patterned paper out of the 6×8 Paper Pad โ€“ Simple Vintage Garden District from Simple Stories. Trace the tag around the piece of patterned paper. Cut the tag out. Punch a hole at the top of the patterned paper tag. Ink the edges of the tag using Walnut Stain Distress Ink and a blending tool with foam from Ranger Ink. Ink the edges…

Hello crafty friends! Tracy McLennon here on the Creative Scrapbooker Magazine blog. Today I have such a fun little card to share featuring a cute little stamp set from Picket Fence Studios and coordinating dies. I also used some of my favourite Scrapbook Adhesives by 3L products and Ranger inks. I started by creating a simple blended background for my card using white cardstock, a Ranger blending tool & mat, and Ranger Tim Holtz Distress Oxide Inks. I was going for a moody sunset kind of backdrop. To add a slightly distressed border I stamped the Ranger Tim Holtz Early Espresso Distress Oxide ink onto my mat, misted it with water, and then drug the edges of the blended background through it. Let dry. This is also when I stamped the card sentiment in the bottom left-hand corner of the card using Ranger Archival ink. I stamped the super cute…

Hi, Creative Scrapbooker fans! Pam Bray here today sharing a tutorial on how to create a monochromatic Image tag using Ranger Tim Holtz’s latest Speckled Egg Distress products. LOVE…the Distress Glaze and the color of the Speckle Egg…oh my! Photo 1: Spray white card stock with Distress Speckled Egg Distress Spray; dry. Photo 2: Ink edges using Speckled Egg Distress Ink. Photo 3: Lay Floral Layering Stencil on the prepared tag; apply Speckled Egg Distress Ink to top. Photo 4: Stamp background image using Distress Speckled Egg Ink. Photo 5: Apply embossing ink over top of prepared tag; emboss with Distress Speckled Eggย  Emboss Glaze. Photo 6: Die cut doily and border from white cardstock; adhere to top of the prepared tag. Apply Distress Speckled Eggย ย  Ink lightly to the top of the doily. Spray white card stock with Distress Spray; dry. Stamp the Stampers Anonymous Tim Holtz Crazy Cat…

Hello everyone! Kerry Engel here today on the Creative Scrapbooker Magazine Blog! Iโ€™ve been looking at stamps differently lately. I like to see if there are ways that I can deconstruct the different design elements so that I can cut it apart and create layers.ย  The Beauty and Song stamp by Picket Fence Studios is a stamp that has a lot of opportunities to go a bit crazy with layers. Hereโ€™s how I put this one together.ย  Step 1. Stamp the image on cardstock and use the Brother ScanNCut to precisely cut the stamped image from the cardstock. TIP: This stamp has some open ends. The Brother ScanNCut scans the outside edge and requires a black edge.ย  The opened-ended leaves on this stamp needed to be closed in. The Brother ScanNCut did an amazing job of cutting out this complex stamp. I was suitably impressed with how it cut perfectly…

Hello Creative Scrapbookers! Jayme Loge here with a glimpse of what is on my scrapbook table.ย  I am going to share a layout with you that documents these Covid times as we are experiencing it. Everything changed so quickly- life was its usual busy self and then it was pared back to just the essentials. Although there are many stresses and trials while living with this virus, there have been many gifts too. I am enjoying the calm and the refocus of what really matters to me. I spent so much time in my pre-covid life just running from task to task that I was not really present for much of it. I lived all those activities but didnโ€™t really experience them.ย  Now, just the simple act of getting groceries is more intent-full, fully felt and a delightful part of my week.ย  I am loving that! I attempted to capture…

Hey Creative Scrapbooker Fans Katelyn Grosart here today! There is so much going on in our world today and I feel that itโ€™s so important to send cards to friends and loved ones to remind them that you are thinking of them or are there for them. So, for todayโ€™s blog post, Iโ€™m sharing my I’m Here For You Card. To create my card, Iโ€™ve used a variety of dies from Elizabeth Craft Designs, Cardstock from Creative Scrapbooker Magazine, a variety of products from Ranger Ink, ย embossing powder from Emerald Creek Craft Supplies and adhesive from Scrapbook Adhesives by 3L. Youโ€™ll want to grab a cup of your favourite beverage and learn how to recreate my card at home. To start, die cut a 4โ€ Stitched Rectangle from Elizabeth Craft Designs out of a piece of Cotton Watercolor Paper from Ranger Ink. Using a paintbrush that has a little bit…

May Your Day Be Happy… What better way to be happy but to get a bit inky!!! I am sharing a mini-tutorial on how to create a mixed media art journal page using Ranger Distress Inks and Markers along with my newest Sensation Stamp Set from Wild Whisper! Begin by stamping the May Your Day Be Happy Sensations Stamp Set multiple times on the journal page using jet black ink from Ranger. Mask off the stamp images and ink journal page with several colors of distress inks using a blending tool. Repeat until you get the background colors that you are happy with. ย Sensations Collection Includes Sensations 12 x 12 Designer Paper in both 12 and 6 sheet packs Sensations Flair Sensations Stamp Set Sensations Bronzed Anther Embossing Powder Stamp background images on prepared background with jet black ink and Mowed Lawn Distress Inks. Apply distress inks using water pen…

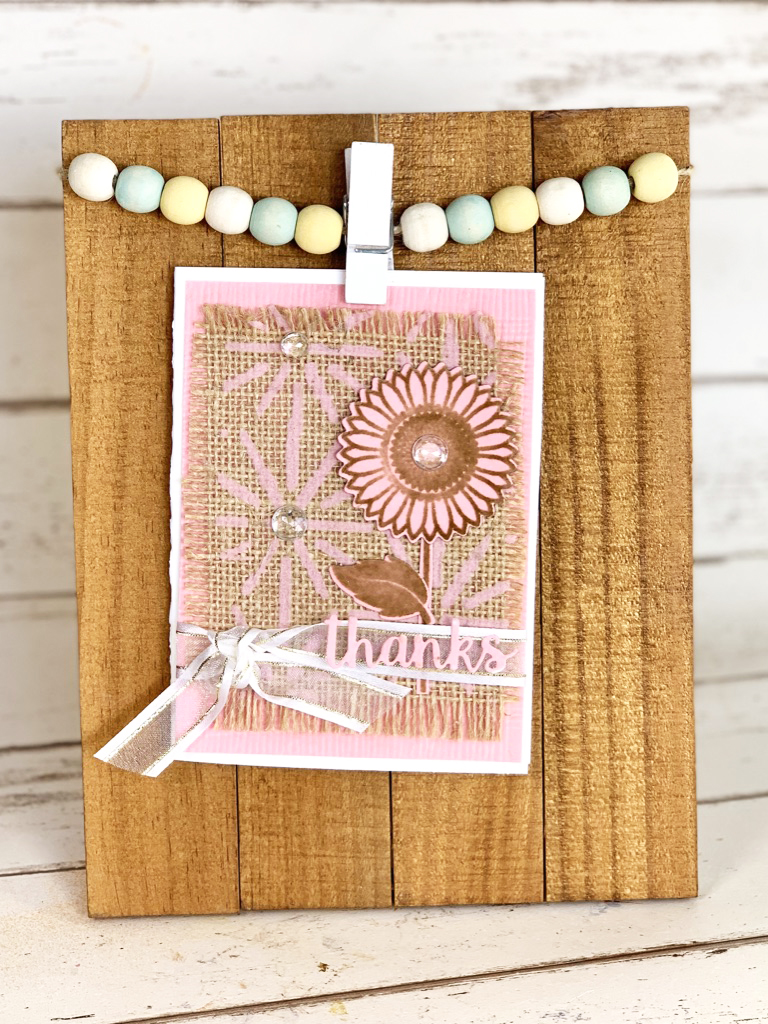
Hello everyone – Kerry Engel here today on the Creative Scrapbooker Magazine blog. I had an afternoon of happy accidents recently when I was playing with Therm O Web Deco Foil Flock Transfer Sheets. I ended up creating a card and a scrapbook page. I started with my MultiCraft Forever in Time burlap. I wanted to see if I could add the Flock Transfer Sheets to MultiCraft Forever in Time burlap using the Therm O Web Deco Foil Transfer Gel Duo. The Transfer Gel DUO works two ways; you can transfer flocking or foil using heat from a laminator OR pressure from a die-cutting machine. Transfer Gel DUO is a permanent transfer medium that dries clear and remains tacky for easy use. I spread the Transfer Gel DUO through stencils and laid a piece of the Flock Transfer Sheet on top and ran it through my die cut machine. A…

Artย  Impressions stamps capture real life for so many women. The confident ladies strutting their stuff in the Girlfriends Make the Best Accessories stamp reminds me of me and my friends when we go for lunch. I wanted to make the ladies a bit glitzy so I used the paper piecing technique on their sunglasses and purses. A little glitter goes a long way! I also tried something different for me, I applied Ranger Tim Holtz Oxide inks onto foiled Therm O Web Gina K. Designs Foil-Mates paper. It turned out really well. The inked and foiled background looks like a Vegas night sky. Hereโ€™s how I created this look: 1. Stamp the Art Impressions Girlfriend stamp on watercolor paper and fussy-cut the ladies. 2. Stamp the Ranger Oxide Inks on a non-porous surface and add water, using a paintbrush paint your stamped image 3. Stamp the image a second…

Hi Creative Scrapbooker Fans, Pam Bray here today sharing my Enjoy the Journey…Rule the World Mixed Media Tag. Most of us are on some type of lockdown because of the COVID -19 Virus and are looking to areas of help others or doing self-help like creating and expressing yourself through art. I created an easy tag by using products in my stash that you might also have in yours. I also included a few new ones that are easily available or that you might incorporate a product you have in your stash. I began by running a piece of mat board through my Xyron Creative Station Light using permanent adhesive. Apply Barn Door and Wild Honey Distress Ink on craft mat; mist with water and dab 5×8″ white card stock through inks. Dry. Adhere to prepared paper to the top of the adhesive mat board. Die cut the tag from…

January 28/26 Online Class

View the Info PDF: Click Here

Link to purchase the Craft Along Kit: Click Here

Recap Video Click Here

February 15th/25

WATCH THE REPLAY: CLICK HERE

Zoom Crop Information PDF: CLICK HERE

FREE Layout Template Guide: CLICK HERE

VIP Zoom Crop

Friday January 17th Zoom Meeting:
Link to replay: CLICK HERE

Saturday January 18th Zoom Meeting:
Link to replay: CLICK HERE

December 30/24 Online Class

CLICK HERE for the Link for Your Crafty Homework

This includes the eBook and printable materials for the class.
Please note: Youโ€™ll need to provide your email address, as Nadine Milton will send the information directly to you.

CLICK HERE for the Link for the Information PDF

This includes the supply list for this class.

VIP Zoom Crop
Friday November 8th: 7:00pm - 10:00pm MST
Saturday November 9th: 10:00am - 10:00pm MST

You will need the ZOOM App on your computer or phone.

Nov 8th - Friday Night
Topic: Zoom Crop #43 - ArtFest hosted by Dooreen Rousseau - FRIDAY NIGHT!
Time: Nov 8, 2024 07:00 PM Mountain Time (US and Canada)
Link: https://us06web.zoom.us/j/87256071707?pwd=F7077MJSL1JLNEK7CMXygrHC0hVAlw.1
Meeting ID: 872 5607 1707
Password: 309205

Nov 9th โ€“ Saturday
Topic: Zoom Crop #43 - ArtFest Hosted by Dooreen Rousseau - SATURDAY
Time: Nov 9, 2024 10:00 AM Mountain Time (US and Canada)
Link: https://us06web.zoom.us/j/87925186090?pwd=EEPjhi54pyB6YQ3olyaJaYggcGRGxP.1
Meeting ID: 879 2518 6090
Password: 222409

Zoom Crop Information PDF: CLICK HERE

July 12, 2024 - Zoom Crop

WATCH THE REPLAY: CLICK HERE

Here are the times of the demos
1:12:07 - Demo - Page Builders Club House with Tracy Pounds
Here is the PDF link for Tracy's demo with the instructions and products she used: CLICK HERE

3:03:27 - Demo โ€“ Infinity Crafts with April Floriant

Thanks so much to everyone who joined and hope to see you all again on Friday, August 9th โ€“ from 10:00am to 2:00pm MDT.

July 24/24 Online Class

View the Class Video: Click Here

View the Info PDF: Click Here

Link to purchase the Craft Along Kit: Click Here

April 30/24 Online Class


View the Info PDF: Click Here

Link to purchase the Craft Along Kit: Click Here

December 9/23 Zoom Crop

8 Hour Zoom Crop: Click Here

After Hours Zoom Crop: Click Here

September 27th/23 Online Class


View the Info PDF: Click Here

Link to purchase the Craft Along Kit: Click Here

This website uses cookies to ensure you get the best experience on our website. Learn more

VIP Zoom Crop
Friday January 16th: 6:00pm - Midnight MST
Saturday January 17th: 10:00am - Midnight MST
Hosted by: Simply Stated Design

You will need the ZOOM App on your computer or phone.

Friday Zoom Meeting:
Link: https://us06web.zoom.us/j/81311221698?pwd=gXkeFjnWDekB0nRHohTqwYpTqZPyps.1
Meeting ID: 813 1122 1698
Password: 751404

Saturday Zoom Meeting:
Link: https://us06web.zoom.us/j/87948630680?pwd=ulxwatsEwIEakz6c5fvQ341BIouJ2t.1
Meeting ID: 879 4863 0680
Password: 862986

Zoom Crop Information PDF: CLICK HERE

To purchase the Craft Along Kit: CLICK HERE