


Today on the blog we welcome Katelyn Grosart
Hi Everyone! I’m Katelyn Grosart and I live in beautiful Calgary, Alberta with my boyfriend of 6 years. I’ve spent the last 7 years in the papercrafting world creating cards, mixed media pages, scrapbook layouts, mini albums and altered items. In my spare time when I’m not crafting I like to read a good book and when the weather is nice, you’ll often find me outside taking advantage of the beautiful Canadian weather.

I’m excited to be a guest blogger today for the Creative Scrapbooker Magazine blog. The wonderful ladies at the magazine asked if I wanted to guest blog for them and I couldn’t pass up this amazing opportunity. With summer right around the corner I thought that I would share with you how to create your own under the sea themed reverse canvas featuring Graphic 45’s “Voyage Beneath the Sea” paper collection. I have created a tutorial below for you so that you can create it at home.

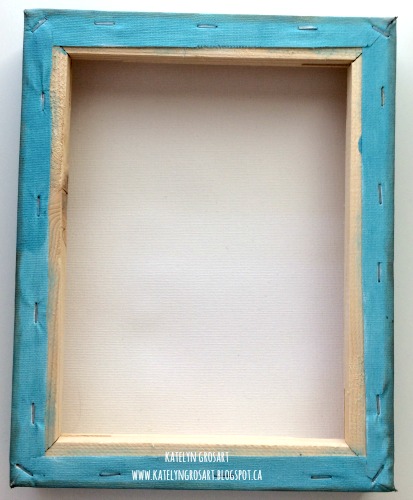
To start, paint the reverse side of the canvas (the backside with the opening) along with the sides in Ranger Broken China Distress Paint. You will need to apply two layers of paint. Once both layers of paint have dried, with a blending tool ink the edges with Ranger Vintage Photo Distress Ink.
For the Emerald Creek Craft Supplies anchor charms, which you will place throughout the canvas, apply a layer of Ranger Gold Mixative Adirondack Alcohol Ink to two anchor charms. Once the gold layer is on both anchors, allow a few minutes for the gold alcohol ink to dry and then randomly apply some Ranger Mushroom Adirondack Alcohol Ink over top of the gold layer. Set both anchors aside to dry.

The octopus images, that you will add throughout the canvas is an Emerald Creek Craft Supplies stamp. Apply Ranger Vintage Photo Distress Ink to the octopus stamp and stamp onto smooth white cardstock. Continue to apply ink to the octopus stamp and stamp onto the smooth white cardstock until you have four octopus images. With a heat tool, dry the octopus images. Once the ink has dried, colour the images using the Ranger Distress Marker Spiced Marmalade. After all the octopuses have been coloured, fussy cut them all out and set aside.

The starfish images that you will hide throughout the canvas is also an Emerald Creek Craft Supplies stamp. Apply Ranger Vintage Photo Distress Ink to the starfish stamp and stamp onto smooth white cardstock. Continue to apply ink to the starfish stamp and stamp onto the smooth white cardstock until you have five starfish images. With a heat tool, dry the starfish images. Once the ink has dried, colour the images using the Ranger Distress Marker Ripe Persimmon. After the starfish have been coloured, fussy cut them all out and set aside.

It’s time to cut the Voyage Beneath the Sea paper from Graphic 45. These are the following pieces of paper that you will need to cut for the inside of the canvas, a 6” x 8” piece from Wild Wild Waves, a 5 ¾” x 7 3/4” piece from Aquatic Passage, a 5 ½” x 7 1/2” piece from Ocean Quest, a 5” x 7” piece from Voyage Beneath the Sea and the “The Take Me to the Sea” card from the Ephemera collection. From a second sheet of Voyage Beneath the Sea fussy cut out the mermaid riding the fish, make sure to save the seaweed from underneath the fish as it will be used on the bottom of the canvas. Once all the images have been cut out for the inside of the reverse canvas, edge distress all of the papers, expect for the fussy cut images. At this time you will also want to grab an octopus, a starfish and an anchor. With a blending tool, ink all the edges of the papers, fussy cut images and stamped images with Vintage Photo Distress Ink. Adhere the layers of papers into the inside of the canvas starting with the largest one on the bottom and ending with the “Take Me to the Sea” card on top. Foam square the mermaid on the fish to the right of the “Take me to the Sea” card, making sure her hair wraps around the words on the card. With a glue dot, adhere the anchor charm to the bottom left hand corner of the “Take Me to the Sea” card. Foam square the octopus image, ½” to the right of the anchor charm, making sure it sits towards the bottom of the card. Foam square the starfish image to the right side of the fishes face, in between the fishes face and fin.

To decorate the rest of the reverse canvas you will need to cut two pieces
1” x 8” and one piece 7/8” x 6”from Graphic 45 Wild Wild Waves, these will become the top edge finishing pieces. Edge distress them and then with a blending tool, ink the edges with Ranger Vintage Photo Distress Ink. Adhere the pieces to the top edges. To the finish the bottom and bottom sides of the canvas, fussy cut the two seahorse images with seaweed from the Voyage Beneath the Sea paper as well as the seaweed leftover from underneath the mermaid riding the fish. The mermaid octopus, man riding the fish and the person in the under the sea attire are fussy cut from the Ephemera Cards. You will also need the rest of the octopus images, starfish images and the anchor charm. With a blending tool, ink all the edges of the fussy cut images and the stamped images. Once inked, start by adhering the seaweed from underneath the mermaid and fish to the bottom middle of the canvas. From there, continue building a scene at the bottom and sides. Make sure to hide the octopus, starfish and anchor charm throughout the bottom and sides to help fill white space.

Once everything has been adhered, using a VersaMark Ink pad, ink the top edges of the canvas. After the edges have been inked, sprinkle Emerald Creek Craft Supplies Burnt Copper Leaves Embossing Powder to all the edges and emboss with a heat tool. Don’t be afraid to have embossing powder on the edges of the octopuses, starfish and anchor. Once the edges have been embossed, use some Ranger Glossy Accents to highlight the eyes on the sea creatures. Allow 24 hours for the Glossy accents to completely dry.
Supplies Used:
- Emerald Creek Craft Supplies: Burnt Copper Leaves Embossing Powder, Starfish & Octopus stamps and Anchor Charms.
- Tim Holtz for Ranger : Ripe Persimmon & Spiced Marmalade Distress Markers, Vintage Photo Distress Ink, Broken China Distress Paint and Adirondack Alcohol Ink – Gold Mixative & Mushroom.
- Ranger : Glossy Accents.
- Graphic 45 “Voyage Beneath the Sea”: Wild Wild Wave, Voyage Beneath the Sea, Aquatic Passage, Ocean Quest and Voyage Beneath the Sea Ephemera Cards.
Thank you so much for joining me today on the Creative Scrapbooker Magazine blog. I also want to thank all of the ladies from Creative Scrapbooker Magazine for giving me this opportunity.
I hope you have a great week!
Katelyn
SUBSCRIBE TODAY to our quarterly publication – delivered right to your door!


Comments
Gorgeous work!
just amazing love it
This is so totally amazing. Makes me want to run out and buy the paper to make my owm canvas! Congrats on not only being a guest designer for my favorite magazine but for making this year’s design team for Graphic45. Your really rocking things this year.
This is fantastic!!! Love it!